How do I reconcile / balance my accounts in ClearCheckbook?
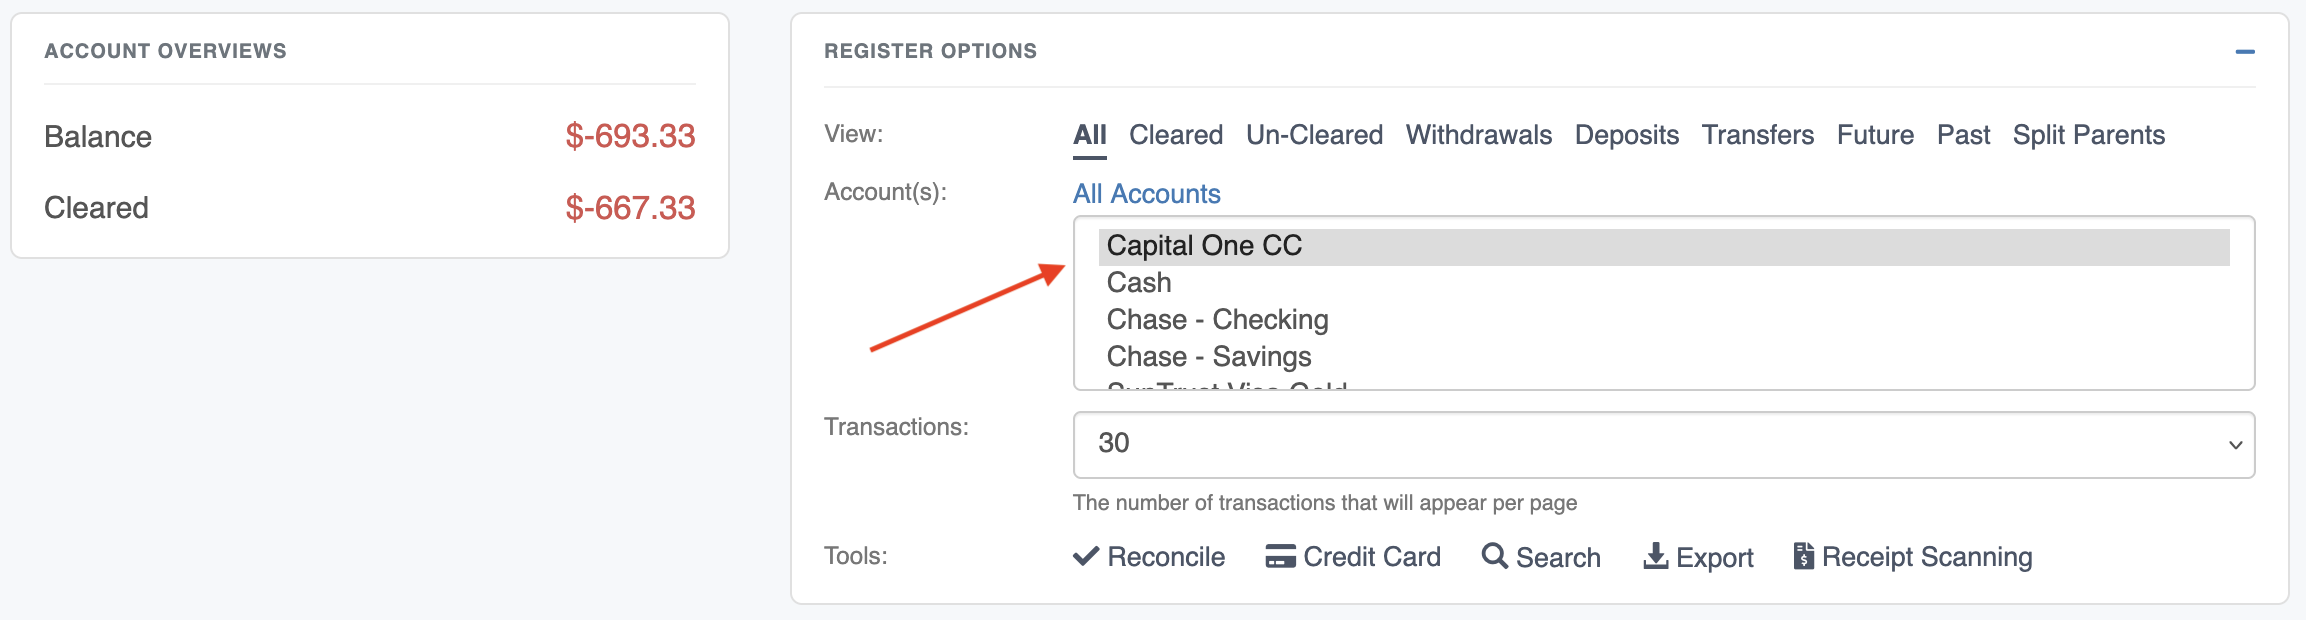
ClearCheckbook uses a tool called Clearing that lets you quickly and easily reconcile your transactions and accounts. When you clear your transactions we show you a Cleared balance that should match your bank statement.
Each transaction you add to ClearCheckbook gets summed into your specific account balances which are then summed into your Overall Balance. This is the sum of every transaction you add to the site regardless of whether it's been cleared or not. The Cleared balance is the sum of every cleared transaction you've added to the site.
How does Clearing work?
We recommend watching the following video tutorial that explains in detail the process you should take to clear transactions whenever you get your bank statement:
![]()
Clearing - Step by step
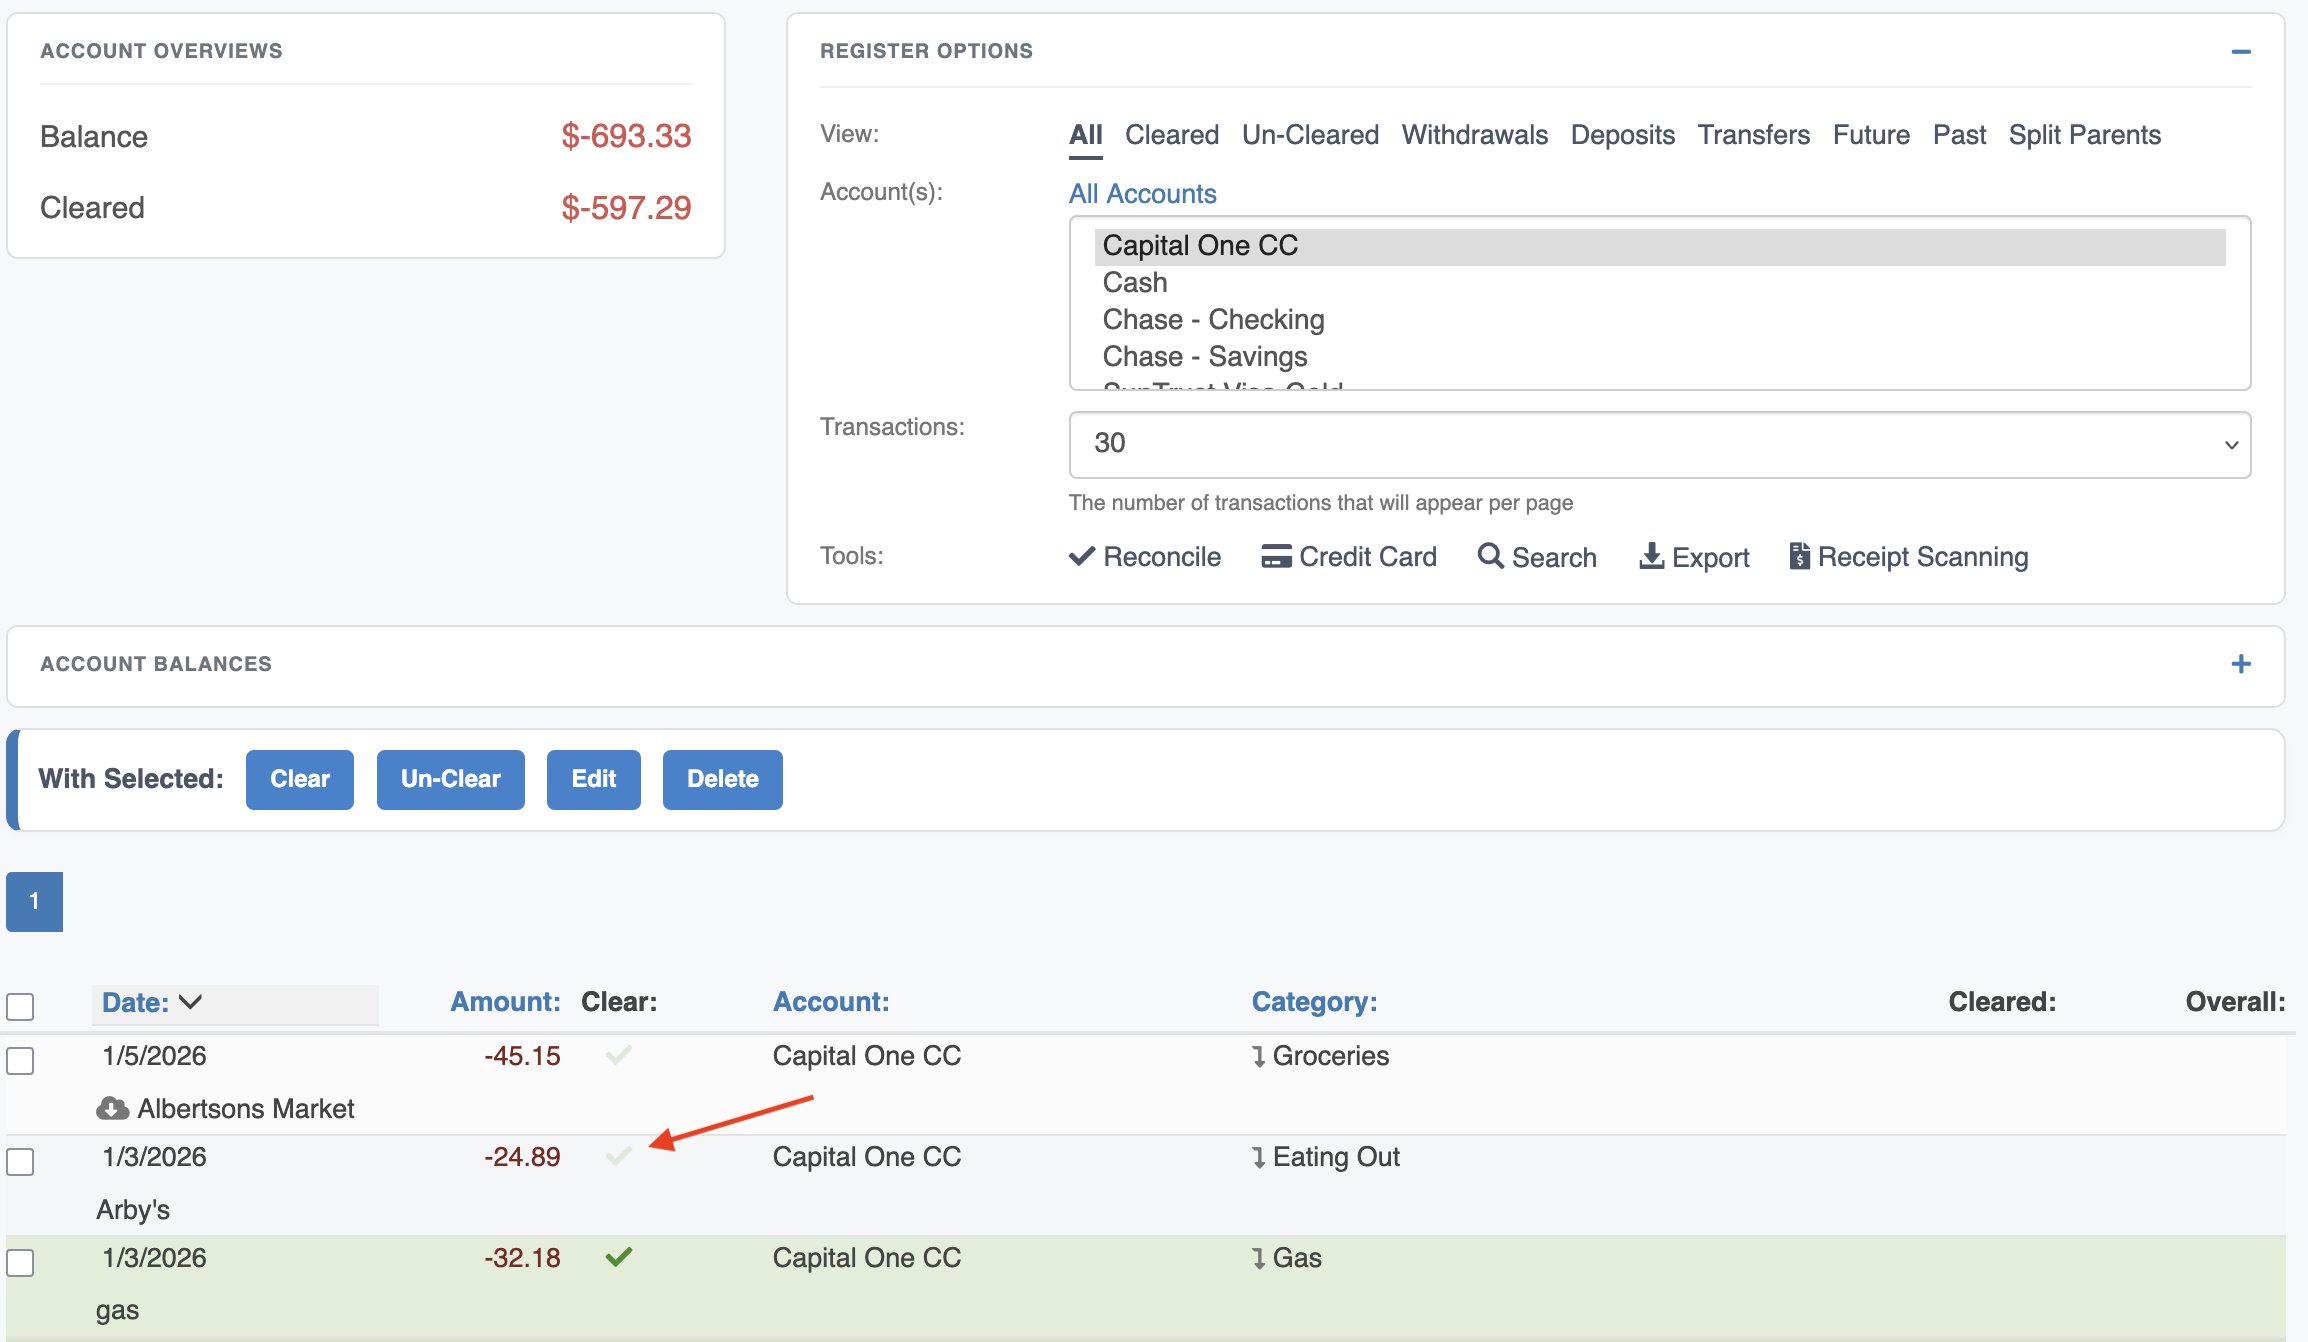
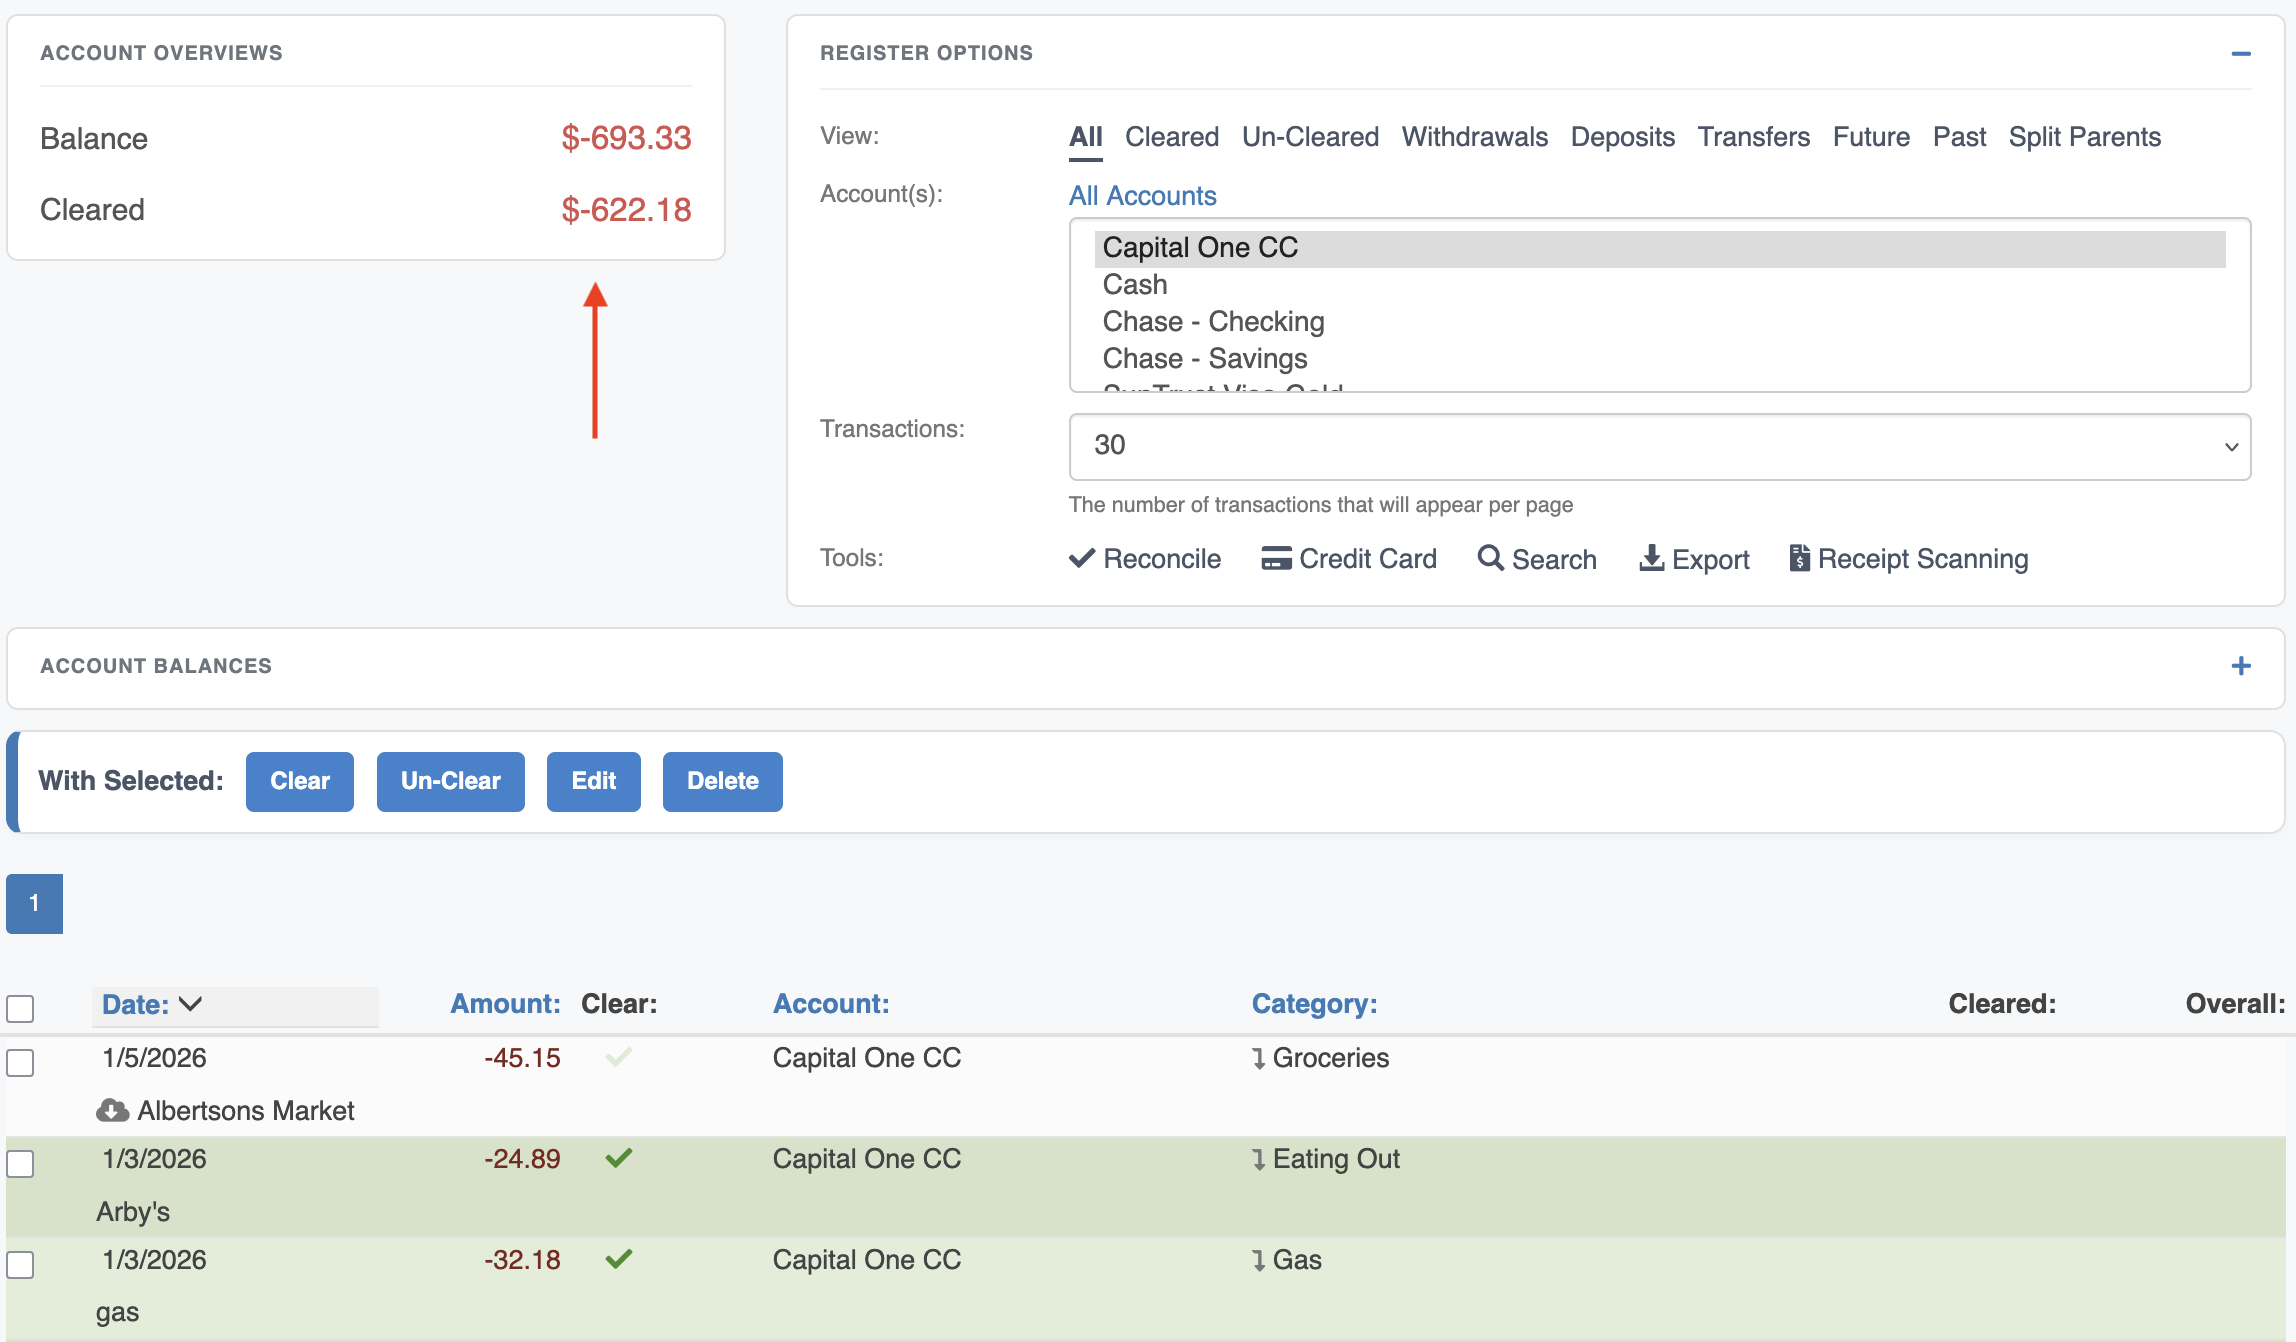
If your cleared balance doesn't match your bank statement ending balance then check for the following common issues:
- Was a transaction entered multiple times by mistake?
- Make sure the transaction was entered with the correct date. Often times around the new year, a transaction could be entered with the incorrect year (eg: June 27, 2025 instead of June 27, 2026)
- The correct account was used when adding the transaction. If you're trying to clear an account but the transaction was entered under a different account by mistake, it won't appear in the transaction list.
- Did you make a mistake when adding the transaction amount? (Make sure you didn't switch numbers by entering something like $43.23 instead of $34.23)
- All transactions that should have been added are properly in your ClearCheckbook register. Perhaps you lost a receipt or made an online purchase but forgot to add it to ClearCheckbook. These discrepancies will become apparent when you see transactions on your bank statement that don't appear on your ClearCheckbook register.
- Unless you added every transaction from the time the account opened, you'll need to add a Starting Balance for that account. Since ClearCheckbook only knows about the transactions you've added to the site, we need to have a starting balance in order to come up with the correct balances. The starting balance is the sum of all transactions that were posted to your account prior to recording them in ClearCheckbook. You can add the starting balance by clicking on Settings -> Accounts.
- You cleared a pending transaction that hadn't fully settled. These transactions usually aren't included in the ending balance for the statement. Pending transactions may also change amounts before they're fully posted (eg: a gas station might set a pending transaction as $1 but post for the full amount)