ClearCheckbook Money Management
ClearCheckbook
Money Management Made Easy
ClearCheckbook Knowledge Base

ClearCheckbook Knowledge Base

Help Sections

General
Tools
Reports
Settings
Apps
Knowledge Base Search:
Would you like to see something added to, or do you have a contribution for, the Knowledge Base? If so, let us know!

2-Factor Authentication (2FA) Settings

Set up 2FA to add an extra layer of security to your login.

You can find the 2-Factor Authentication settings by clicking on Settings at the top right side of the page, then click on 2-Step Verification under the Security header.

What is 2FA?

2FA is an extra layer of security used to make sure that people trying to gain access to an online account are who they say they are. First, a user will enter their username and a password. Then, instead of immediately gaining access, they will be required to provide another piece of information.

Description taken from Authy
The second piece of information for 2FA on ClearCheckbook is a 6-digit code that can be optained from a multitude of authenticator apps.

Setup Instructions and Requirements

Instructions:
  1. Download and install a security app to your phone (see list of recommendations below).
  2. Open the security app and add a new site.
  3. Select the 'Scan a Barcode' option and scan the QR code on the 2-Step Verification page.
  4. Once confirmed, enter the 6 digit code in the form on the 2-Step Verification page to verify setup is complete.
  5. You will be asked for a 6 digit code, obtained from the security app, each time you log in.
Requirements:
  • You must have a security app installed and set up on your phone.
  • Your phone must have a camera for scanning the QR code on this page.
  • You must be able to access your phone and associated security app when signing into ClearCheckbook.

Enabling 2FA for your login

When you load the 2-Step Verification page you will see a QR code and an input box to enter a 6 digit code. To start, scan the QR code with your authenticator app of choice and add ClearCheckbook as a new site.

2 Factor Authentication Settings - Enable 2FA
QR Code for Enabling 2FA

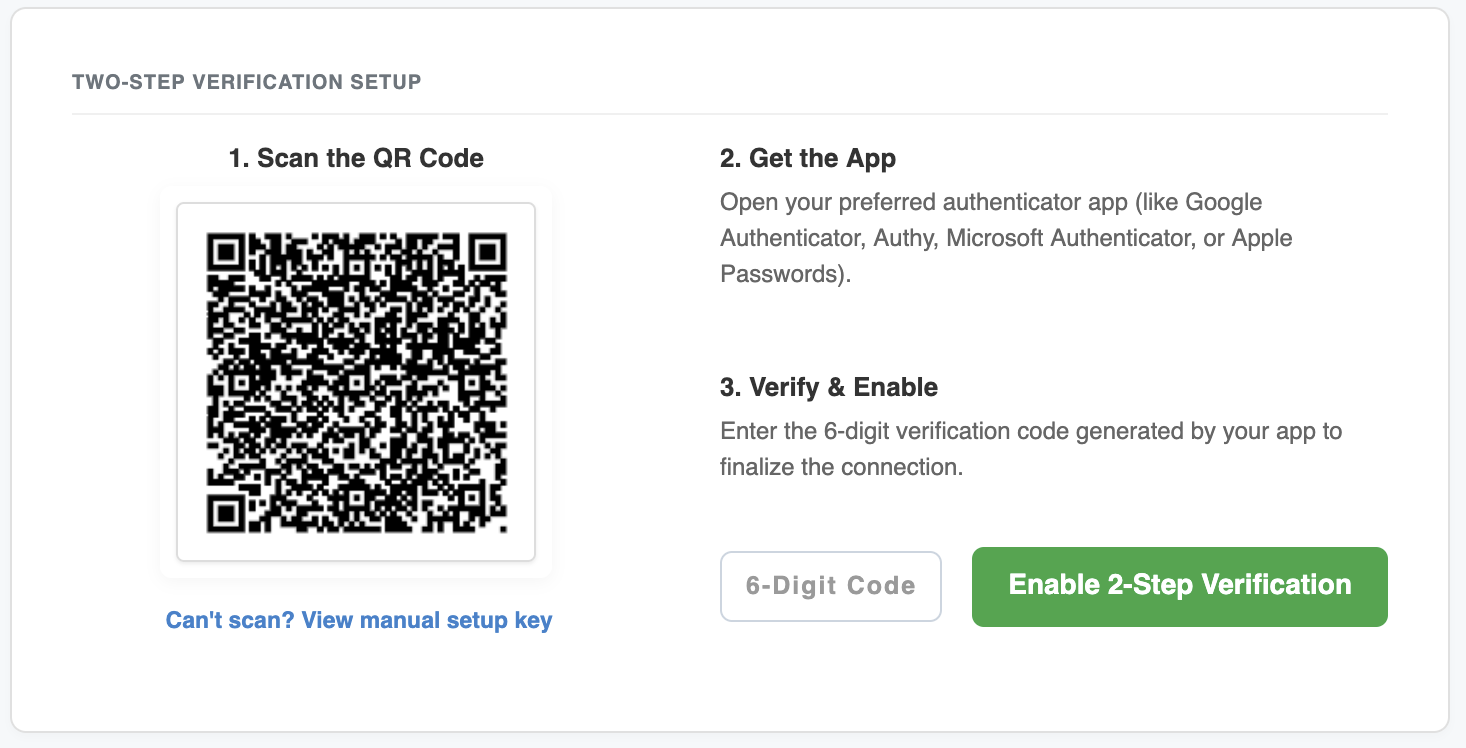
Once you have scanned the code and added it to your app, ClearCheckbook will appear in the list with a 6-digit code that changes every 15 seconds or so. Enter this pin into the Enable 2-Step Verification input box as seen in the screenshot above.

2 Factor Authentication Settings - Enable 2FA
Example of 6-digit code in Google Authenticator
After you enter the 6-digit code, 2FA will be set up for your login and you will be prompted to enter the 2FA 6-digit code next time you log into your account.

2FA Process on Login

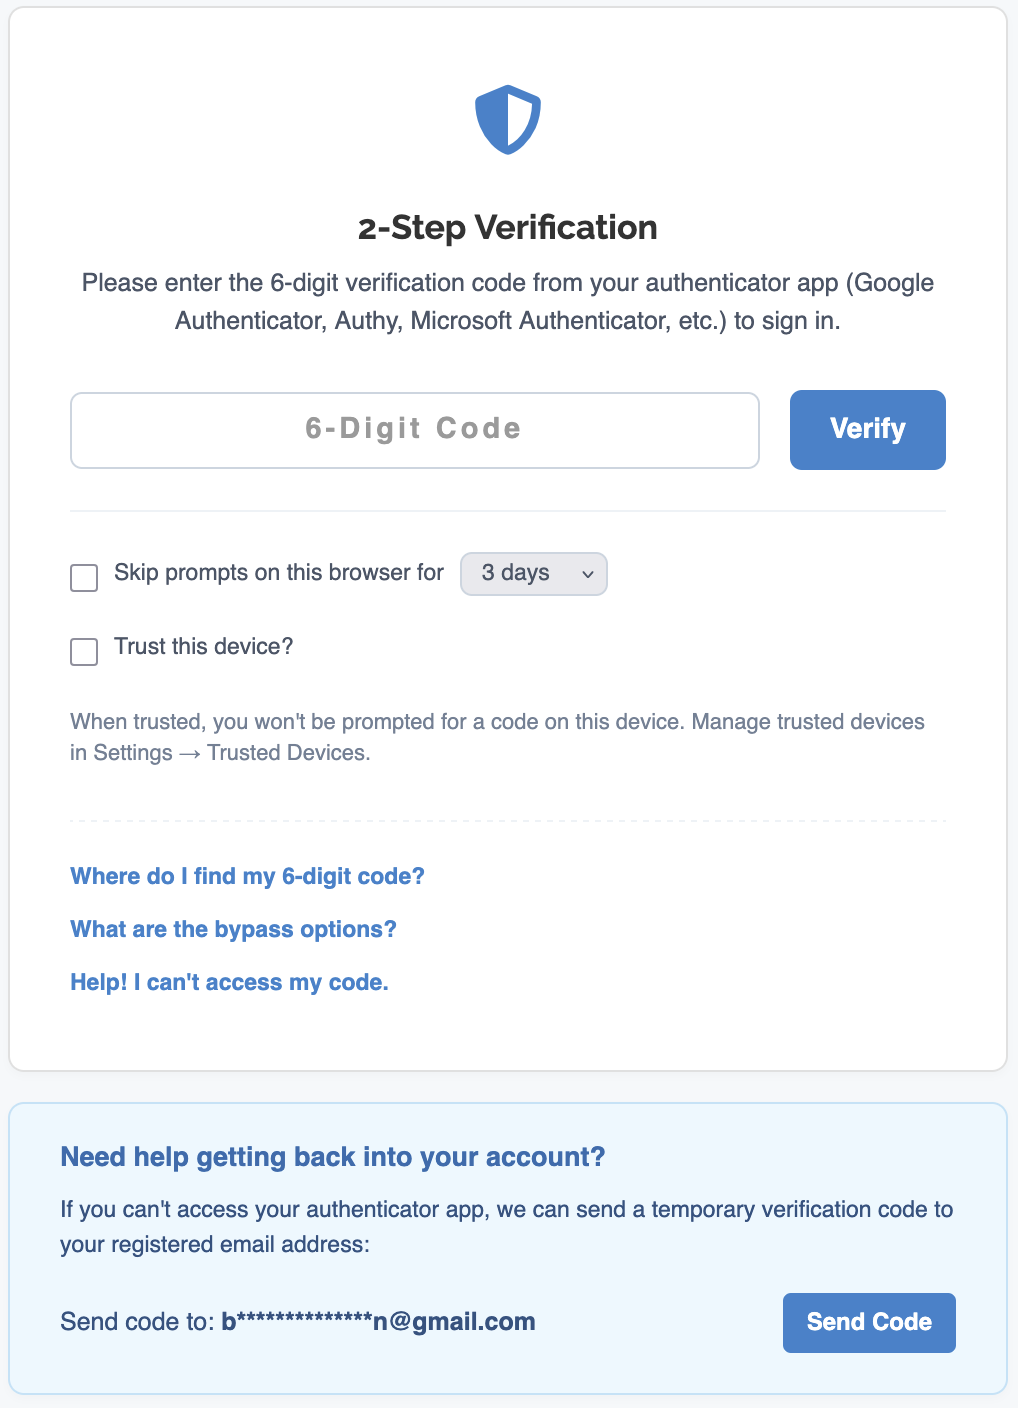
The first step is to simply log in as normal with your username and password. After entering those details correctly, you will be prompted to enter your 2FA code.

2 Factor Authentication Settings - Enter 2FA code
Example 2FA prompt on login

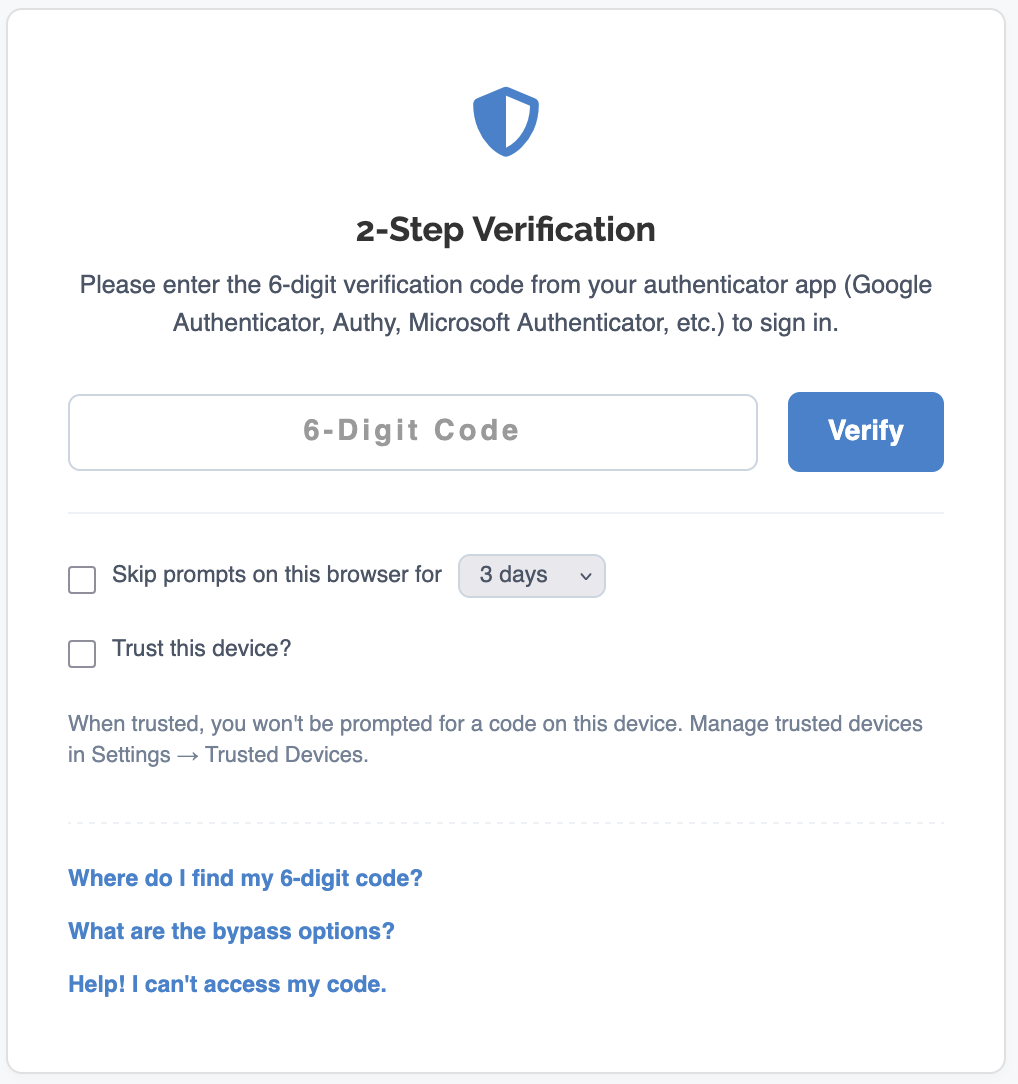
Open your authenticator app to get the 6-digit code for ClearCheckbook. Use this code in the form field as shown in the screenshot above.

2 Factor Authentication Settings - 2FA authenticator code
Example of 6-digit code in Google Authenticator
After successfully entering the code, you will be redirected to your account.

Disable 2FA for your login

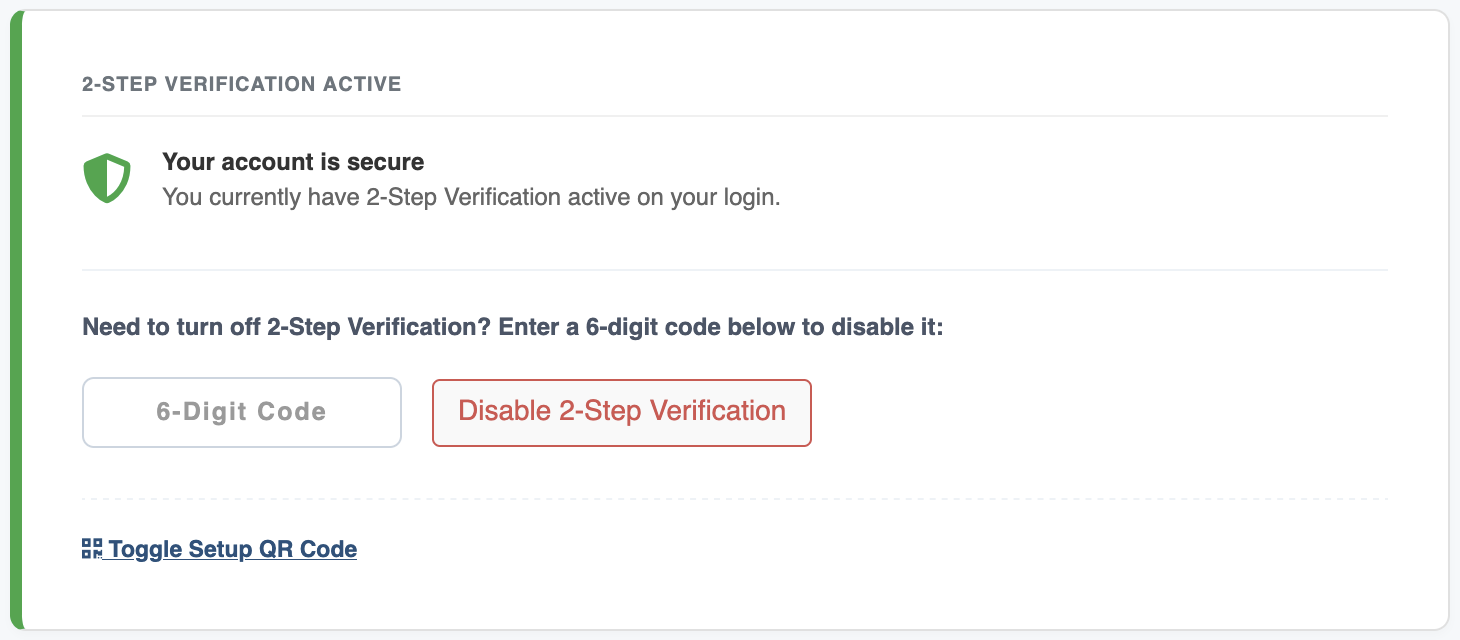
If you no longer want 2FA for your login, go back to the 2-Step Verification settings page and enter the 6-digit code from your authenticator app into the input field in the green box on the page.

2 Factor Authentication Settings - Disable 2FA
Example of input for disabling 2FA

Account Recovery

If you can't access your authenticator app for whatever reason, you have the option to have a temporary code sent to your recovery email address which, when entered correctly, will allow you to access your account.

The first thing you need to do is make sure your recovery email address is set correctly. You can see this on the 2-Step Verification page. The recovery email address is set to whatever the main email associated with your ClearCheckbook is set to.

2 Factor Authentication Settings - Setting recovery email
Example of setting your recovery email

When logging in and receiving the 2FA code prompt, click on the Help! I can't access my code link.

2 Factor Authentication Settings - Recovery process step 1
Recovery process step 1

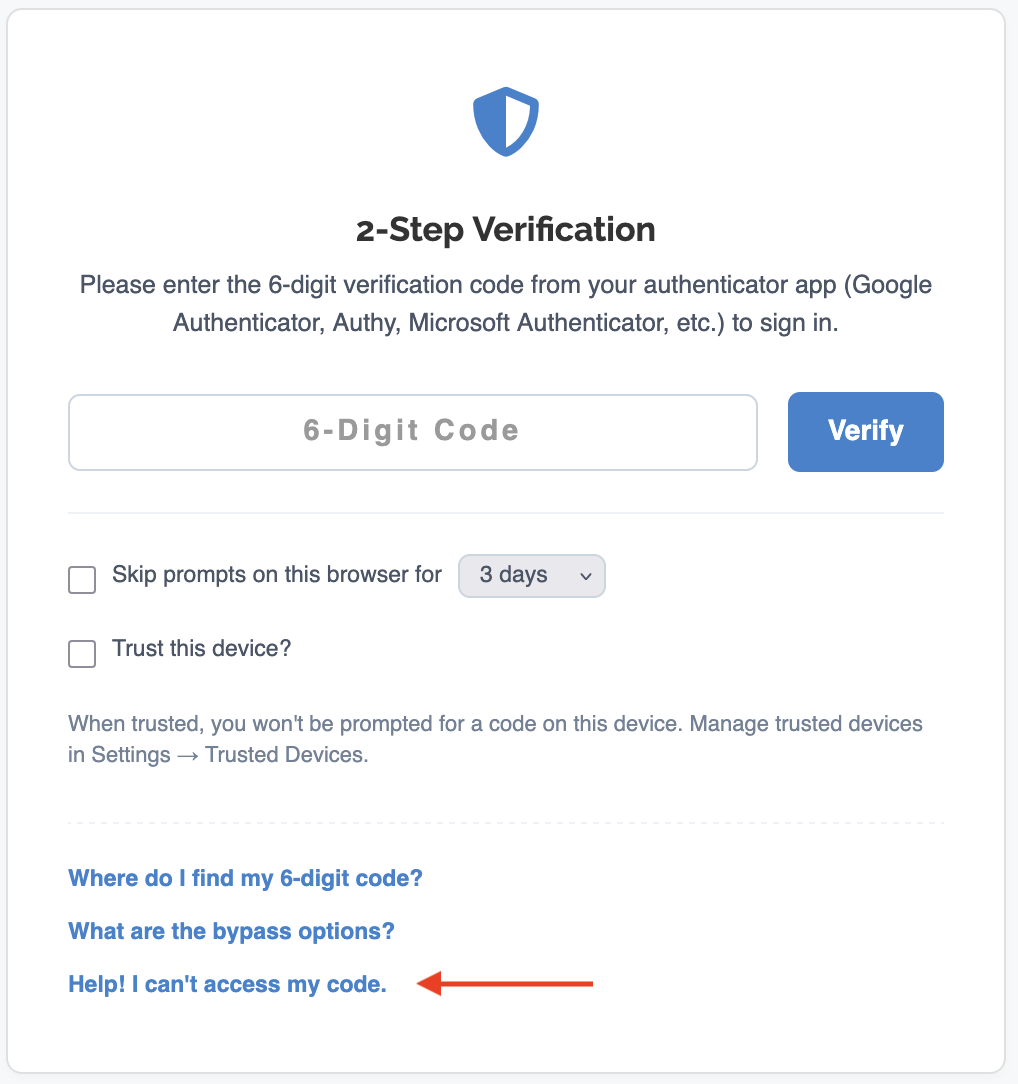
After clicking the link as shown in the screenshot above, click the blue Send Verification Code button. This will send a bypass code to your recovery email address.

2 Factor Authentication Settings - Setting recovery email
Example of setting your recovery email

Once you click the Send Verification Code button, a new box will appear where you can enter the code that's sent to your recovery email address.

2 Factor Authentication Settings - Recovery code input
Example of recovery code input form

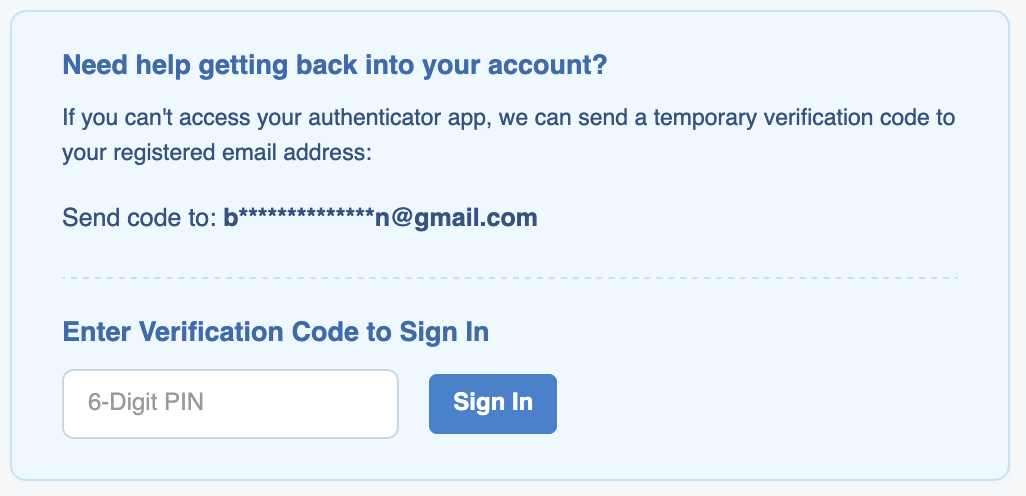
The email sent to your recovery address will contain a code that you can copy/paste into the form above.

2 Factor Authentication Settings - Recovery email example
Example of recovery email
After successfully entering the code and signing in, 2FA will be disabled on your login. You can re-enable it using the Enabling 2FA for your login instructions above.

Authenticator Apps

There are many apps that handle 2FA but the apps below are widely used and trusted amongst the security community.

Trusted Devices

You can opt to set up trusted devices so you aren't prompted for your 2FA code each time you sign in from your own computer. To learn more about devices, check out the Settings Security Trusted Devices Knowledge Base section.