You can set up and manage all of your categories through the Category Settings page. Each transaction can get tagged with a category for tracking your expenses and income in the reports and budgets.
Settings at the top right side of the page, then click on Categories under the Manage Your: header.The form at the top of the page lets you add new categories to ClearCheckbook. We don't limit the number of categories you can have, so you can create as many as you'd like.
The screenshot below shows the standard Create Category form.

The Create Category form contains the following fields:
| Option | Description |
|---|---|
Category Name |
You can give your category any name you want. |
Parent |
Optional If you want this to be a sub category of an existing category, select the parent category from this list. If you want this category to be a parent, leave the option set to -- No Parent -- |
Categories can have a parent/child relationship where there is a parent category that contains multiple sub categories under it. This is useful if you want to be able to track all your food spending together but still keep groceries separate from eating out. In this example, you would create a Food category and then create two sub-categories, Groceries and Eating Out.
To create a parent category, use the Create Category form at the top of the Category Settings page and leave the Parent field set to -- No Parent --.
To create a sub-category, use the Create Category at the top of the page and select the parent category you want from the Parent field.
When you add transactions, simply select the appropriate category. Any sub categories will appear with a icon next to them in the transaction register.
The categories list shows all of your categories with the parents listed in alphabetical order and any of their sub-categories in alphabetical order underneath them. Sub-categories also appear with a blue background and are slightly indented under the parent.
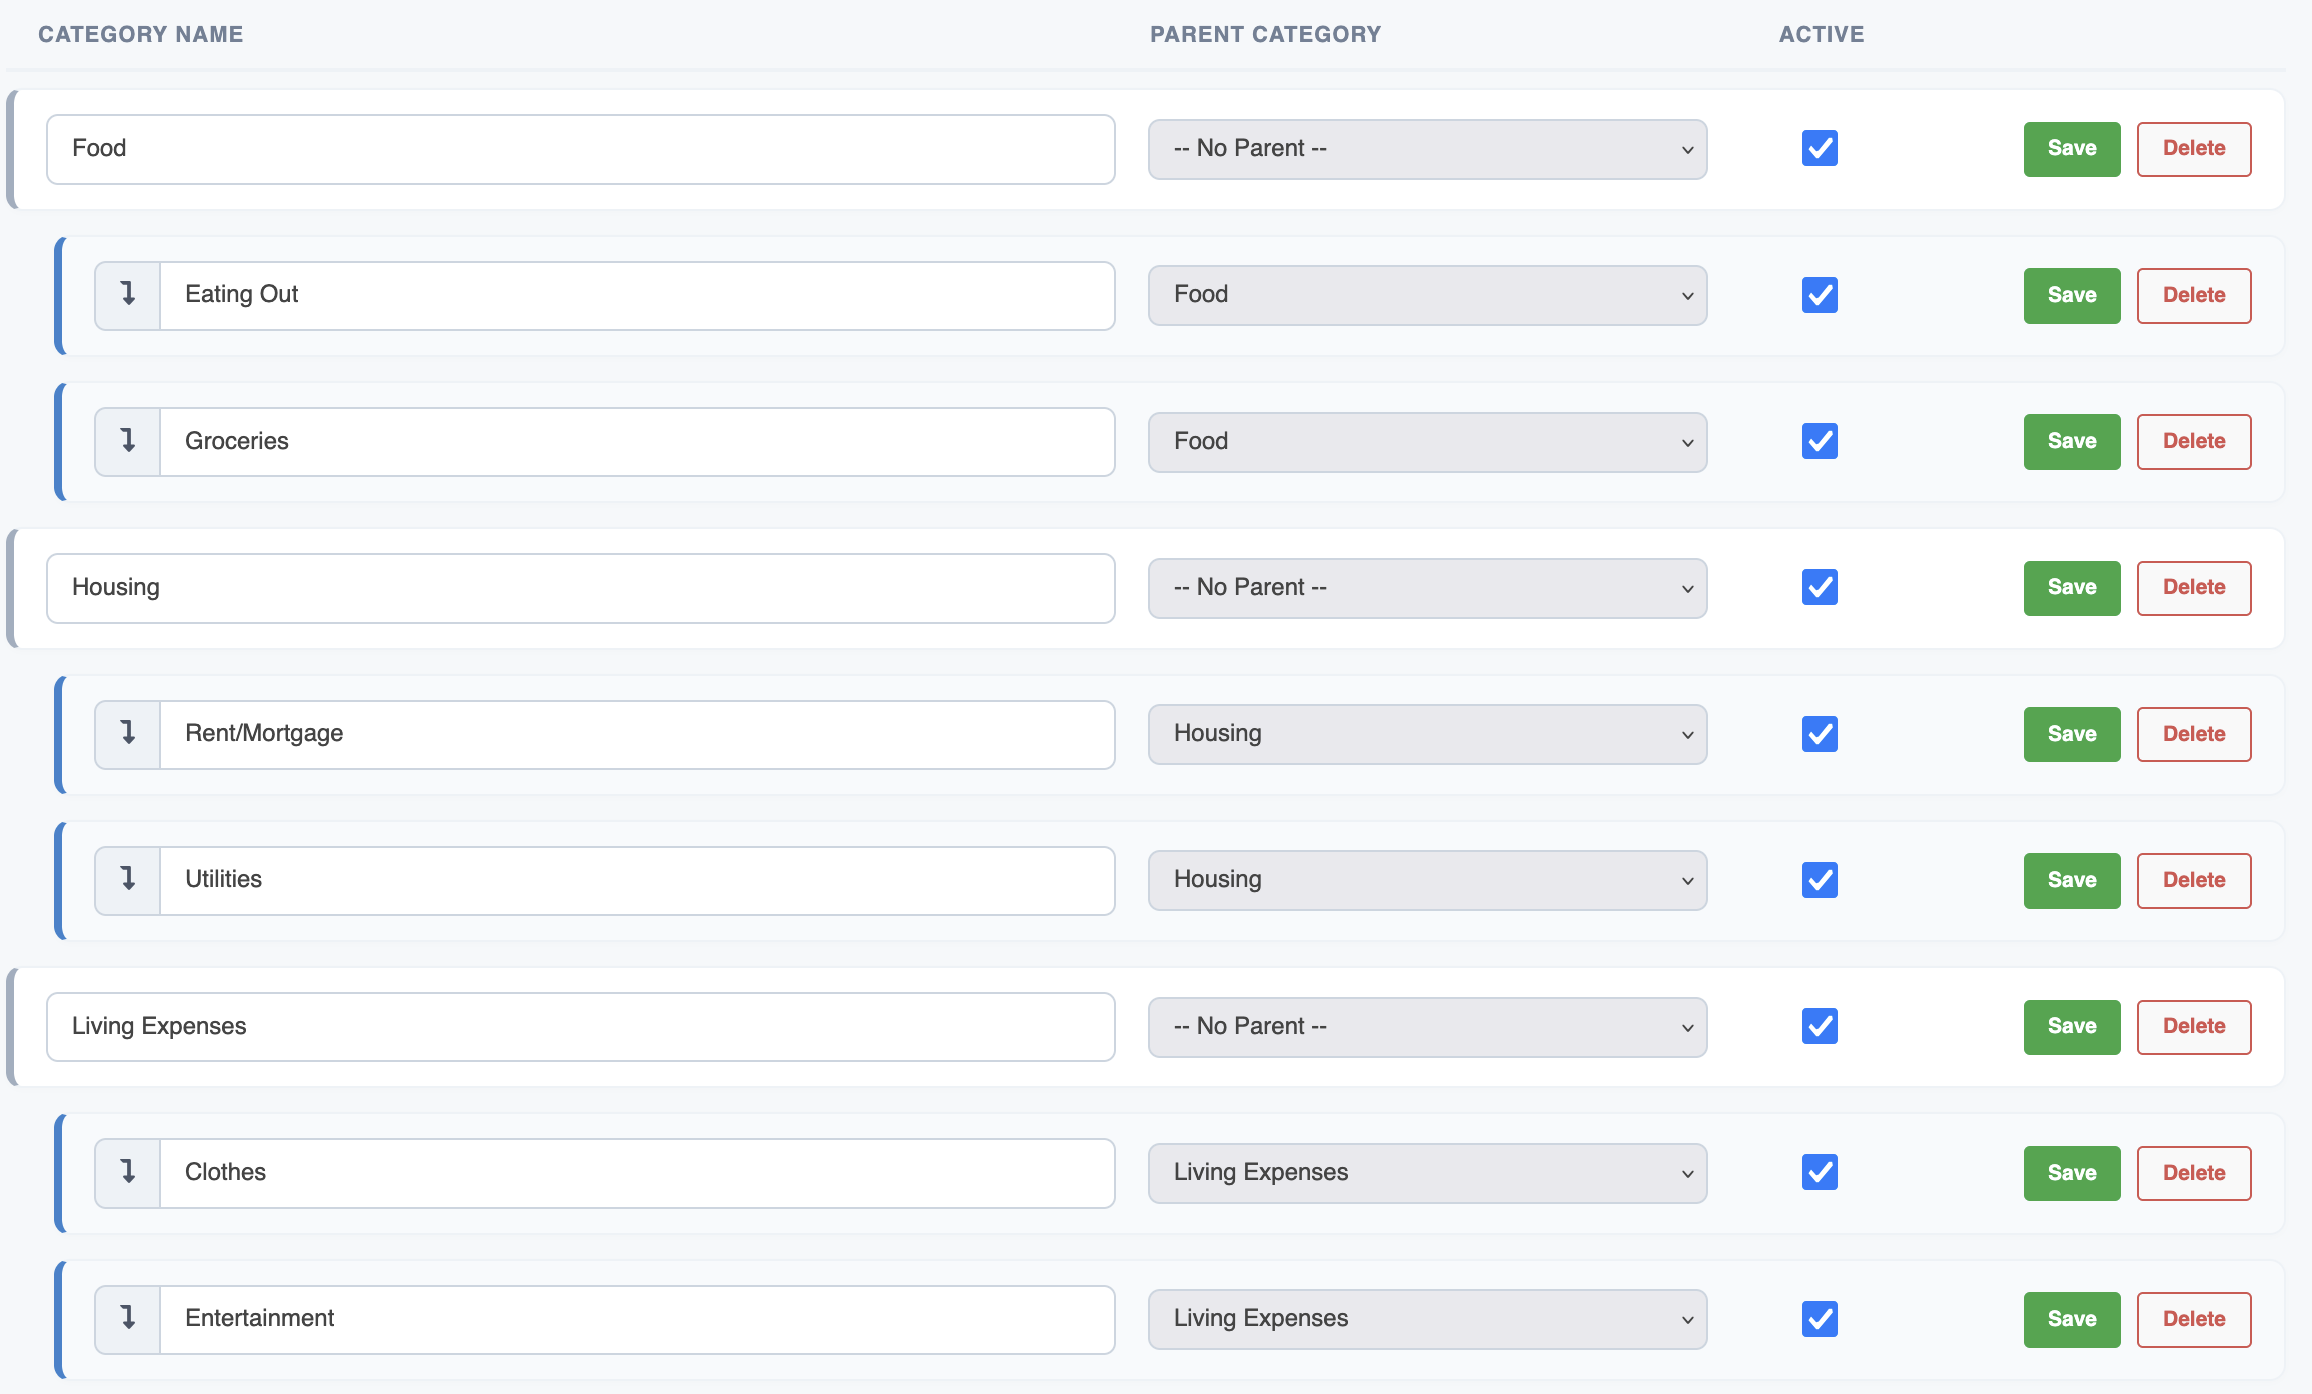
To edit a category, simply find it in your categories list and make the necessary changes. You can edit which category a sub-category belongs to by changing the drop down list in the Parent column. If a category is already a parent to sub-categories, you cannot assign it as a sub-category.
You can mark a category as inactive by unchecking the Active checkbox. When a category is marked as inactive, it will not appear in any of the Add or Edit Transaction lists or in the reports or budgets.
You can delete a category by clicking the red Delete button in the categories list for the category you want removed.
Any transactions that are associated with the deleted category will no longer have a category associated with them. The category will also not be able to be used in reports and budgets once removed.
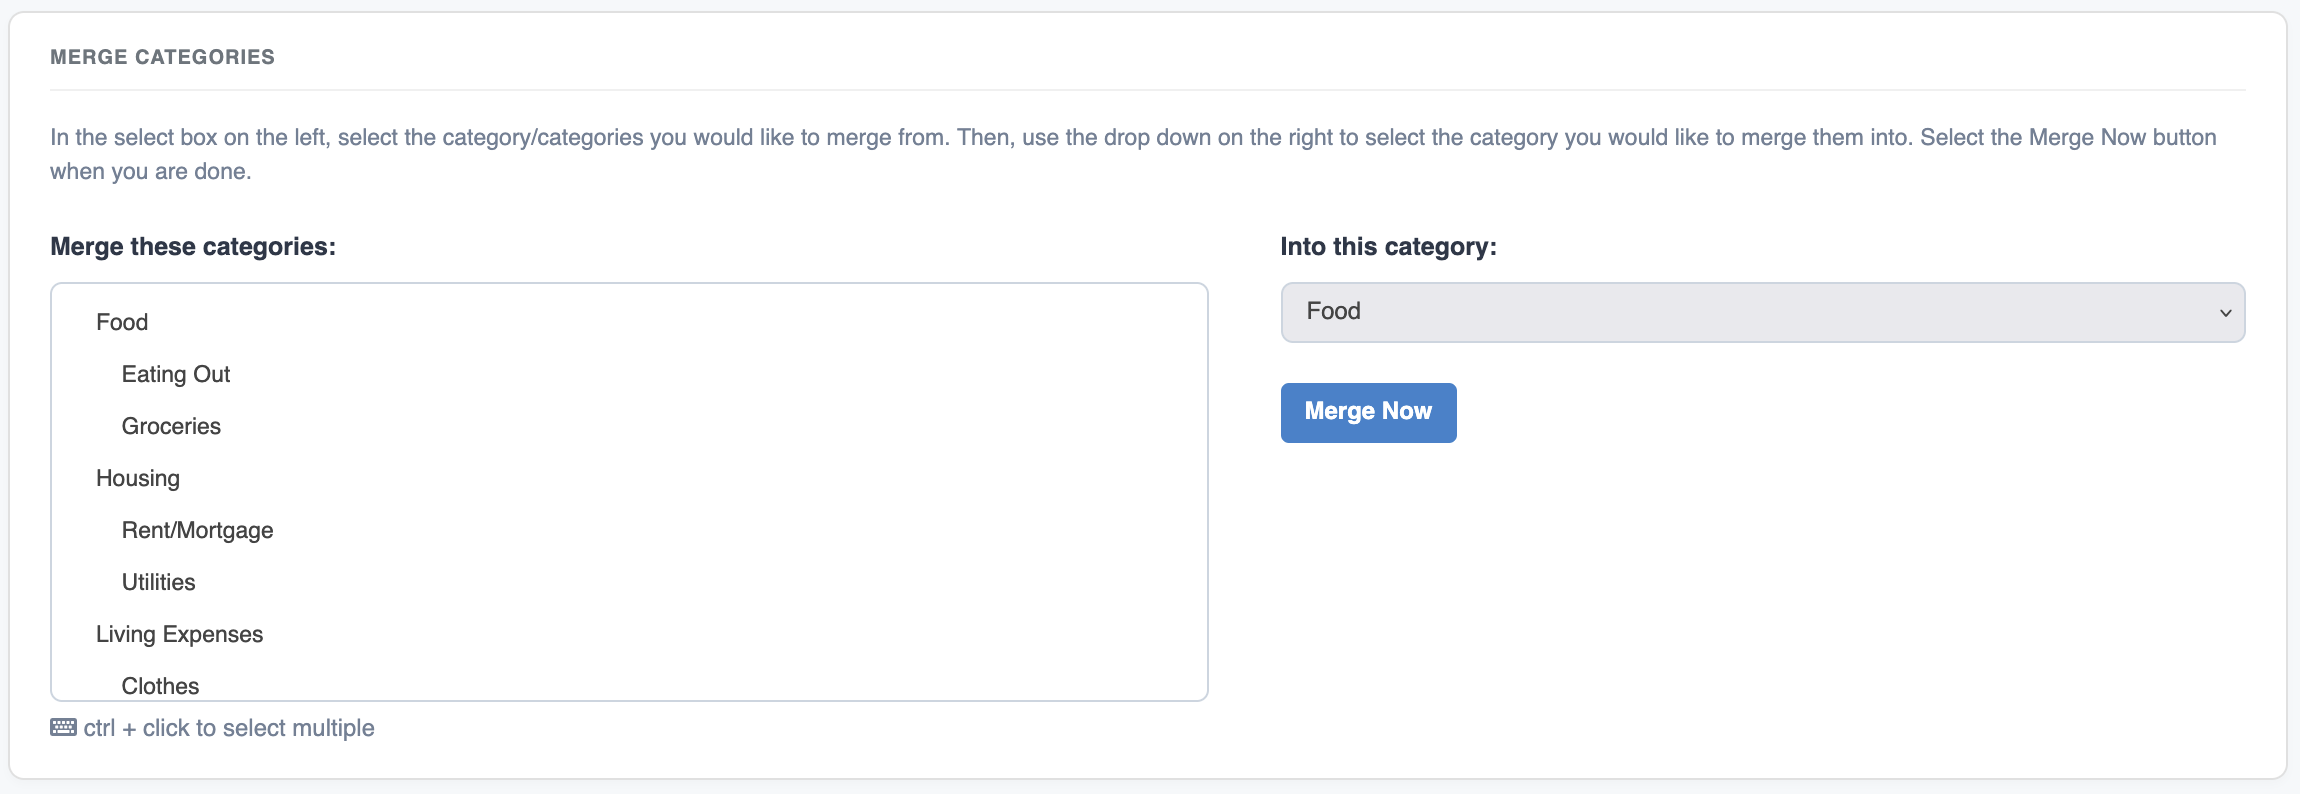
If you delete a parent category that has sub-categories associated with it, those sub-categories will becomeOrphaned and appear in the Orphaned Categories list. In some cases you might want to merge multiple categories into one. You can do this in the Merge Categories section.
This works by selecting the categories you want merged from the list on the left and which category you want them merged into in the drop down list on the right.
If you delete a parent category that has sub-categories, those sub-categories become orphaned since they no longer have a parent category. Those orphaned categories will appear in the Orphaned Categories list. You can assign them to a different category, make them a parent or delete the category entirely.
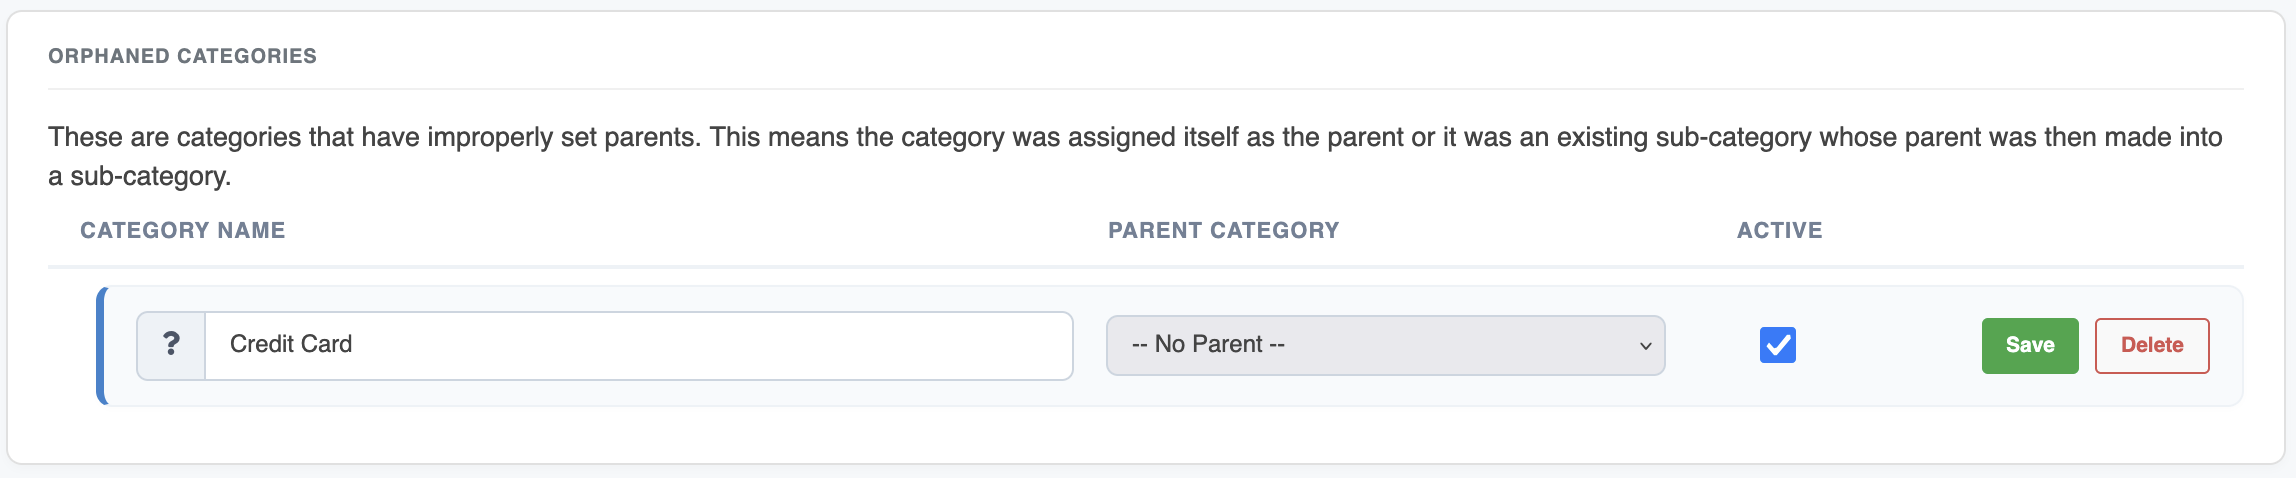
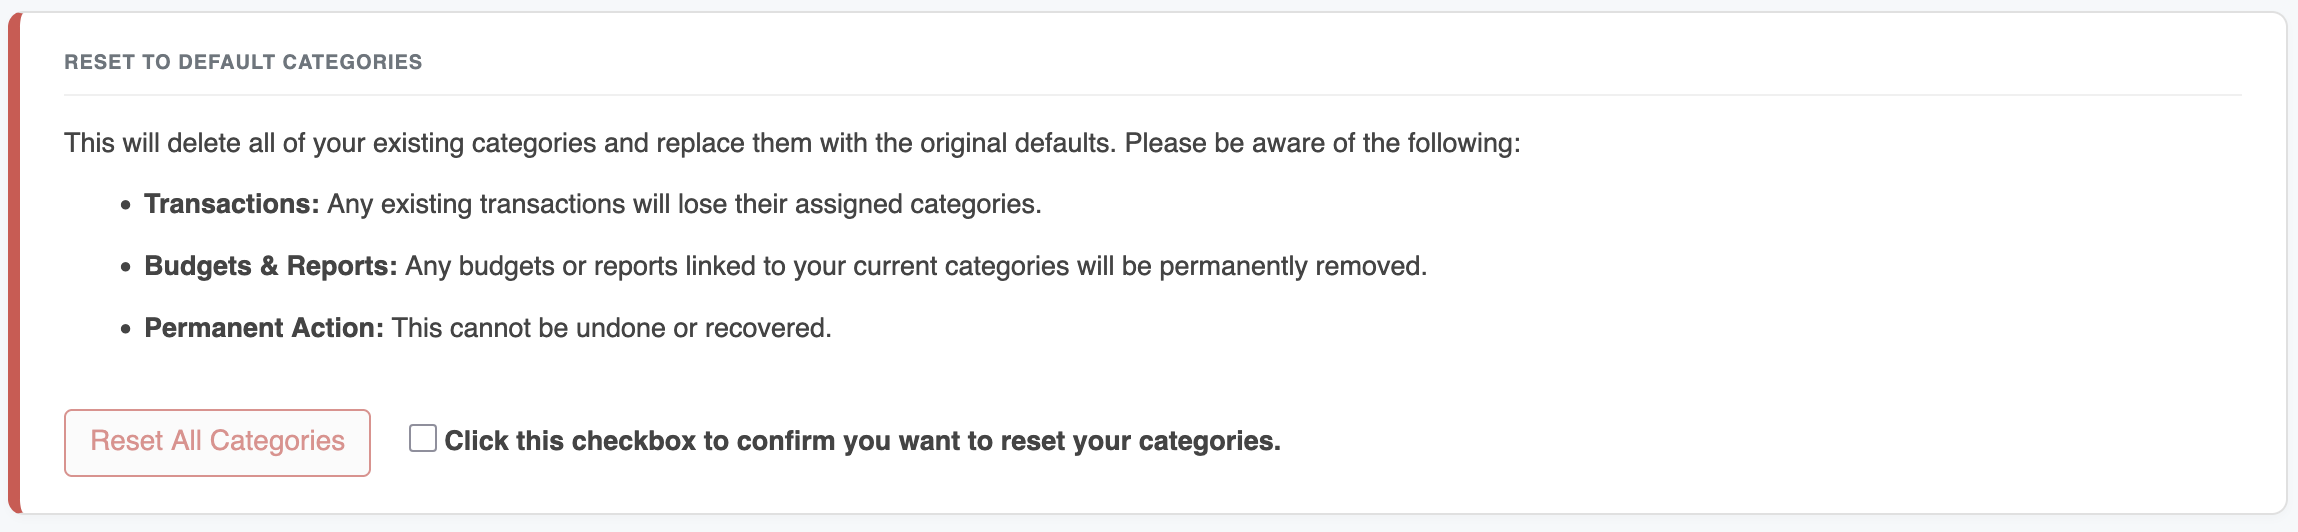
Bank with a sub-category called fees. When the Bank category was deleted, fees became orphaned. The Reset Categories form will delete all of your existing categories and restore them to the default categories that were created when you signed up for ClearCheckbook. Any transactions that are currently assigned to categories will no longer have a category associated with them.