The Bill Tracker is a great way to keep track of what bills you owe, which ones you've paid, and how much you owe for them. When you mark a bill as paid, we'll automatically add this as a transaction to your register and keep a history of your bill payments.
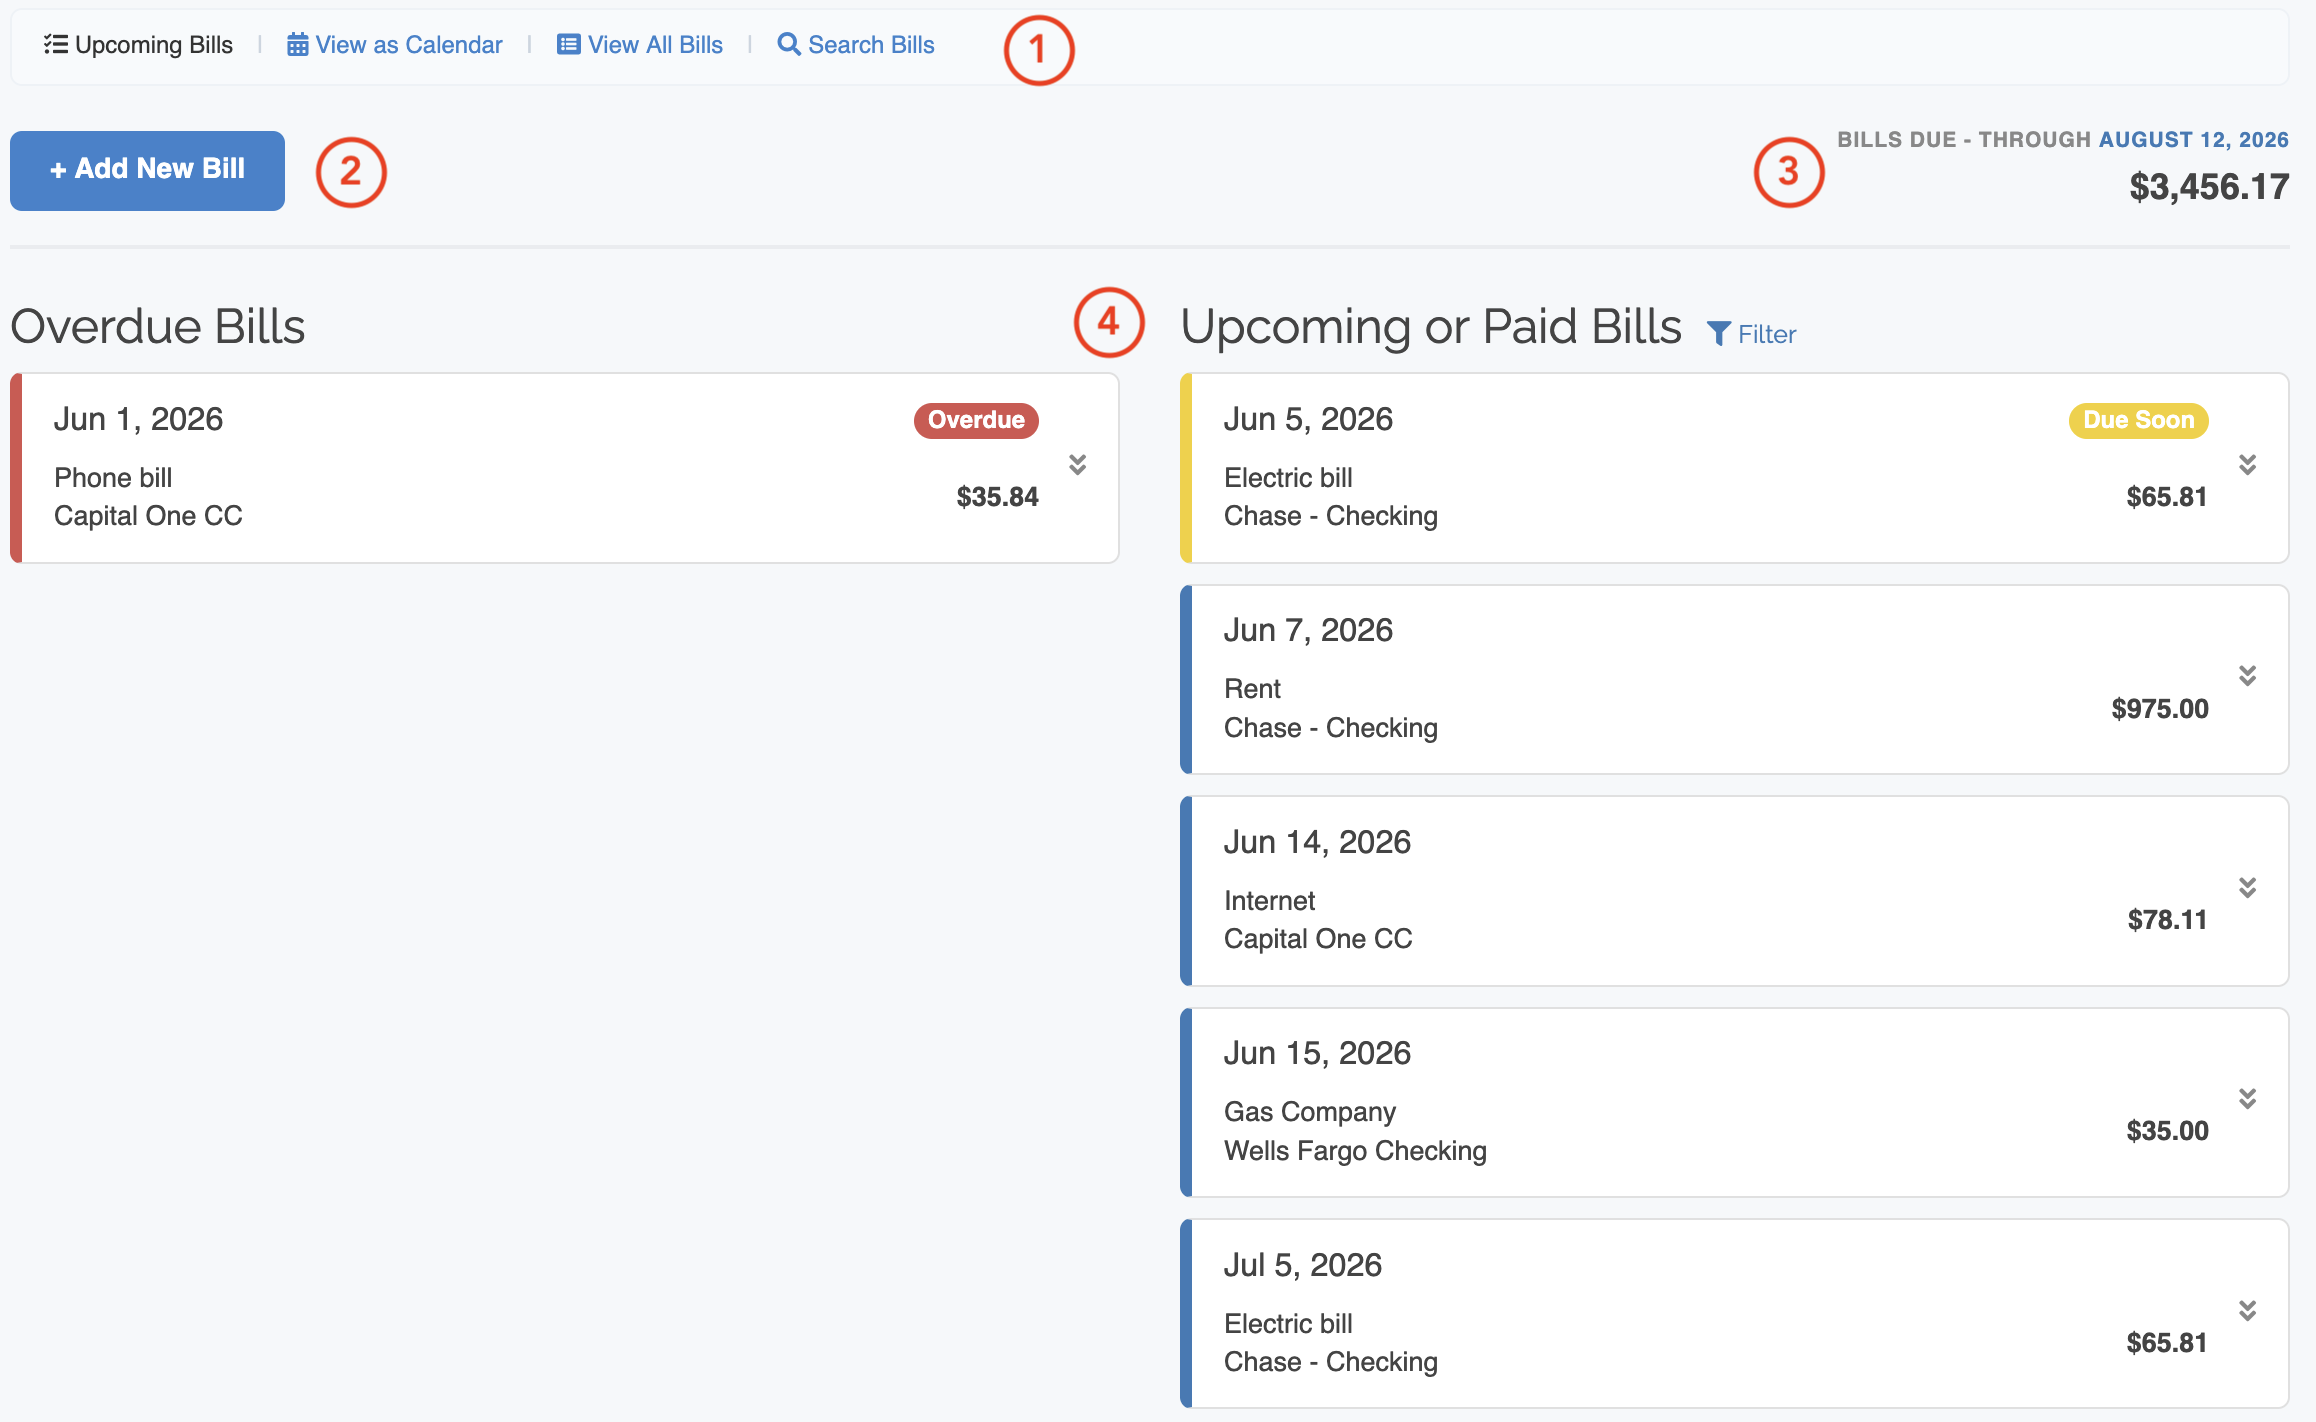
You can find the Bill Tracker by clicking on Tools at the top of the page, then click on the Bill Tracker link.The Bill Tracker has several different sections that help you view and manage your bills. The screenshot below shows an example of the main Bill Tracker page.
| Number | Description |
|---|---|
1 |
The navigation at the top of the Bill Tracker lets you change how you view your bills. The options are |
2 |
You can add new bills by clicking the + Add Bill button. |
3 |
This section shows you how much you owe in the near future based on your upcoming bills. The default is 30 days into the future but ClearCheckbook Premium members can change that to 45, 60, 90 or 120 days. |
4 |
The list of bills shows any overdue bills regardless of date and upcoming bills that fall within the number of days set in #3. Click on a bill to view more details and perform various actions. |
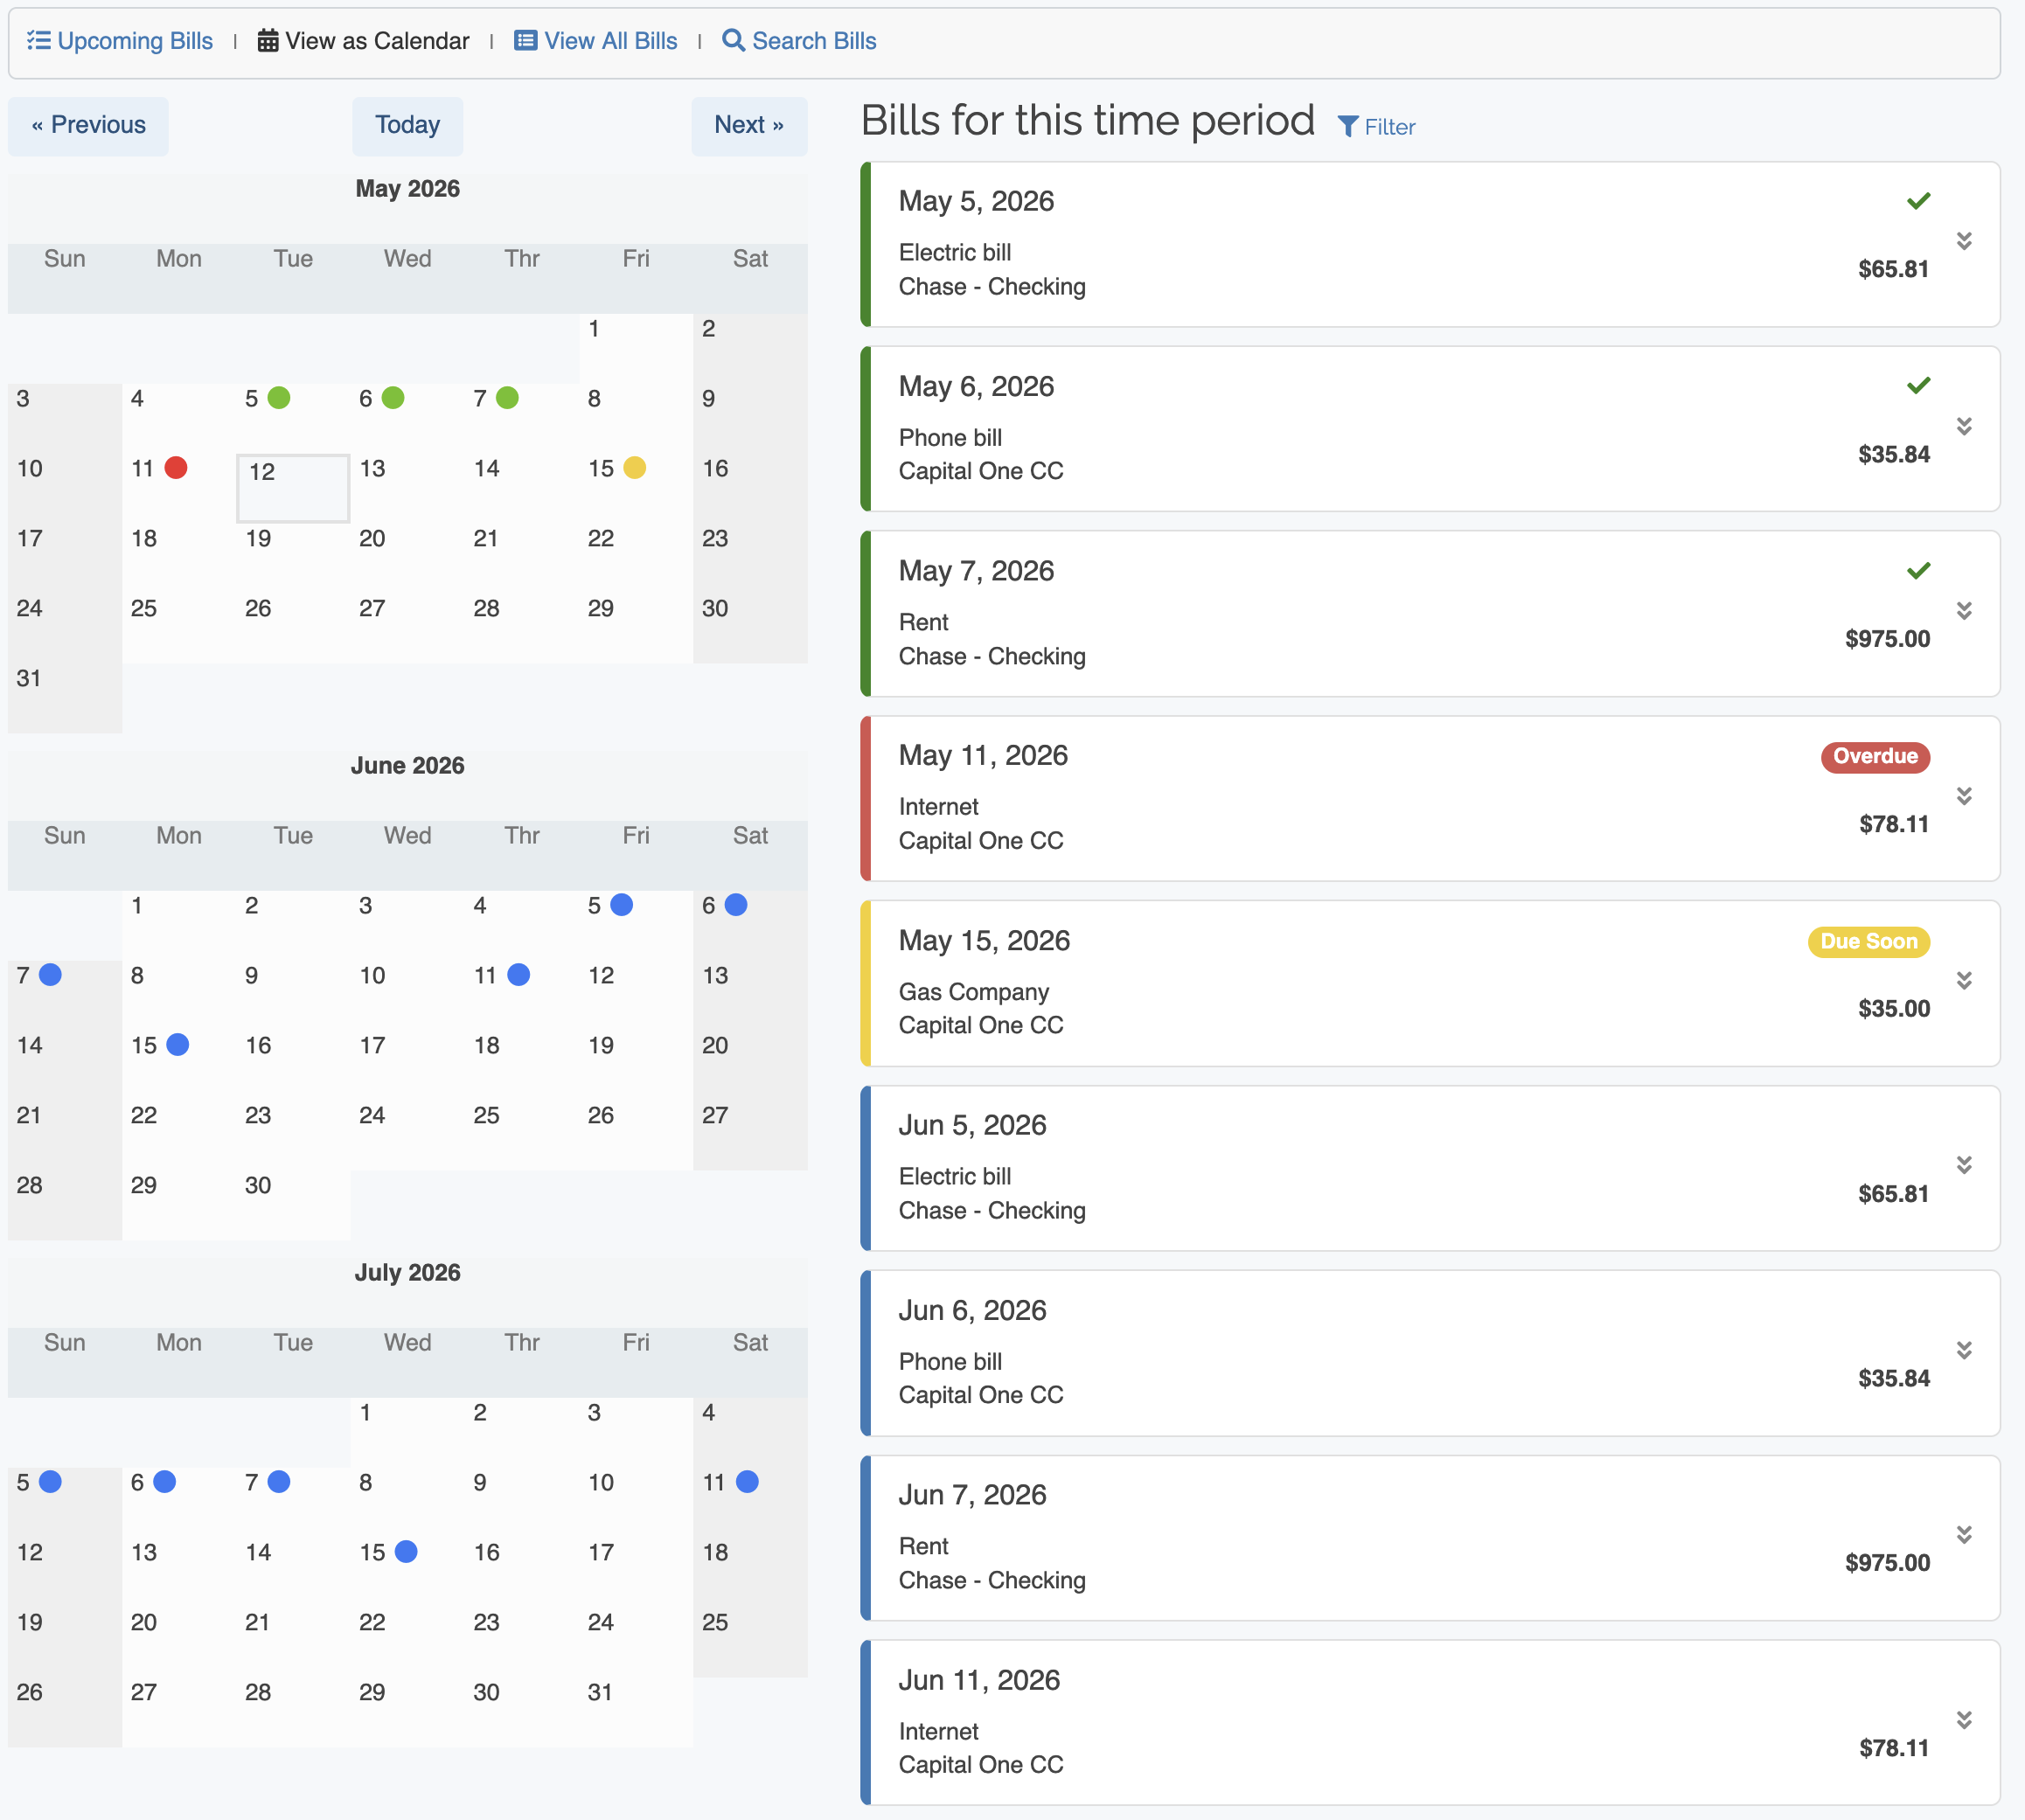
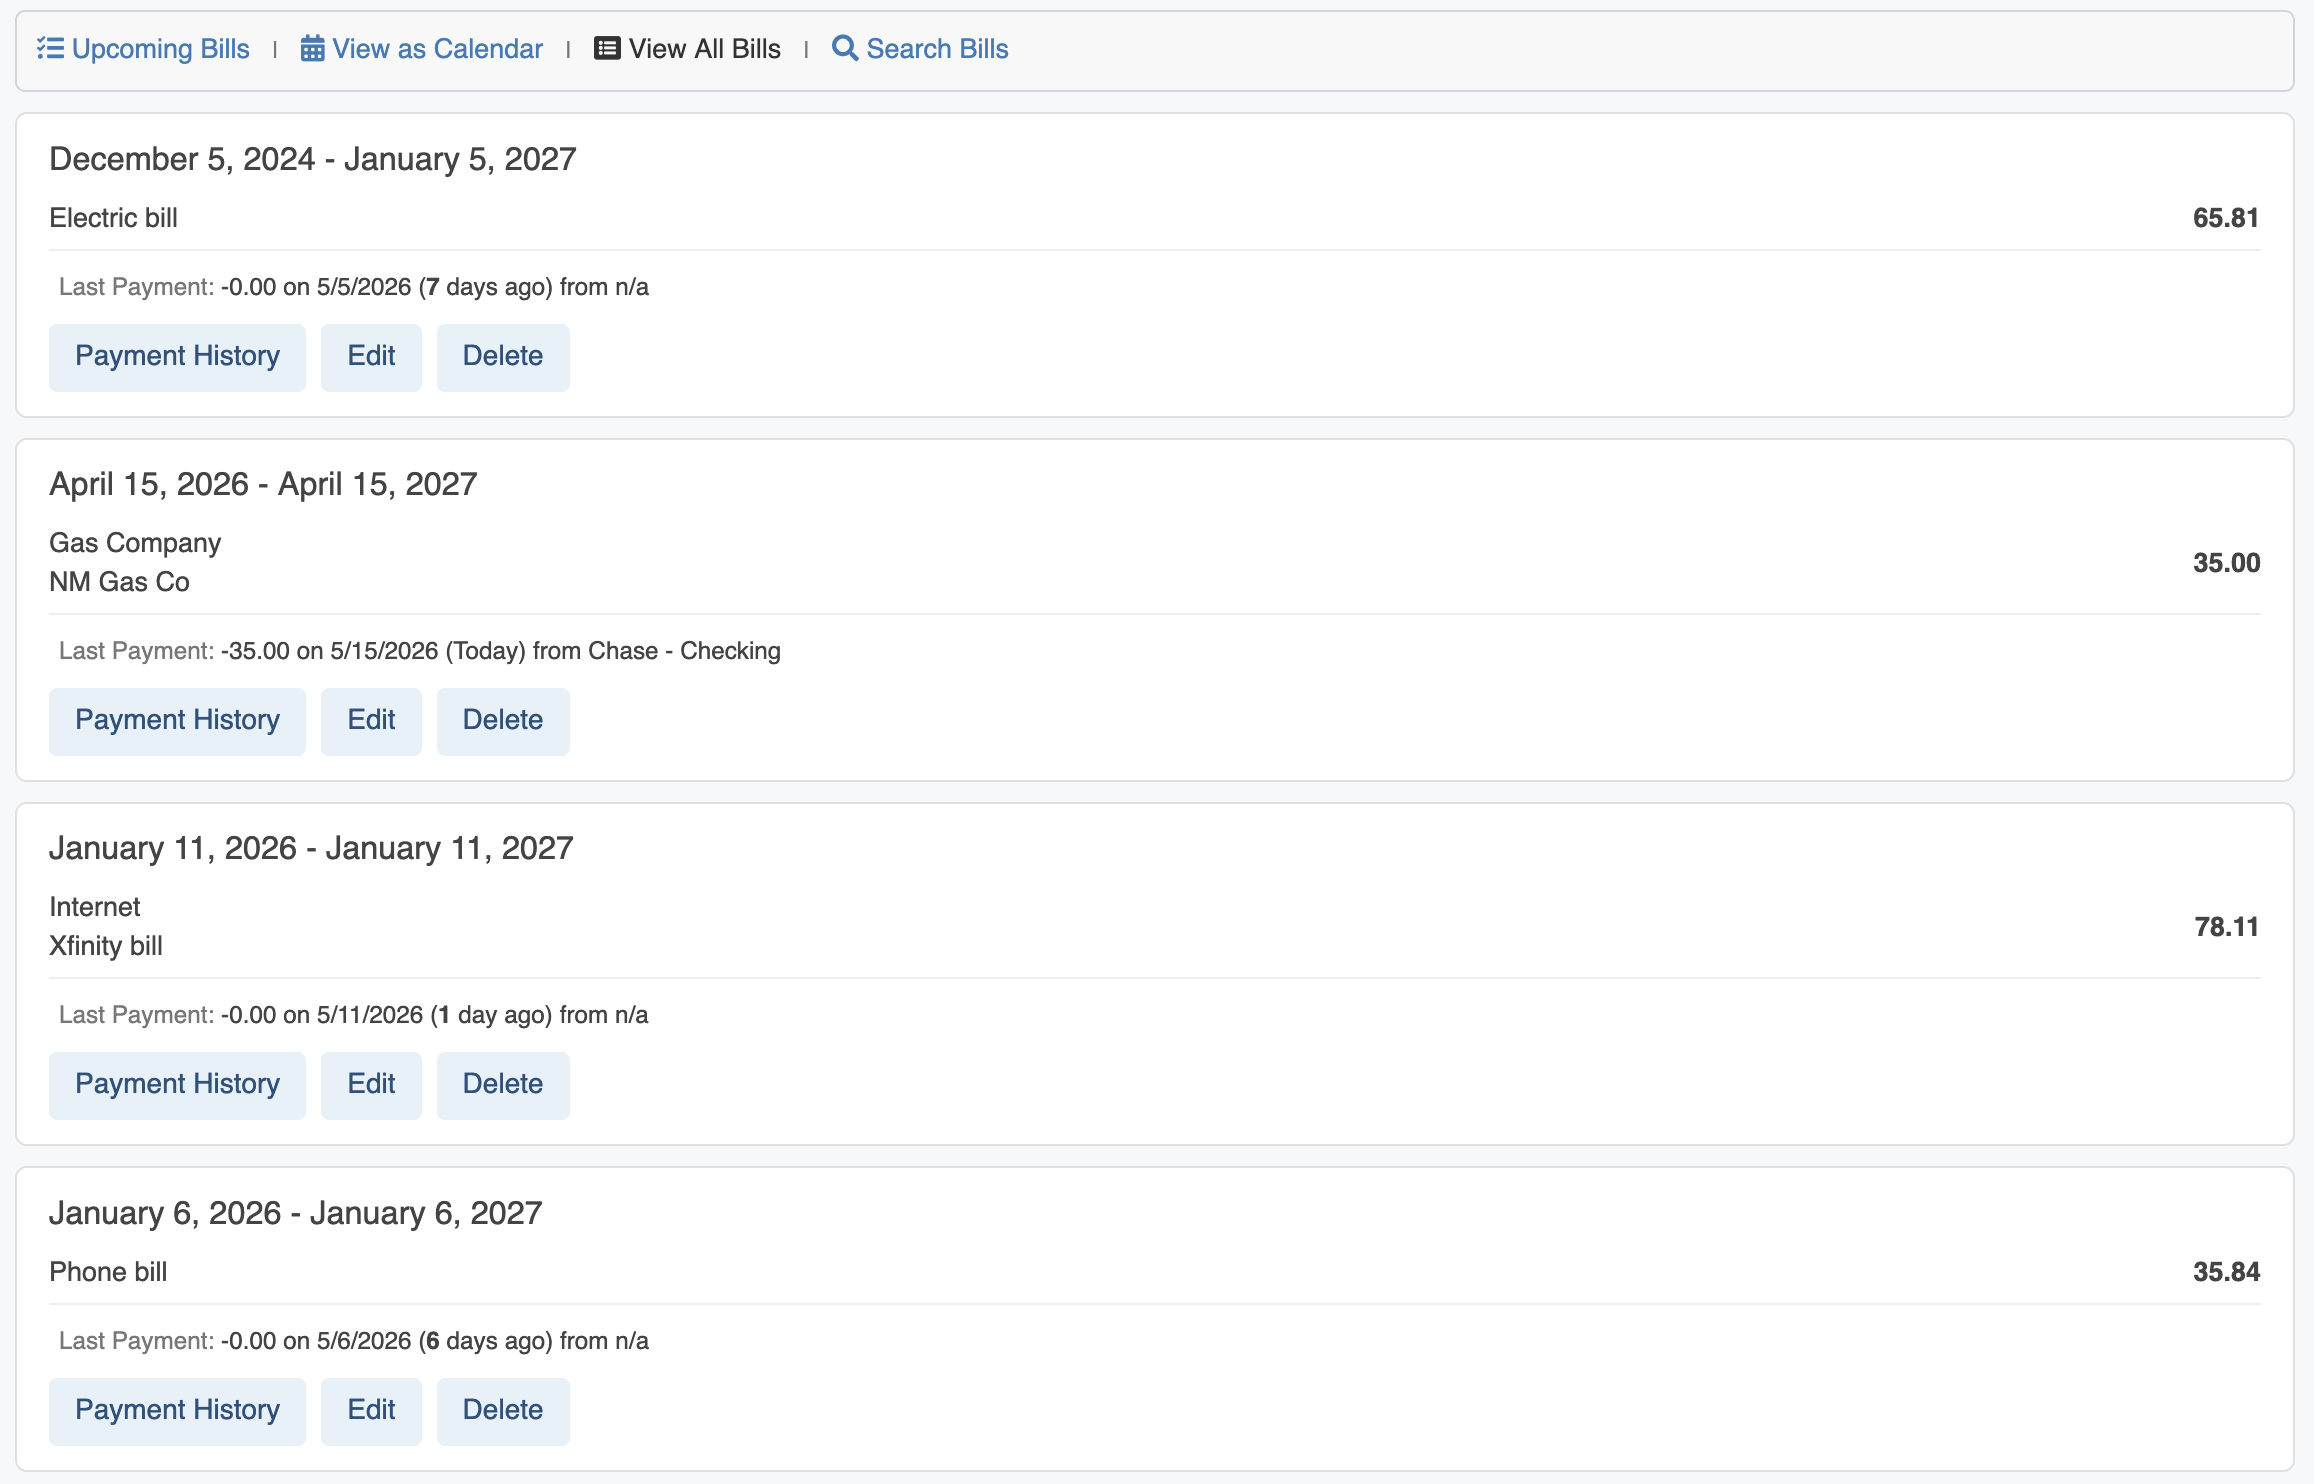
There are a few different ways to view your bills and you can switch between those views in the Bill navigation (see #1 above for the location). The different views are explained in the table below.
| Link | Description |
|---|---|
Upcoming Bills |
This is the default view for the Bill Tracker and is the layout shown above. |
View as Calendar |
This view looks similar to the Reminders / Recurring Transactions default view. There are two calendars on the left and a list of upcoming bills on the right. |
View All Bills |
This page shows a list of all your actual bills. You can view payment history, edit or delete entire bills here. |
You can add a new bill by clicking on the + Add Bill button at the top of the Bill Tracker page. When the Add New Bill form loads, you'll be presented with three sections each containing several fields which are explained below.
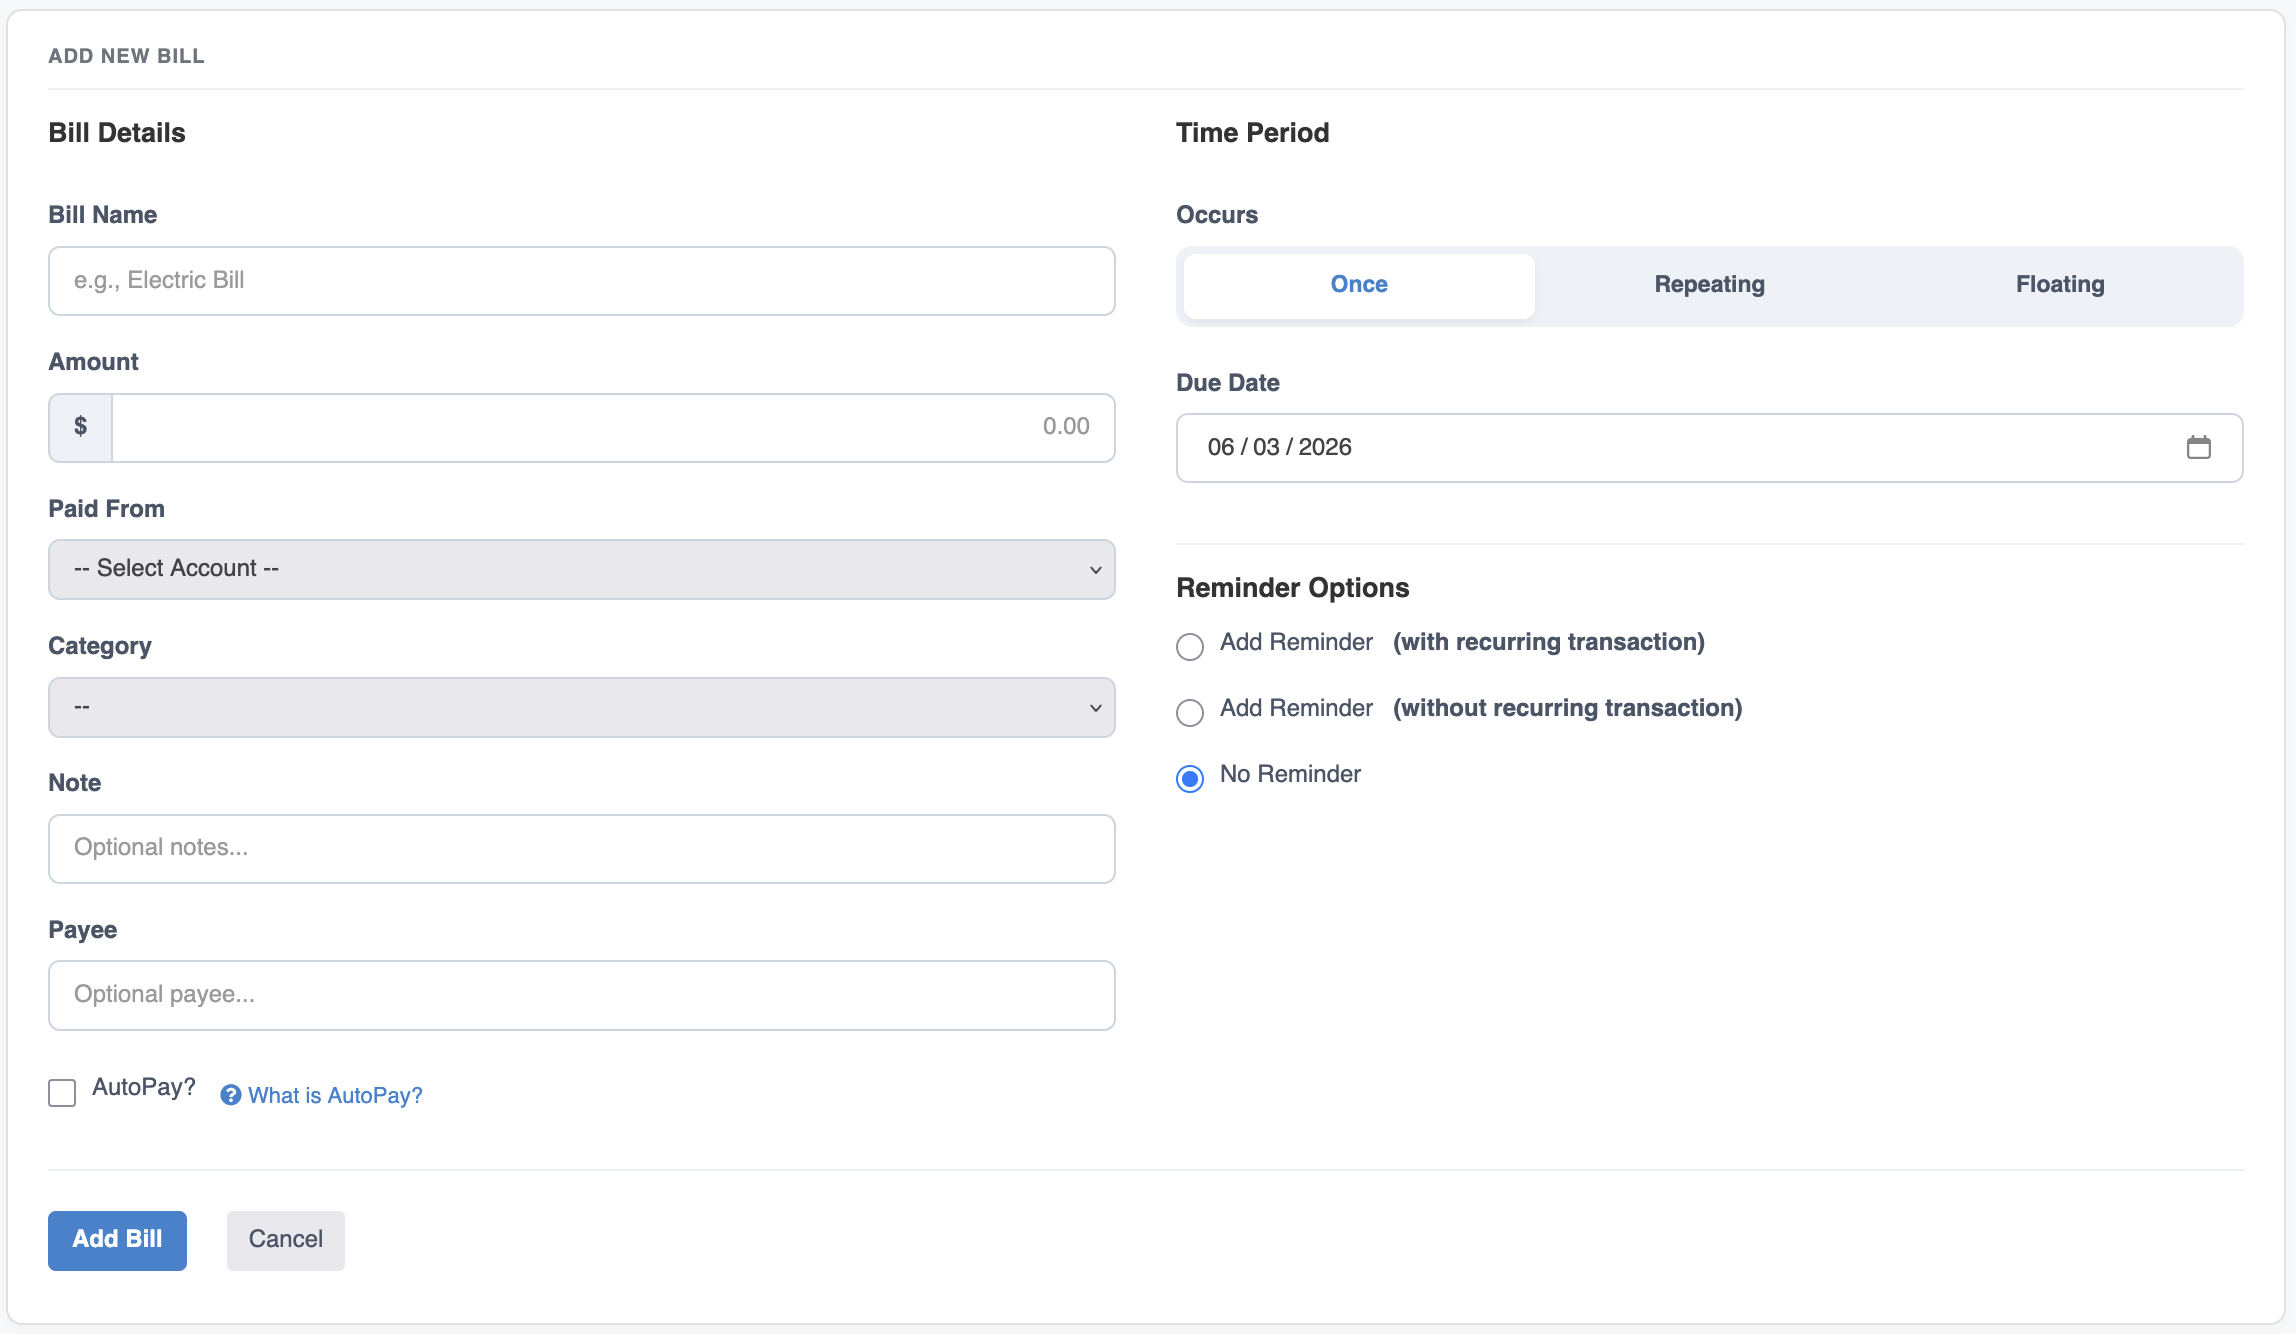
This section has the basic information for the bill.
| Field | Description |
|---|---|
Bill Name |
This will show up in the bill list and anywhere the bill is displayed. |
Amount |
The default amount for the bill. You can change this at any time or when you pay the bill. |
Paid From |
Select the account you normally pay this bill from. This is used to pre-populate the bill payment form. This will also be used if you opt to associate this with a recurring transaction in the Reminders tool. |
Category |
You can optionally select a category to pre-populate the bill payment form. This will also be used if you opt to associate this with a recurring transaction in the Reminders tool. |
Note |
This is an optional note you can assign to a bill. This could be anything from a payee name or payment number. |
Autopay |
The
Autopay checkbox can be checked to remind you that this bill is automatically paid from your bank account and you don't need to manually pay it.When checked, a
|
This section determins whether or not this bill repeats, and if so, on what kind of schedule. The Occurs option is explained in more detail in the table below.
| Option | Description |
|---|---|
Once |
When selected, the bill will only occur once on the date specified in the Starts field. |
Repeating |
You set a start and end date and then the frequency and frequency type. The full 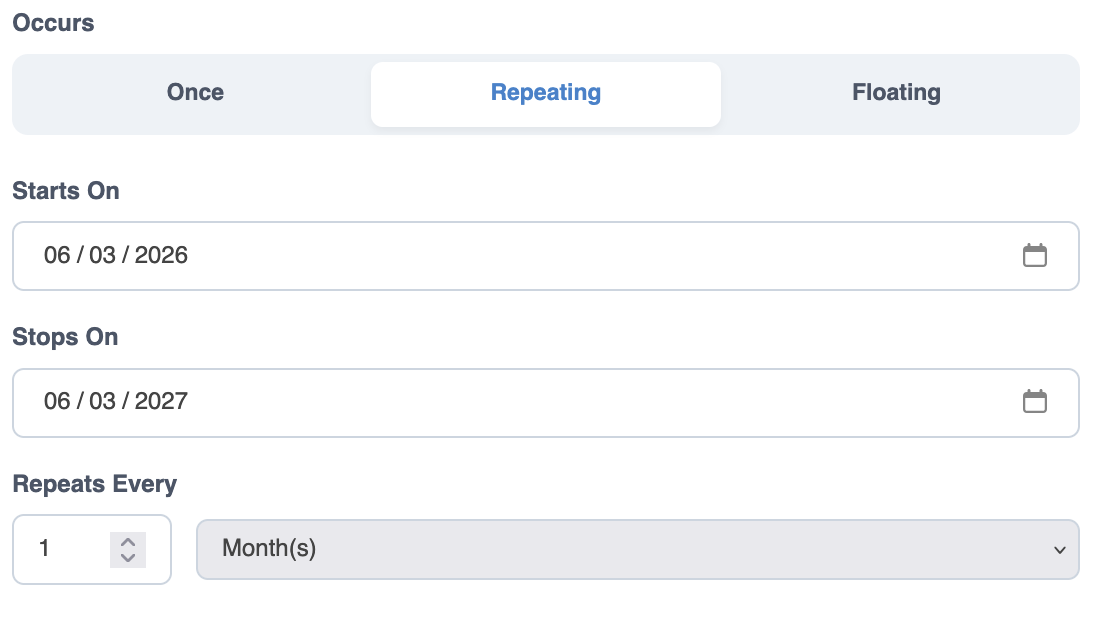 Repeating option The Repeats Every options let you enter a numerical value in the first box and then select from This option is great for bills that need to repeat at regular intervals. For example, if you needed to pay a bill every two weeks you would first select the necessary start and end dates then enter |
Repeating (Floating) |
The 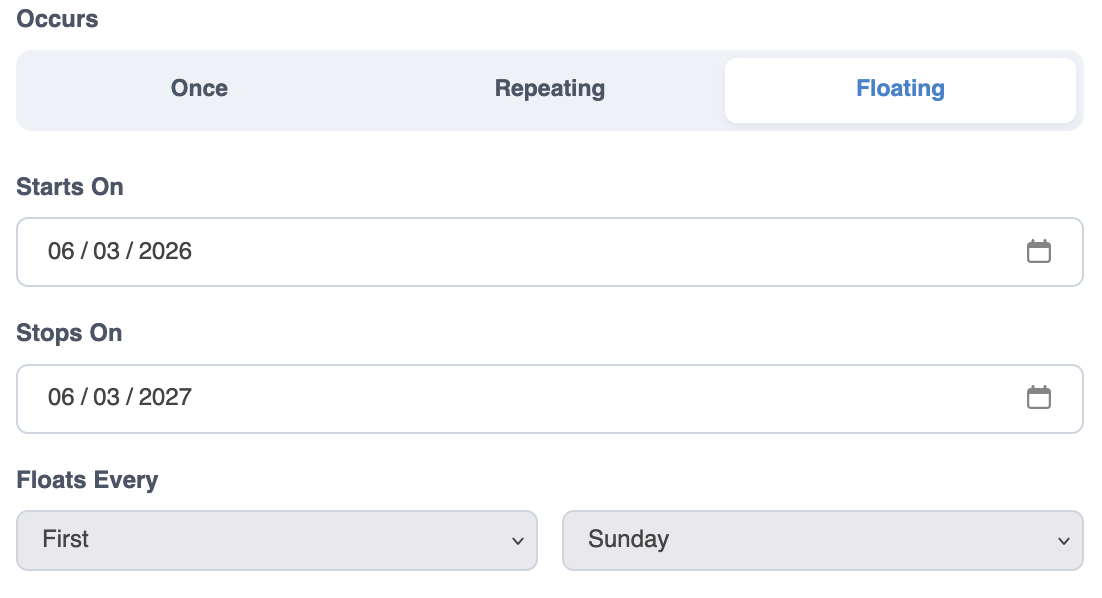 Repeating (Floating) option The Using these two drop down boxes you can set a bill to occur on something like the |
You can choose if this bill should be associated with a reminder, and if it is, whether it should automatically post the transaction to your register.
| Option | Description |
|---|---|
Add Reminder (with recurring transaction) |
When the bill is added, a reminder using the Time Period options will be created and a recurring transaction with the information from the Bill Details section above will be attached to it. The recurring transaction will post to your register when the bill occurs. |
Add Reminder (without recurring transaction) |
This creates a reminder that will show up in the Reminders / Recurring Transactions tool. You will also have the option of having the reminder email you ahead of time. |
No Reminder |
There is no association with the Reminders tool and this bill will only show up in the Bill Tracker. |
Once you've entered all the details for your bill, click the blue Add Bill button at the bottom of the form. When you add the bill, the list will refresh and show that bill if it's set to occur in the next 30 days.
The bill list shows you all of your overdue and upcoming bills and gives them each a label. Each label is color coded based on the severity of the bill due date. The four labels are Overdue, Paid, Due Soon and Upcoming
| Label | Color | Description |
|---|---|---|
Overdue |
The due date for the bill has passed and it has not been paid. | |
Paid |
The bill has been paid. | |
Due Soon |
The bill is due within the next 3 days. | |
Upcoming |
The bill is due between 3 and 30 days from now. If you changed the number of days the list is shown for, it will also include bills due through that many days. |
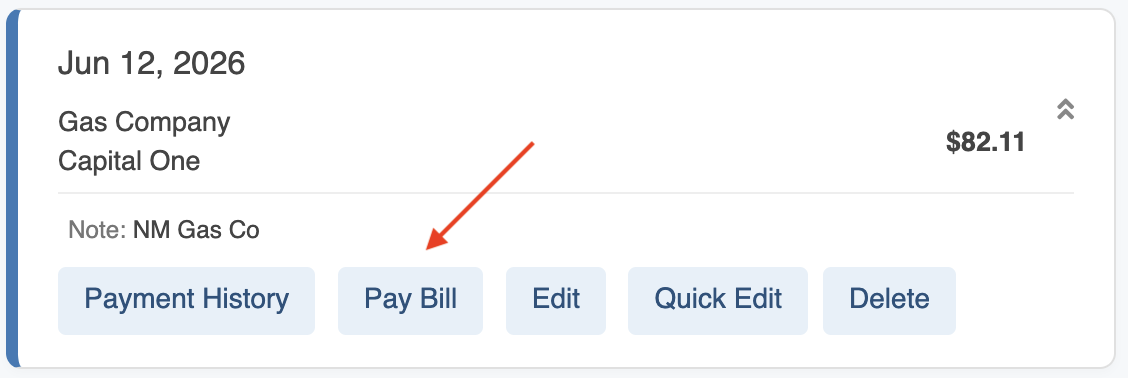
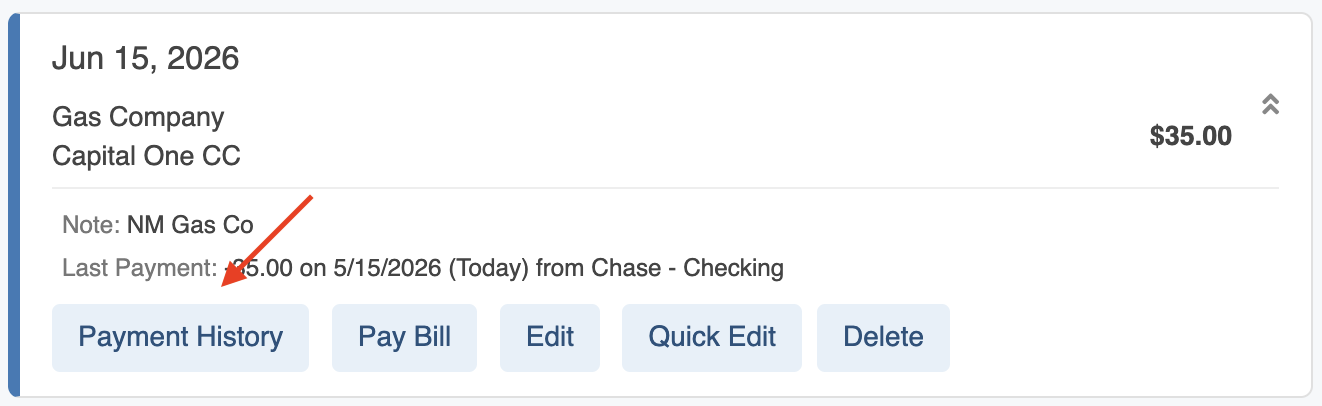
When you click on a bill it will expand with more information. The bill amount, name and last payment details (if applicable) will appear. The actions you can perform on a bill are Payment History, Pay Bill, Edit and Delete. These actions are explained in more detail below.
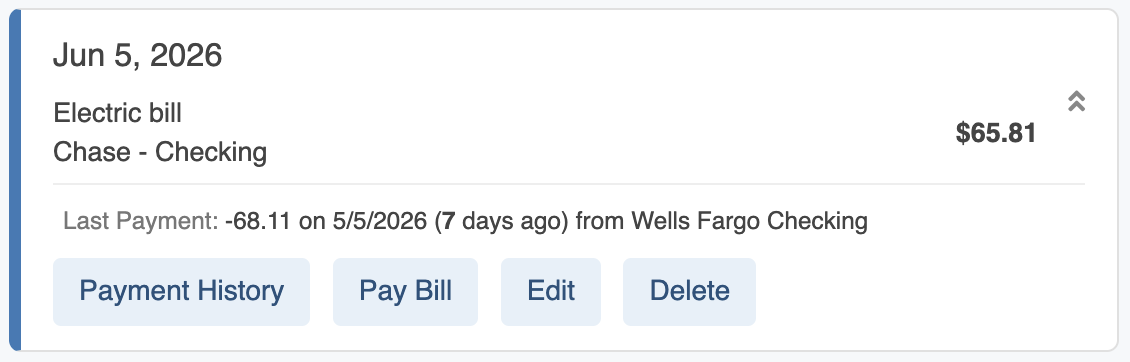
| Action | Description |
|---|---|
Payment History |
Clicking this link will show a history of payments to this bill if any payments have been made. See the Bill Payment History section below for more information. |
Pay Bill |
This will bring up a form where you can pay the bill. This will create a transaction in your transaction register and mark the bill as paid. See the Pay a Bill section below for more information. |
Edit |
You can edit the details of a bill. See the Edit a Bill section for more information. |
Delete |
You can choose to delete the entire bill or a single occurrence by clicking this link. See the Delete a Bill section for more information. |
To pay a bill, find it in your bill list and click to expand it. Next, click on the Pay Bill action.
Once you click on the Pay Bill link you will have two different ways to pay the bill. The first is to use the form to enter the payment details for the bill. When you submit the form, the bill will be marked as paid and the transaction will be added to your transaction register.
The second option is to click the Set as 'Paid' without adding transaction link at the bottom of the form. This will mark the bill as paid without adding a transaction. This can be useful if you already added the transaction into your register the bill was paid from a source that you aren't tracking in ClearCheckbook.
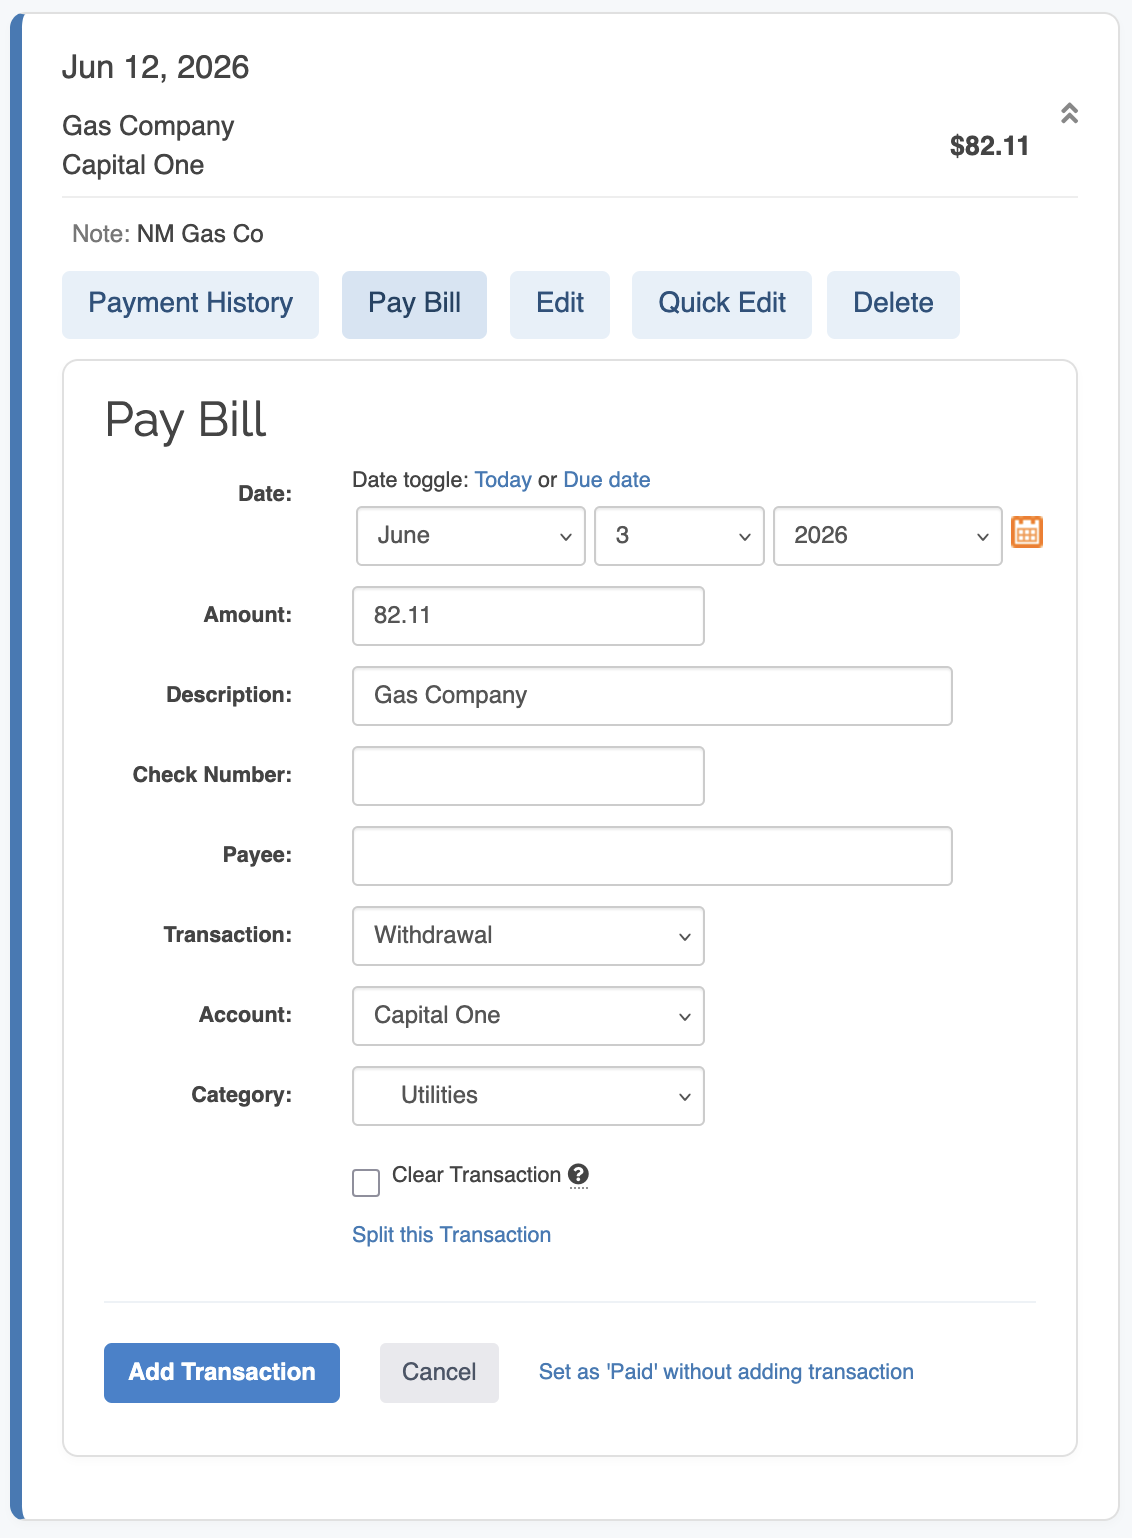
If you opt to pay the bill by adding a transaction, the form behaves exactly the same as the standard Add Transaction form.
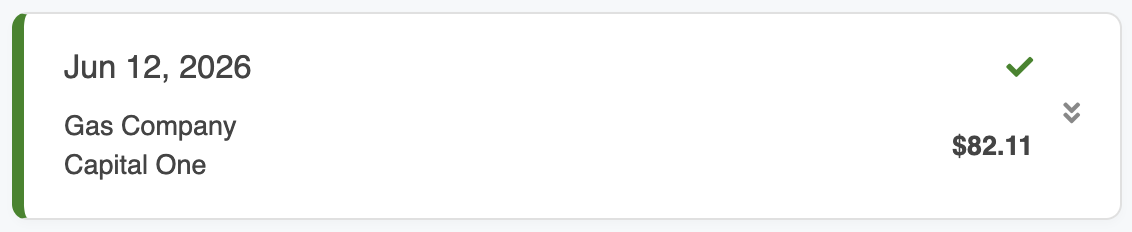
When you pay the bill through either method, the bill will turn green with a Paid! label in the bill list.
You can view a table with all the payment history for a bill by expanding it from the bill list. After that, click on the Payment History link (shown below).
The bill history shows both a visual report and a table view of your past payments.

You can easily edit a bill by clicking on the bill to expand it and then click on the Edit link.
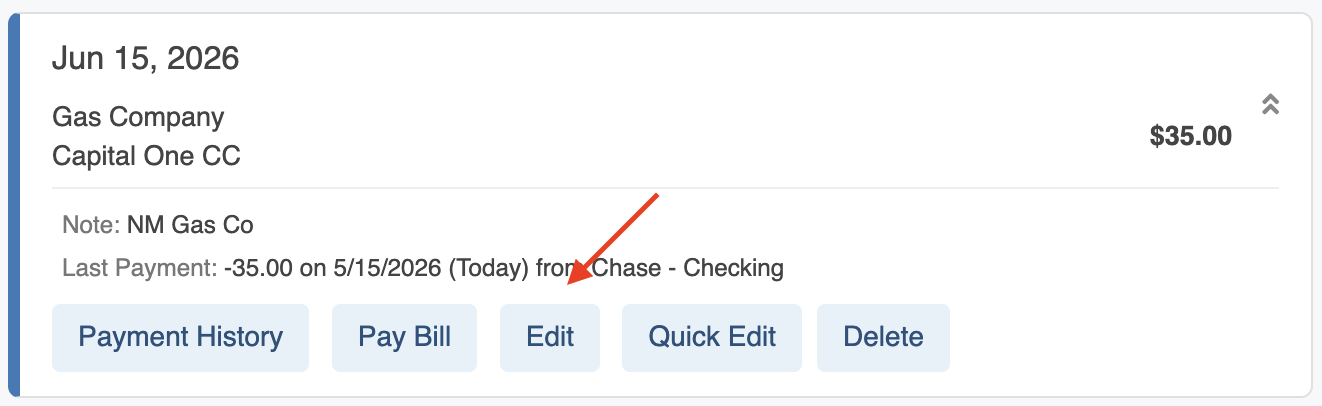
This will bring up a form with all of the same fields as the Add Bill form but with all of the details for the bill pre-populated. Simply make your changes and save your bill.
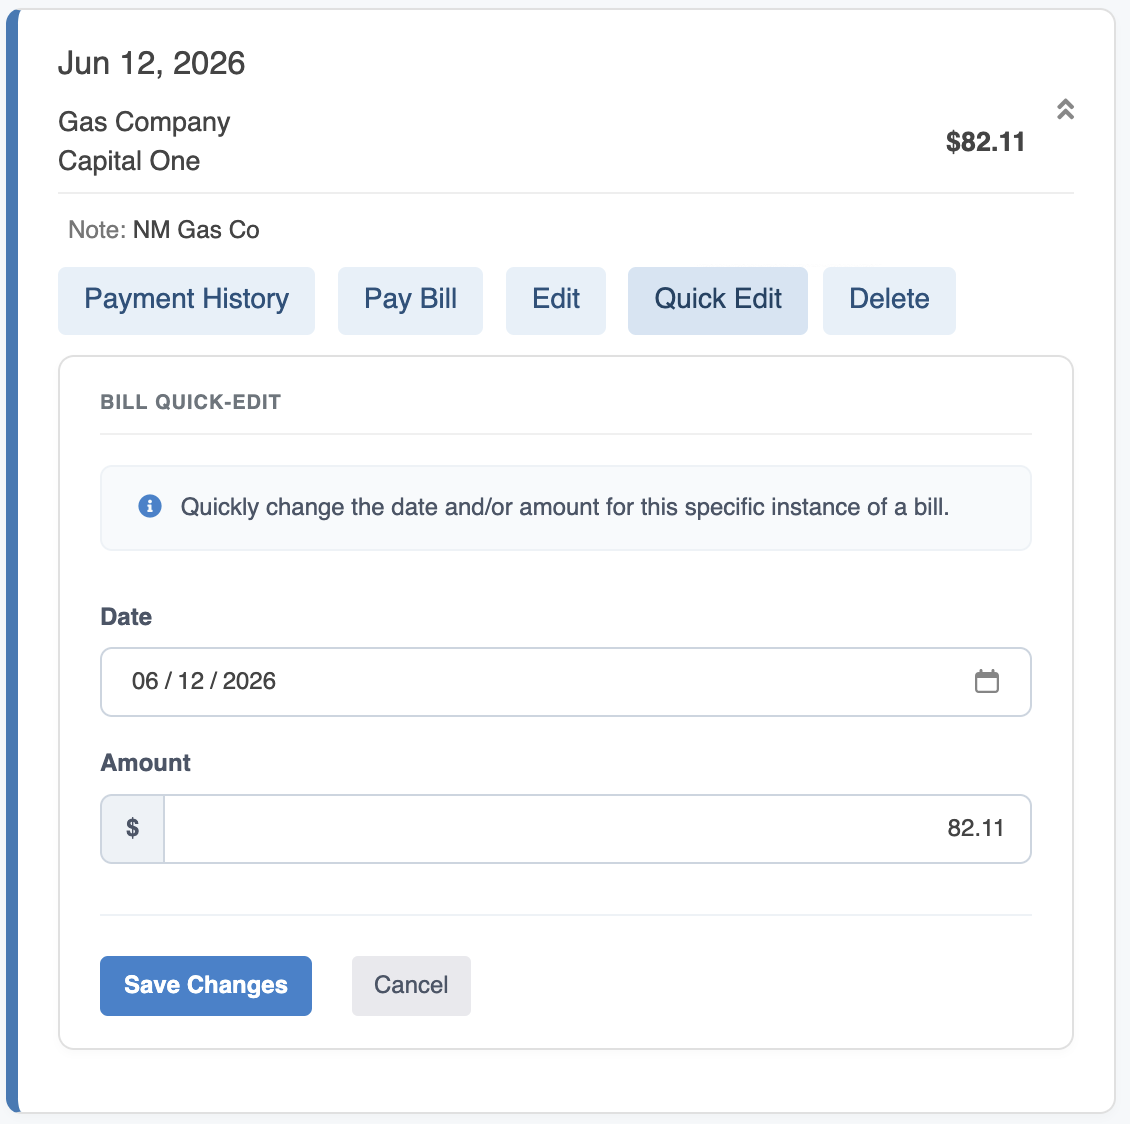
Quick Edit allows you to edit a single instance of a bill without affecting subsequent instances of that bill. You can open the Quick Edit form by clicking the Quick Edit link under any bill that has an associated recurring transaction (via the Reminders / Recurring Transactions tool). Remember: This option only appears for bills that have an associated recurring transaction.
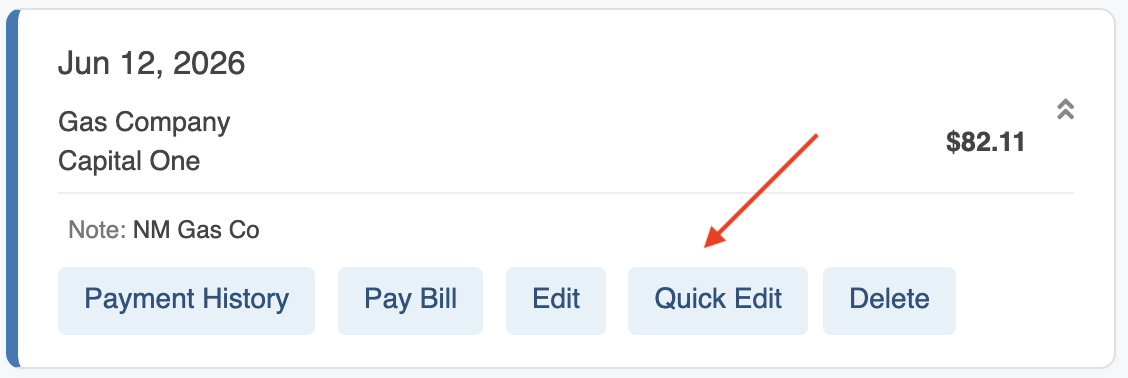
The Quick Edit form lets you change the date and amount for the bill's recurring transaction. When changed, this instance of the recurring transaction will post on the new date specified and use the amount you enter in the Amount box.
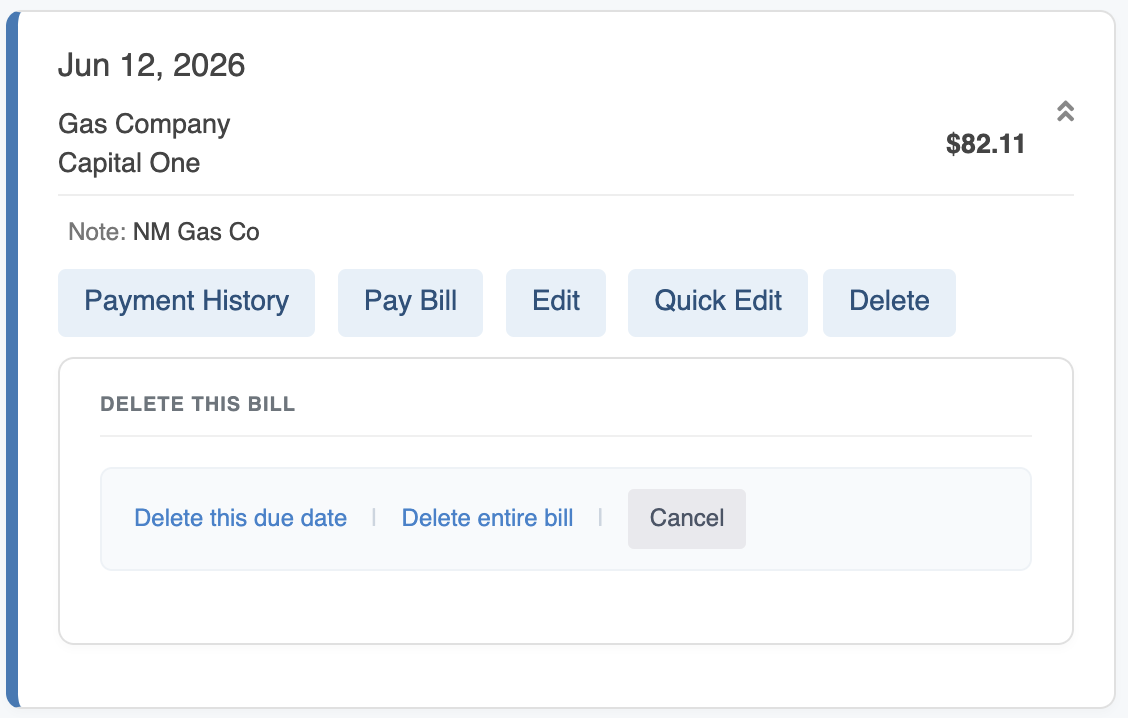
To delete a bill, click on the bill to expand it and then click on the Delete link.
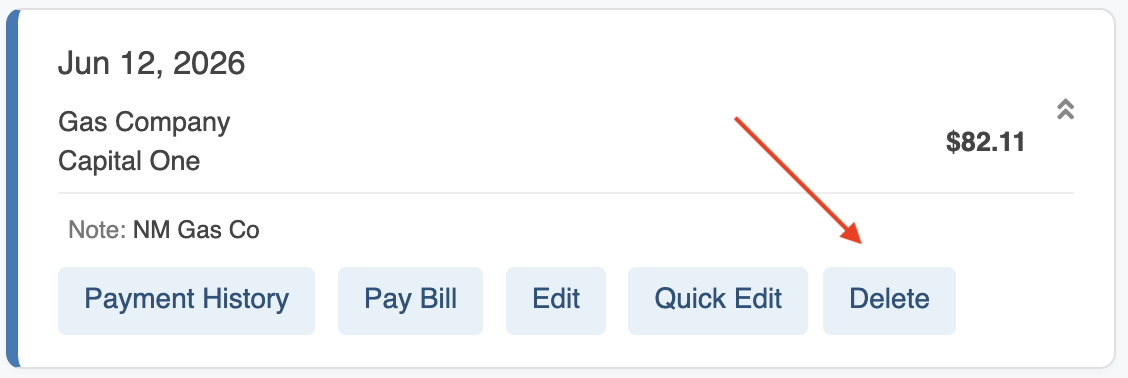
After clicking the Delete button you will be presented with a few different options. The first option, Delete this due date, will delete only this instance of the bill and leave the rest alone. The second option, Delete entire bill, will delete the entire bill and all instances of it.
This video shows you how to manage and track your bills using ClearCheckbook's Bill Tracker tool. Learn how to set up recurring payments, view upcoming bills, and avoid late fees with smart reminders and flexible payment options. Stay organized and in control of your finances with ease.
Direct link to YouTube