The Account Settings page lets you add new categories, edit and delete existing categories, set account groups and manage your global currency.
Settings at the top right side of the page, then click on Accounts under the Manage Your: header.The form at the top of the page lets you add new accounts to ClearCheckbook. We don't limit the number of accounts you can use, so you can create as many accounts as you'd like.
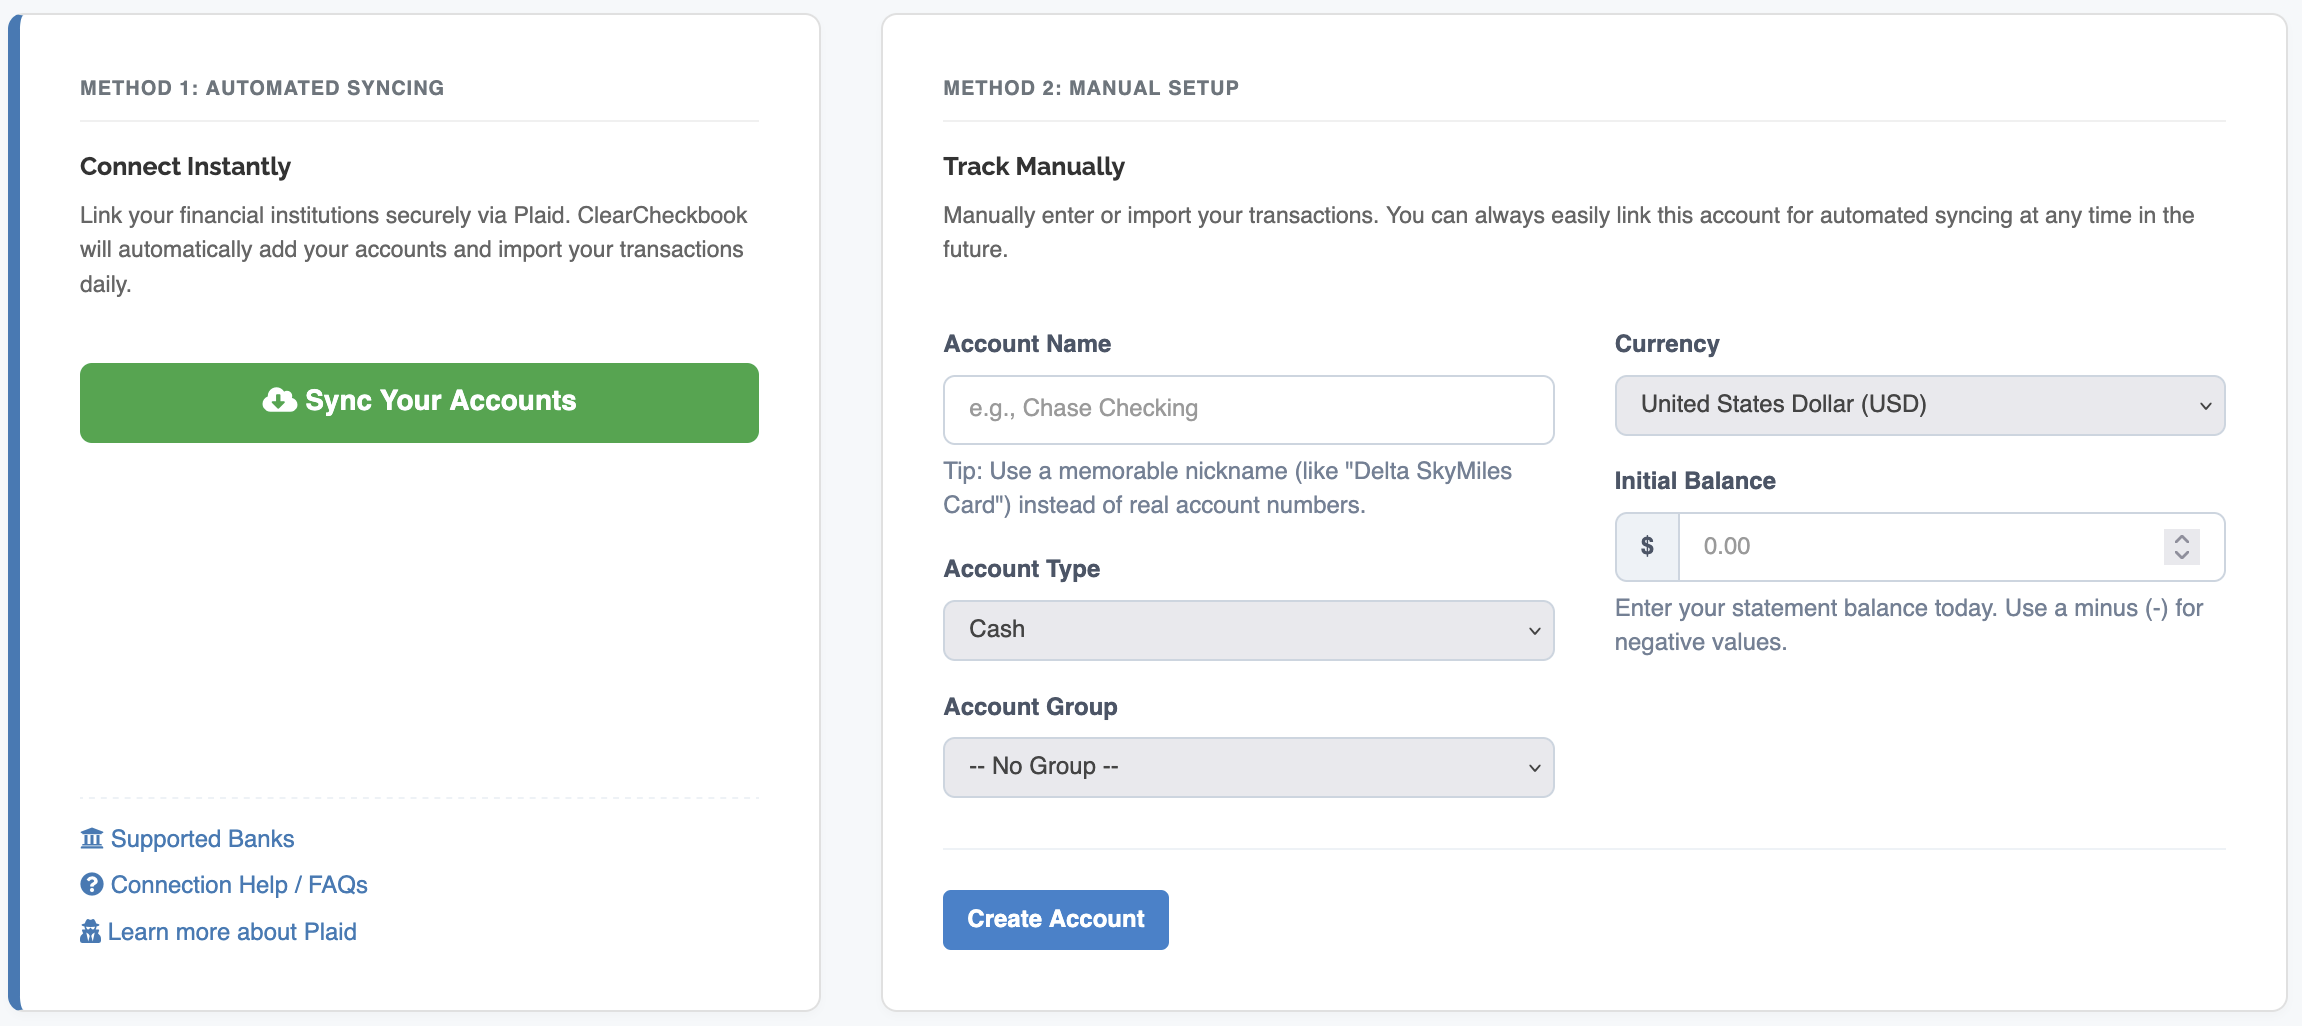
There are two methods for adding an account to ClearCheckbook.
The screenshot below shows the Create Account form with both methods.
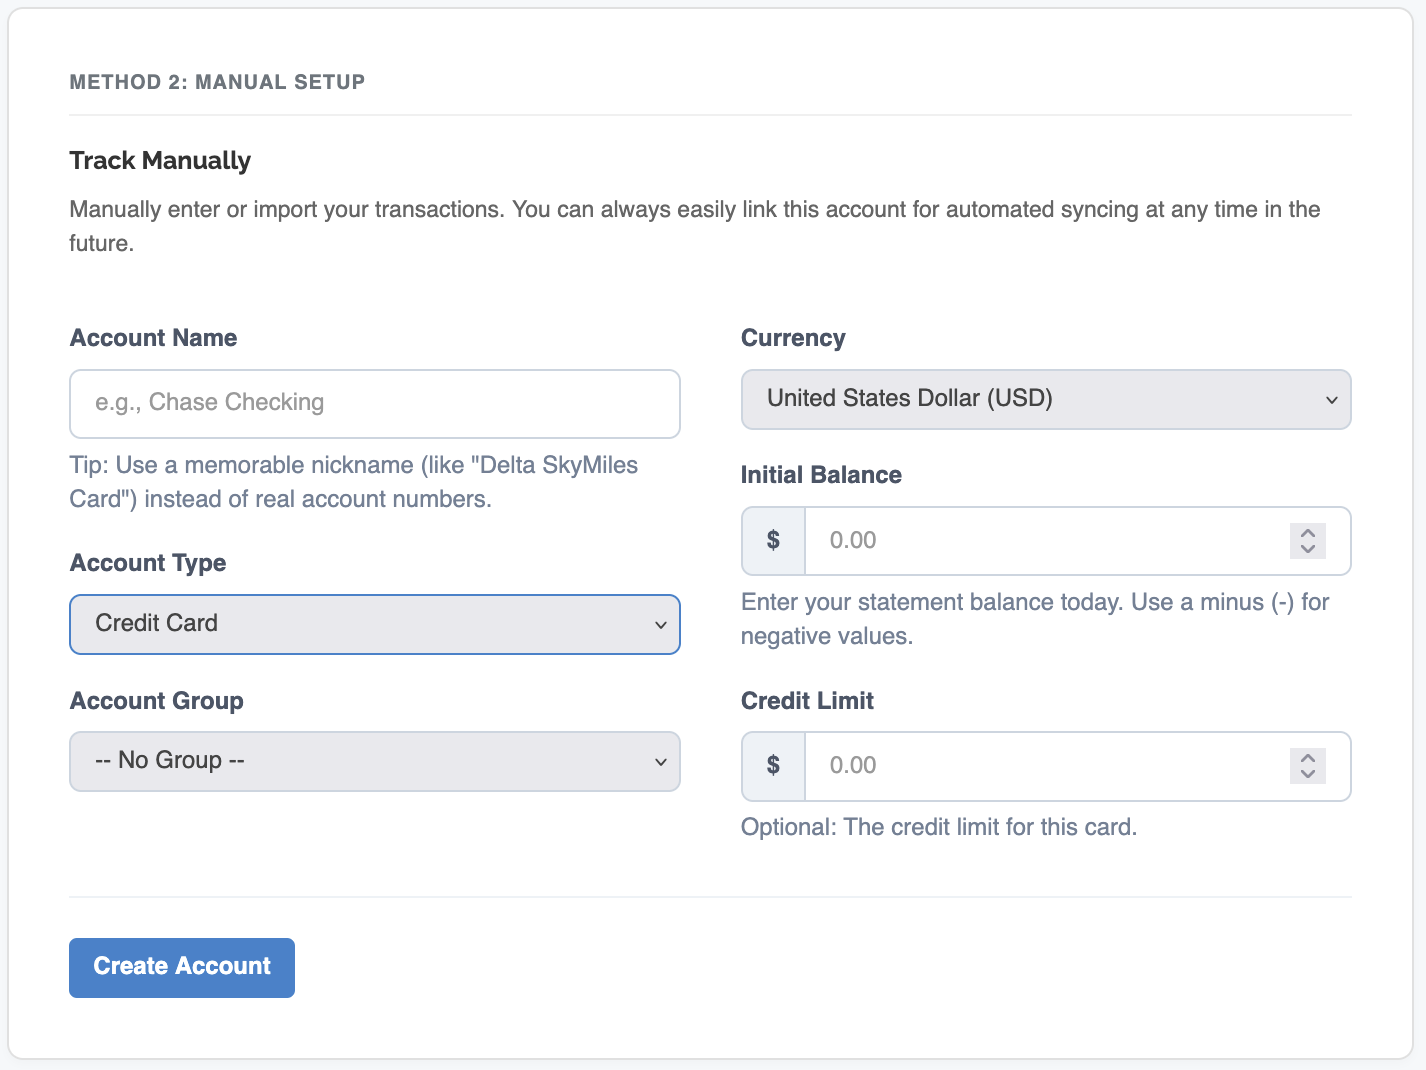
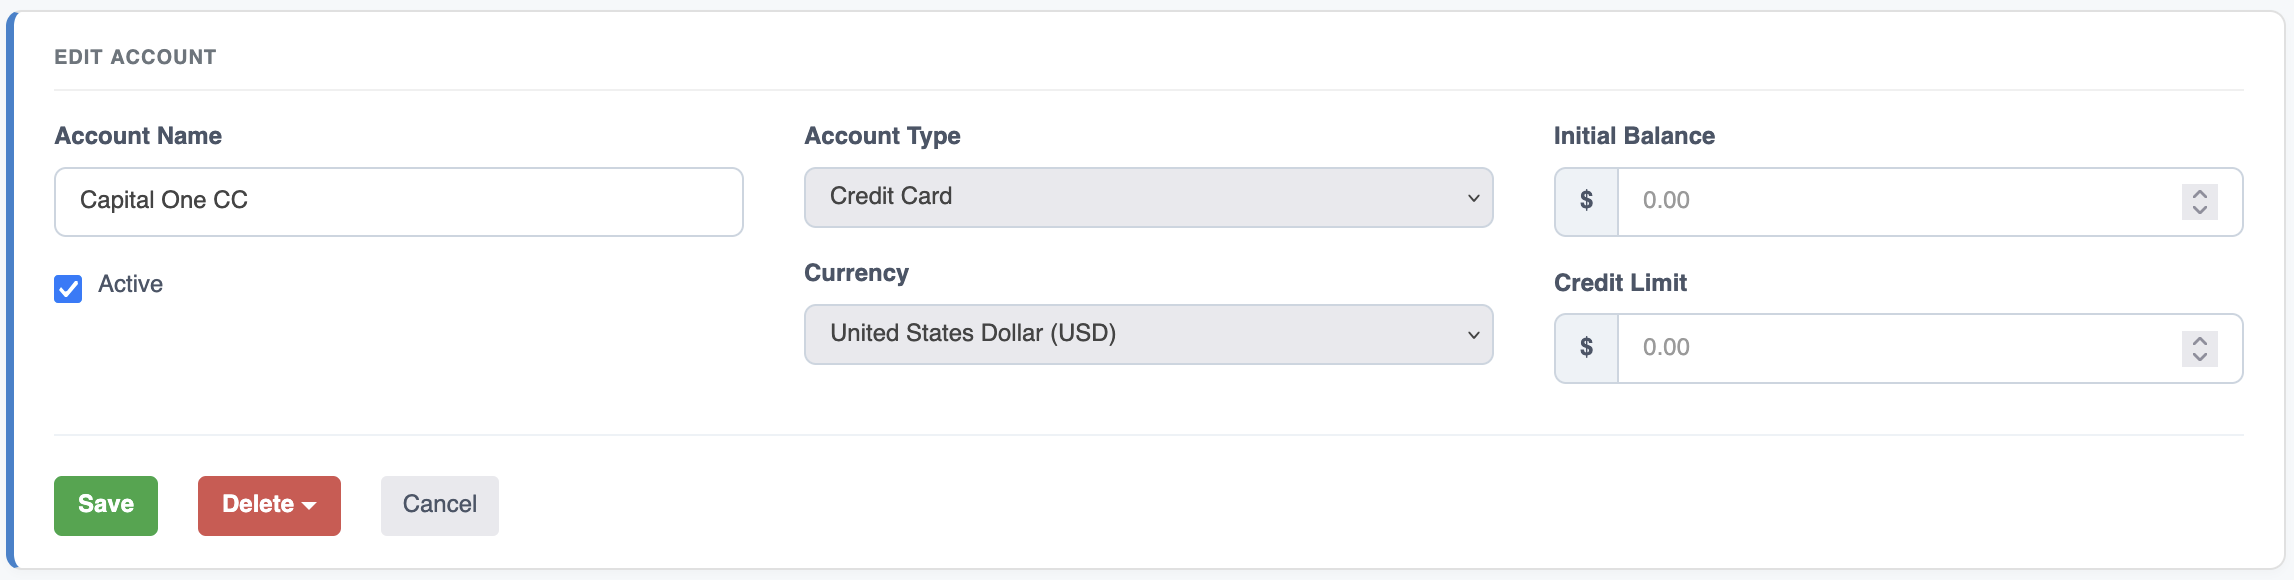
The screenshot below shows how the Create Account form changes slightly when the Credit Card account type is selected
The Create Account form contains the following fields:
| Option | Description |
|---|---|
Account Name |
You can give your account any name you want. |
Type |
You can set what kind of account this is. The options are Credit Card type. This gives you access to tools to help keep track of credit card purchases and payments. All other types are simply for organizational purposes. |
Currency |
This is set to your default currency but you can change it as needed if you have accounts in multiple currencies. |
Initial Balance |
Optional You can set the starting balance of the account here if you don't want to enter all your transaction history for the account. Learn more about Initial Balances |
Group |
Optional If you have set up any account groups and would like to assign this account to a group, you can select that group here. |
Credit Limit |
Optional If you chose the Credit Card type, you can enter a credit limit. The Account Balances list will show how close you are to your limit if you enter a value here. |
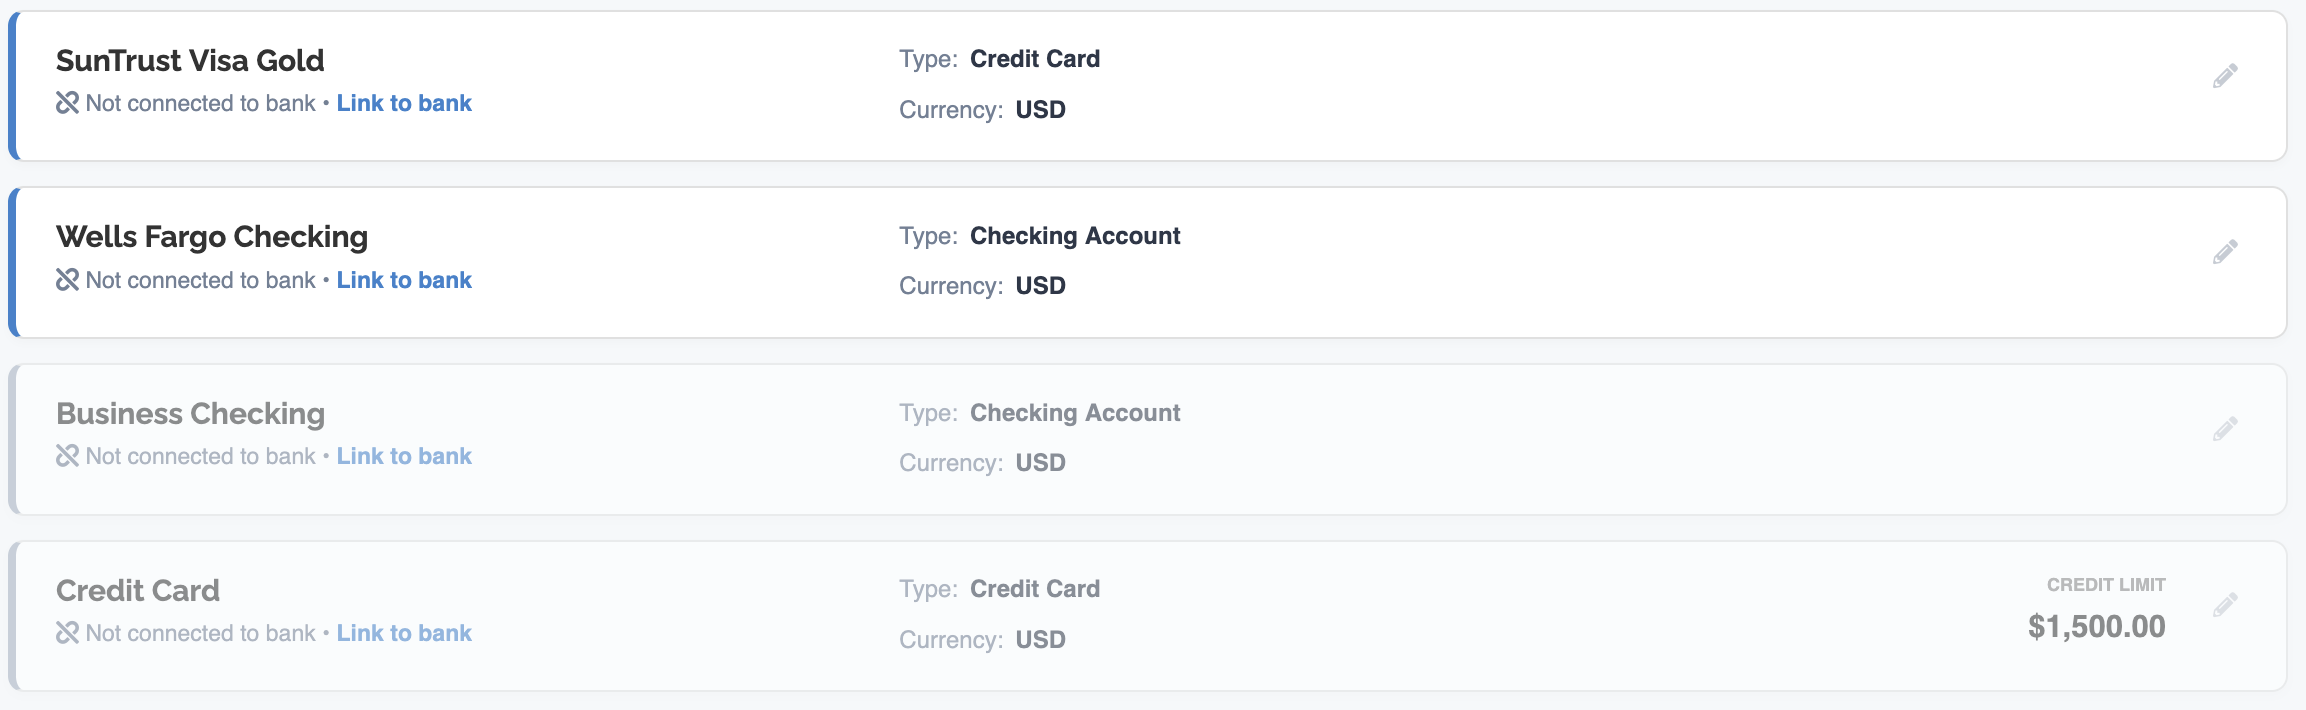
The Accounts List shows all of your accounts and gives you the ability to edit any aspect of that account.
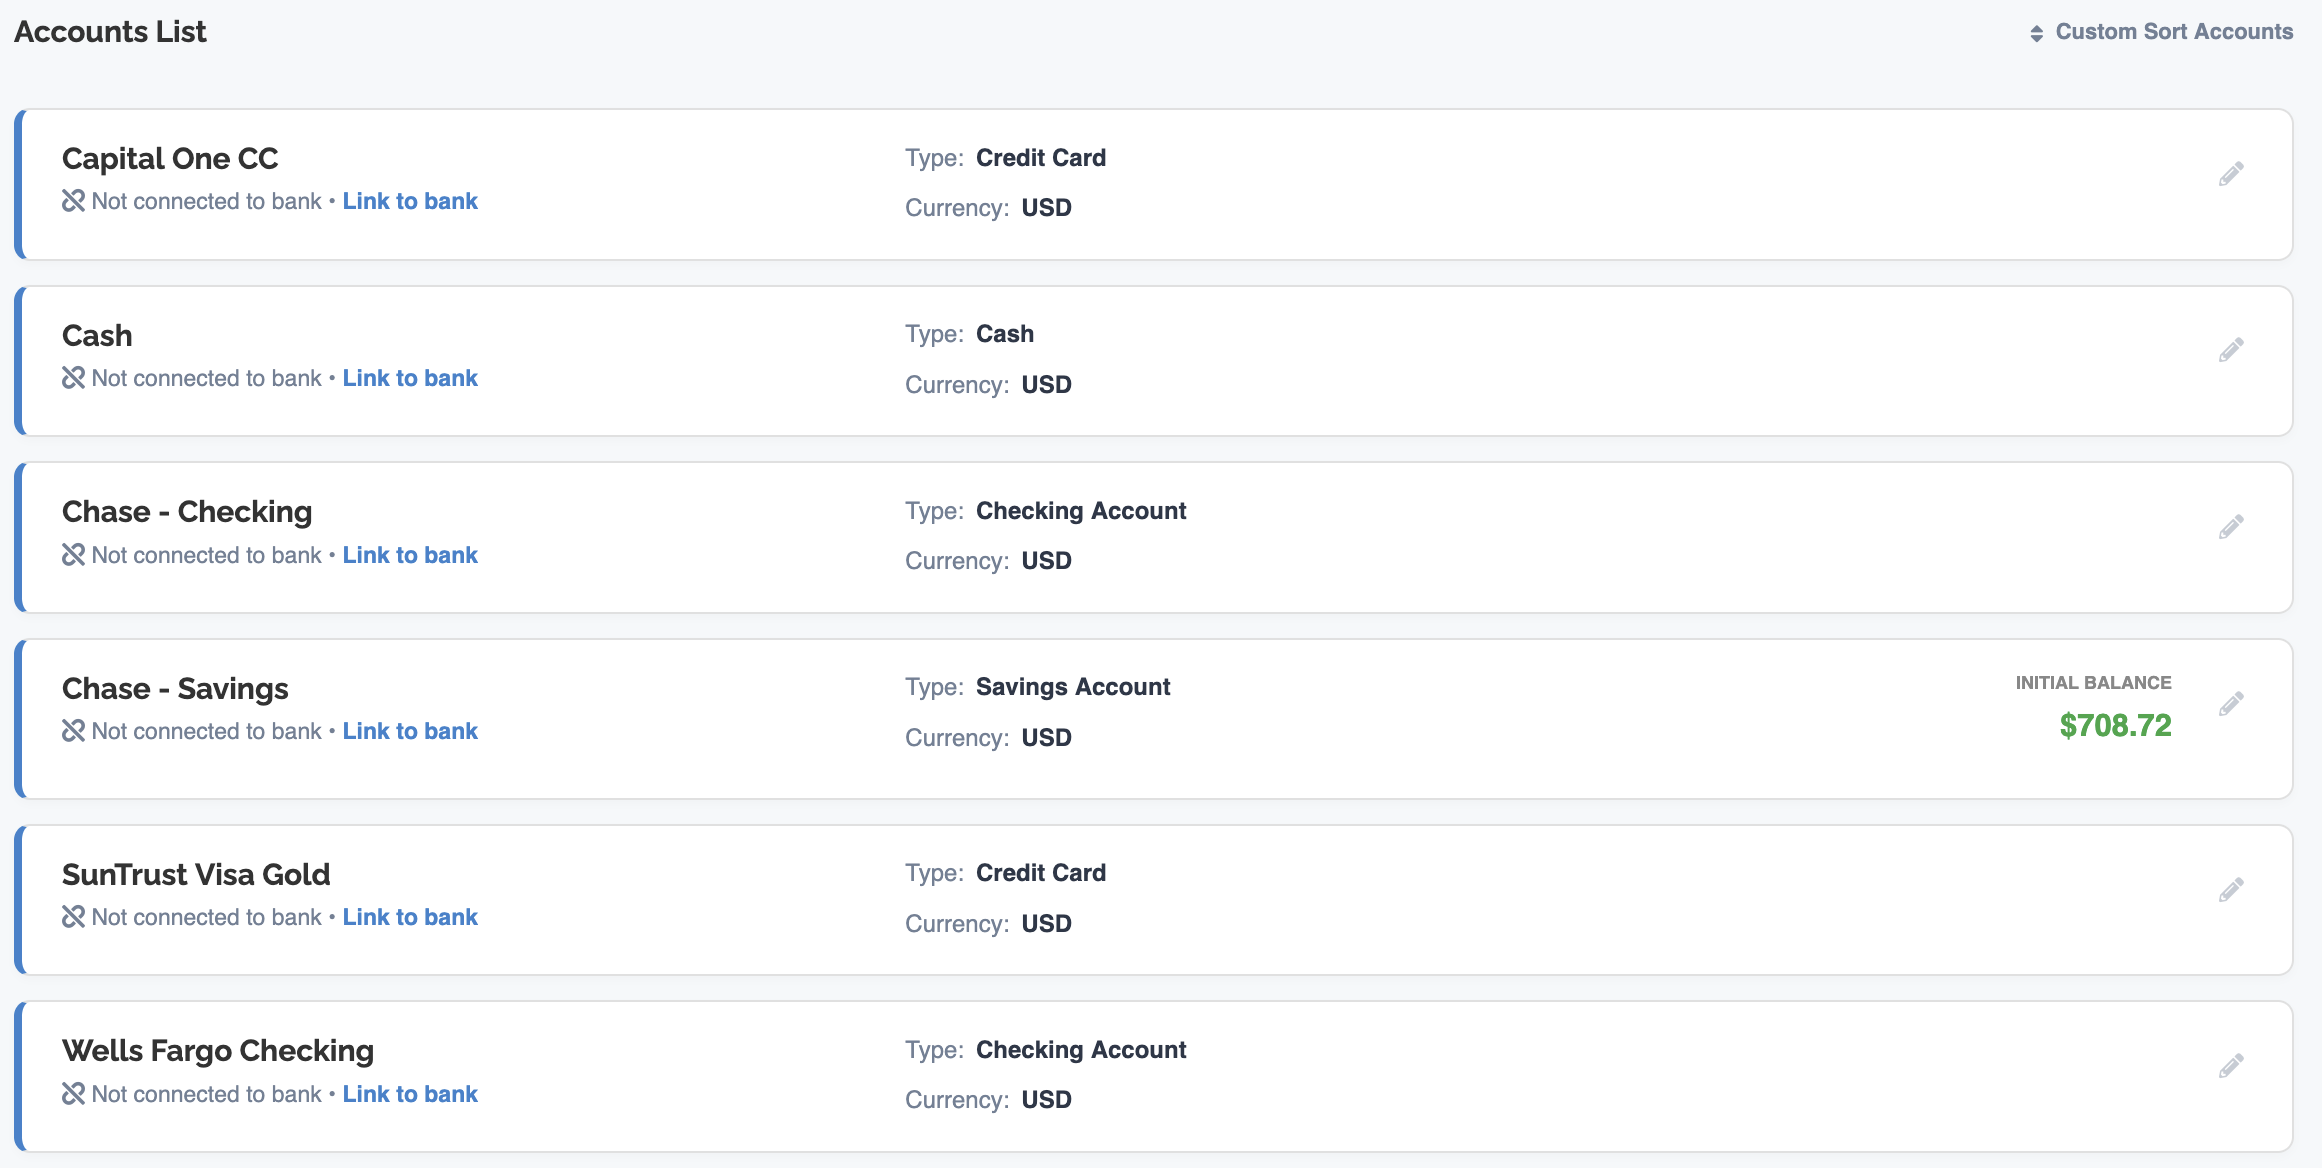
The accounts list shows you everything you need to know about your accounts:
| Item | Description |
|---|---|
Account Name |
The name of your account. |
Connected Status |
This will show you whether the account is connected to a bank and automatically downloading your transactions. |
Type |
What kind of account this is. The options are Cash, Checking Account, Savings Account, Credit Card, Investment, Loan. These are mostly used for identification purposes and don't change the behavior of the account (with the exception of the Credit Card type.) |
Currency |
The currency you have set for this account. |
Initial Balance |
Optional If you set up an initial balance for this account, it is shown here. |
Group |
Optional If you have set up any account groups and added this account to a group, the group name is shown here. |
Credit Limit |
Optional If you chose the Credit Card type and entered a credit limit, it will be shown here. |
Manage |
Click to bring up the Edit Account form. |
If you're a ClearCheckbook Premium member, you have the ability to connect to your bank accounts so your transactions are automatically downloaded to ClearCheckbook.
You can learn more about connecting with your bank in the General Sync with Banks Connect to a Bank Knowledge Base section
You can make changes to an account from the Accounts List by first clicking on the Manage icon at the top right side of the account.

When the Edit form loads, you can make the necessary changes to your account and then click the Save button to save your changes.
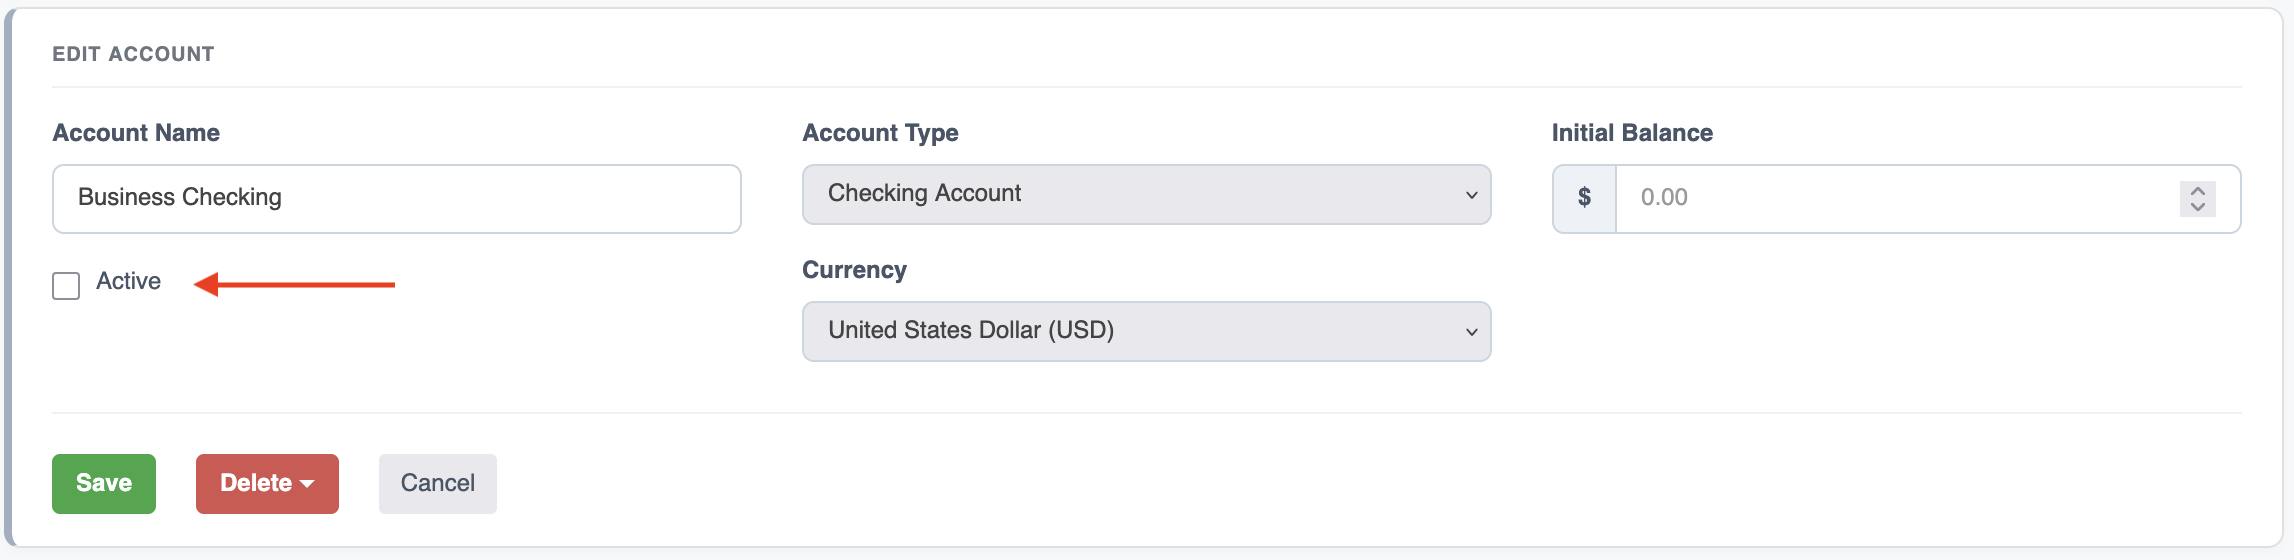
If you mark an account as inactive, it will not appear in any of the drop down lists or selection boxes throughout ClearCheckbook. The account will also appear at the bottom of your Accounts List and it will be slightly grayed out.
In the screenshot below, the account named Business Checking has been marked as inactive.
You can mark an account as inactive by editing the account and unchecking the Active checkbox.
You can delete an account from the Accounts List by clicking the Manage link on the right side of the account you want to remove (see the Edit an Account section for more information).

Next, click the red Delete button. When you do this, you will be presented with two different options: Delete Account & Transactions and Delete Account Only.
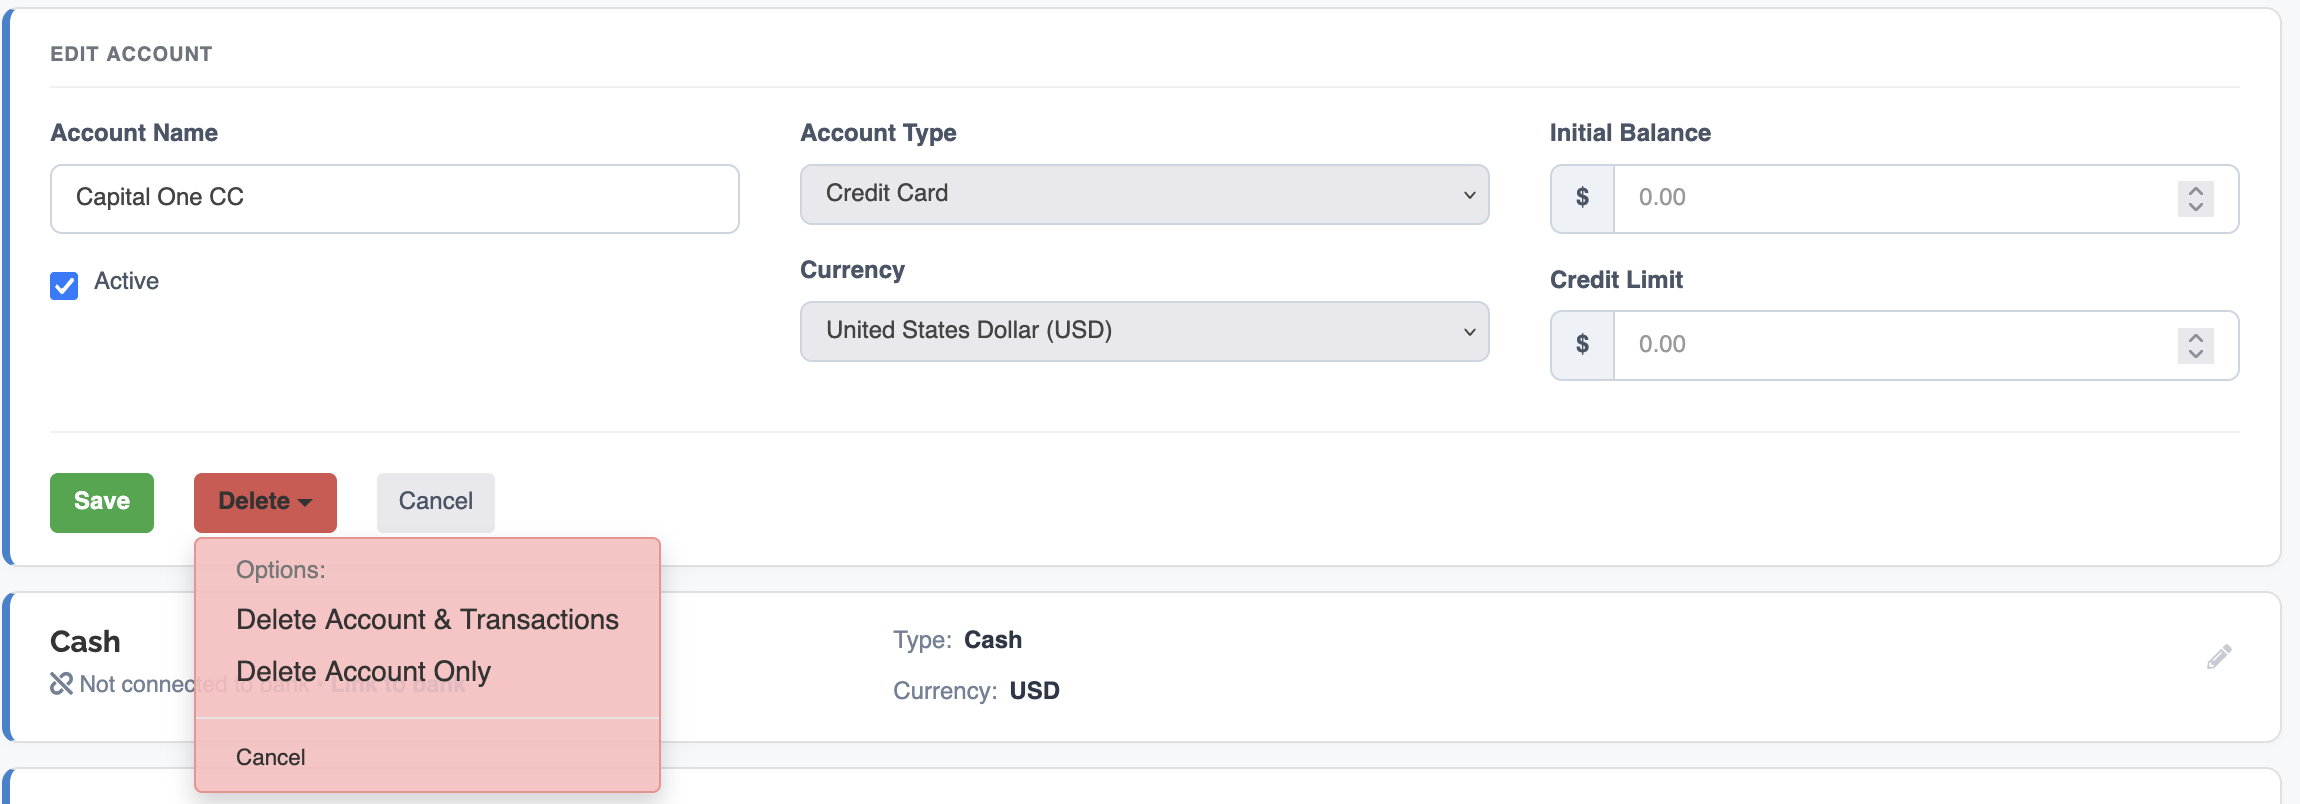
If you select Delete Account & Transactions, the account and all transactions currently assigned to that account will be deleted.
Delete Account Only, the account will be removed and all transactions currently assigned to that account will now be labeled as No Account since they do not have an account associated with them. By default, account names are sorted alphabetically. ClearCheckbook Premium customers have the ability to customize how their accounts are sorted by dragging and dropping them into the positions they want.
To customize your account sorting, click on the Custom Sort Accounts link on the top right side of your account list.

The account sorting page will show all of your accounts listed in their own boxes. You can move these boxes up and down in the list to set how you want the accounts to appear everywhere throughout the site. Your sorting preferences are automatically saved after you move an account in the list.
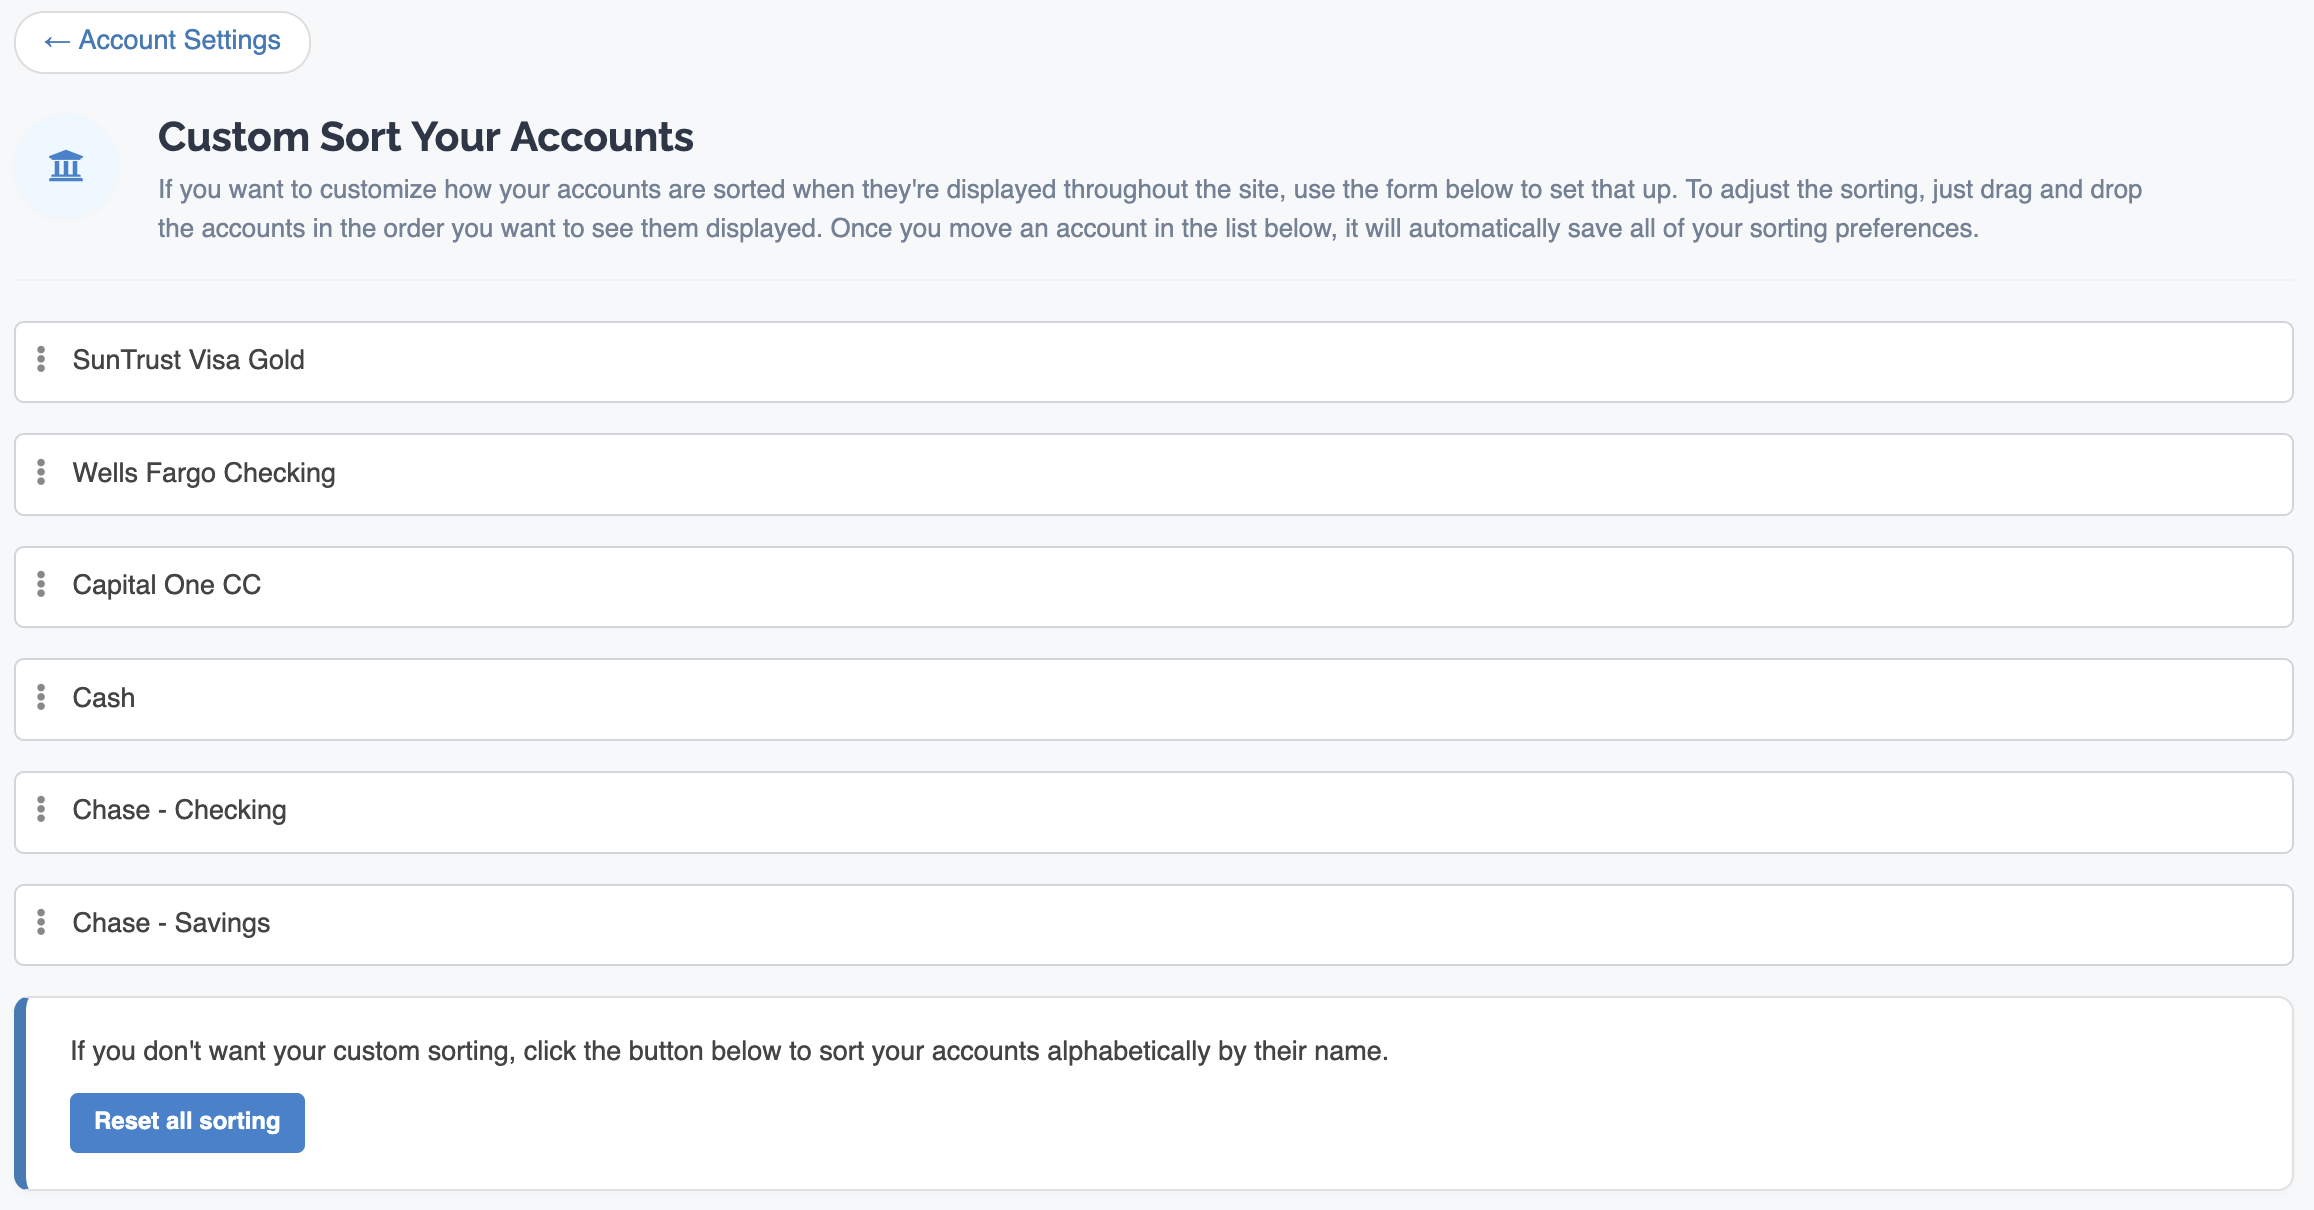
If you want to remove all custom sorting for your accounts and restore them to their alphabetical defaults, click the red Reset all sorting button below the sortable account list.
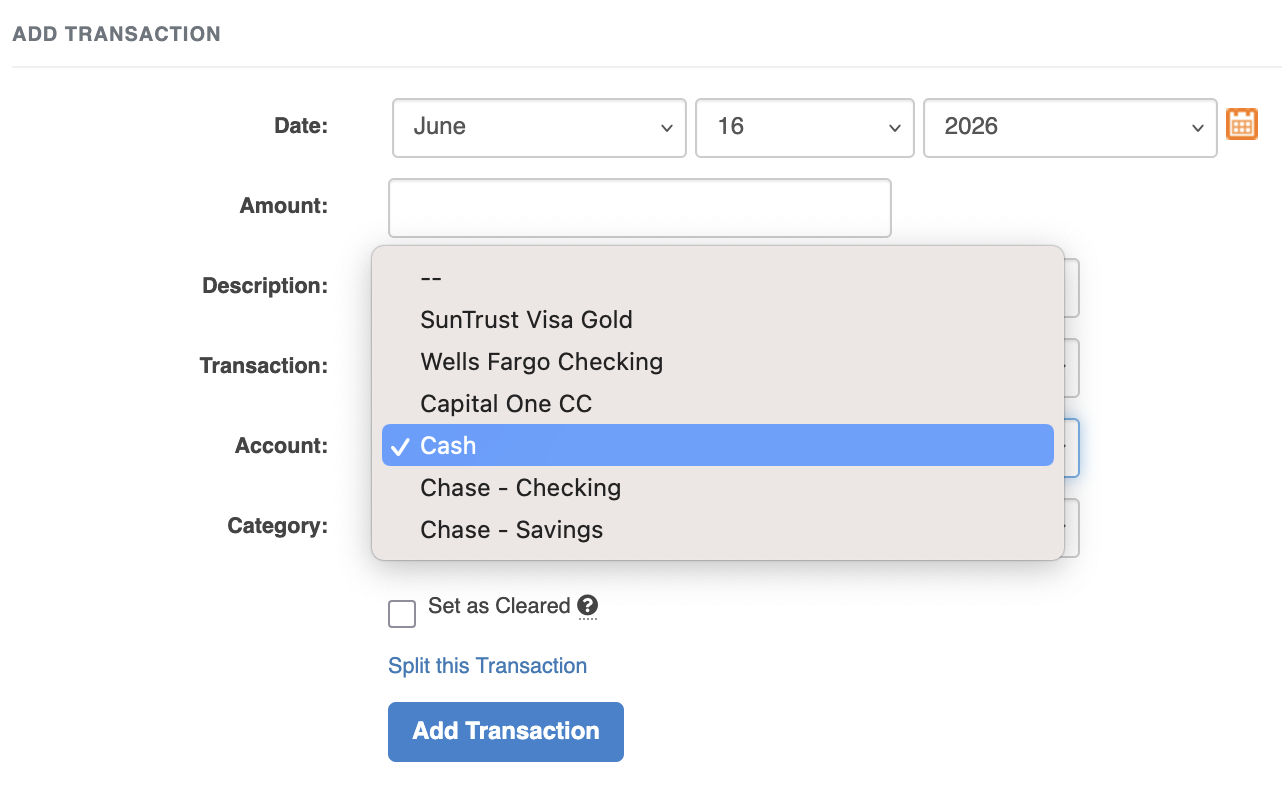
Below is an example of showing how custom sorted accounts will appear in your Add Transaction account list.
If you've connected ClearCheckbook to one or more of your bank accounts, these connections will appear in the Bank Connections section. This is also where you can authorize new bank connections and update which accounts are authorized for each bank.
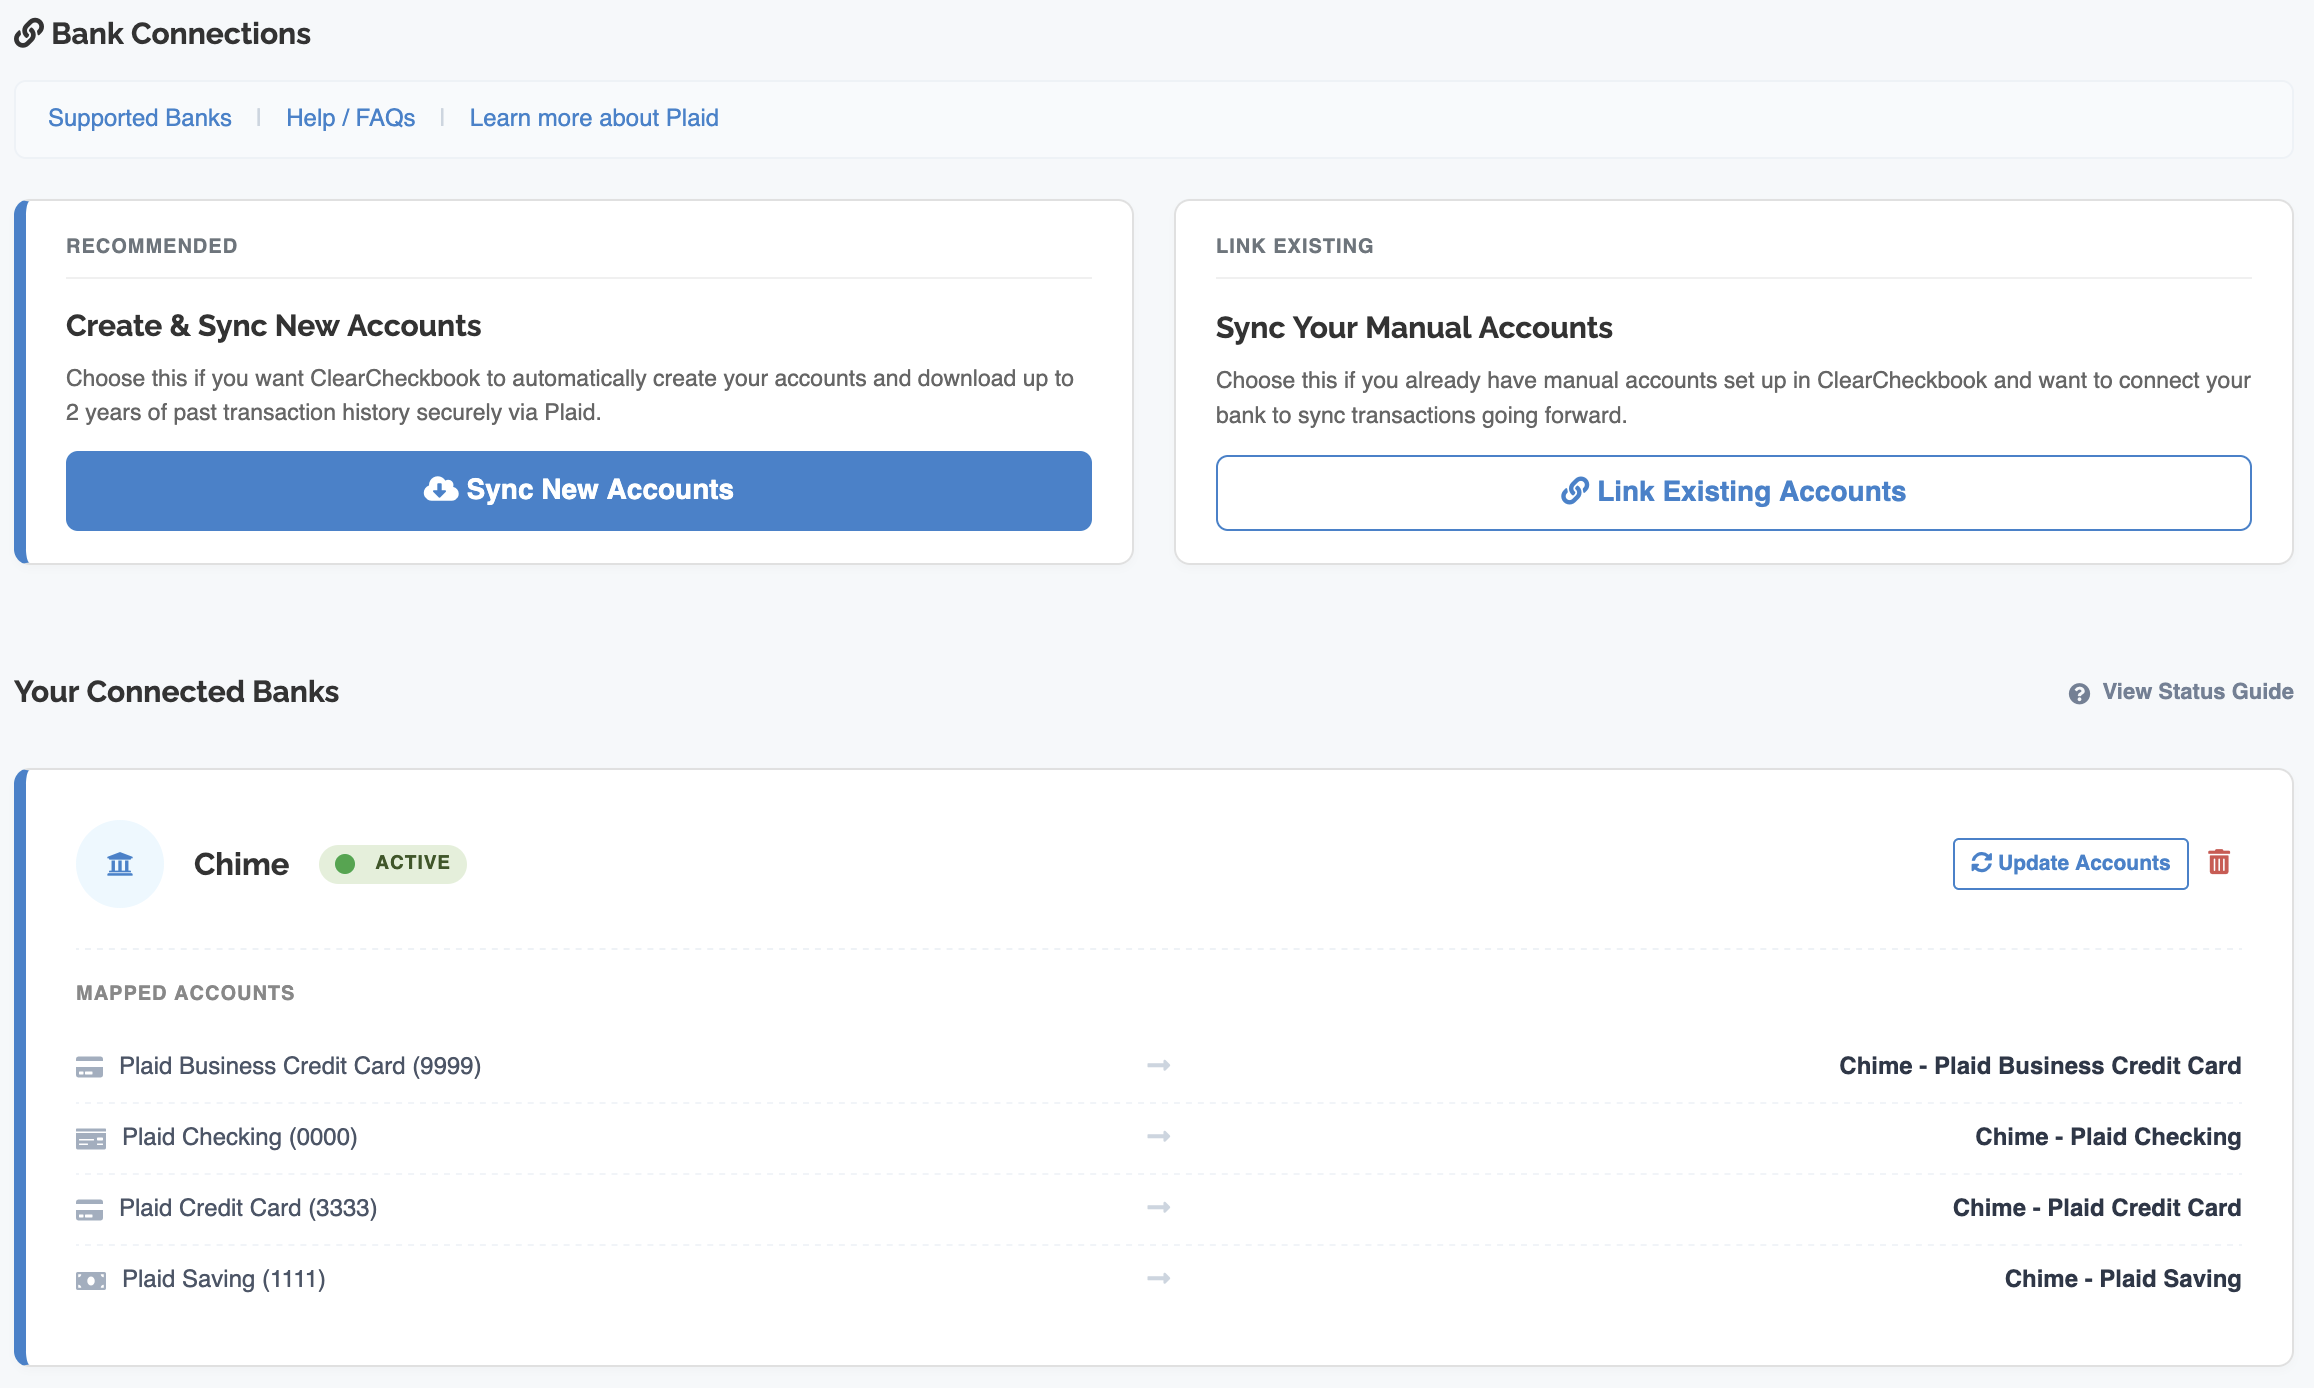
The Bank Connections section gives you three ways to create bank connections and authorize your accounts:
Option 1: Choosing this method will create accounts in ClearCheckbook for all of the accounts you authorize with this connection. Choose this option if you haven't created the accounts in ClearCheckbook yet and would like transaction history to download after making the connection.
Option 2: The second option is to create a new bank connection without creating the accounts. You'll want to use this option if you have a new bank that isn't already connected to ClearCheckbook. When you click the Link Existing Accounts button, you'll select the bank, enter your credentials and then select which accounts you want ClearCheckbook to have access to.
Option 3: If you already have a connection to a bank but want to change which accounts ClearCheckbook has access to, you can use this section. To add a new account to an existing connection, click the Update Accounts link next to the bank connection name. After entering your bank credentials, you'll select which accounts ClearCheckbook can access.
After you've connected a bank and have authorized accounts, you'll see a list of the authorized accounts for each bank along with the ClearCheckbook account they're paired with. If the authorized account hasn't been paired yet, you can pair it to a ClearCheckbook account by clicking the Link to Bank link under the account in the Accounts List. Unpaired accounts will show up in the Currently Authorized Accounts list with grey, italicized, text
If you want to remove a connection to a bank, click on the red trash can icon on the right side of the connection card. This will remove the connection and any authorized accounts will stop syncing with ClearCheckbook.
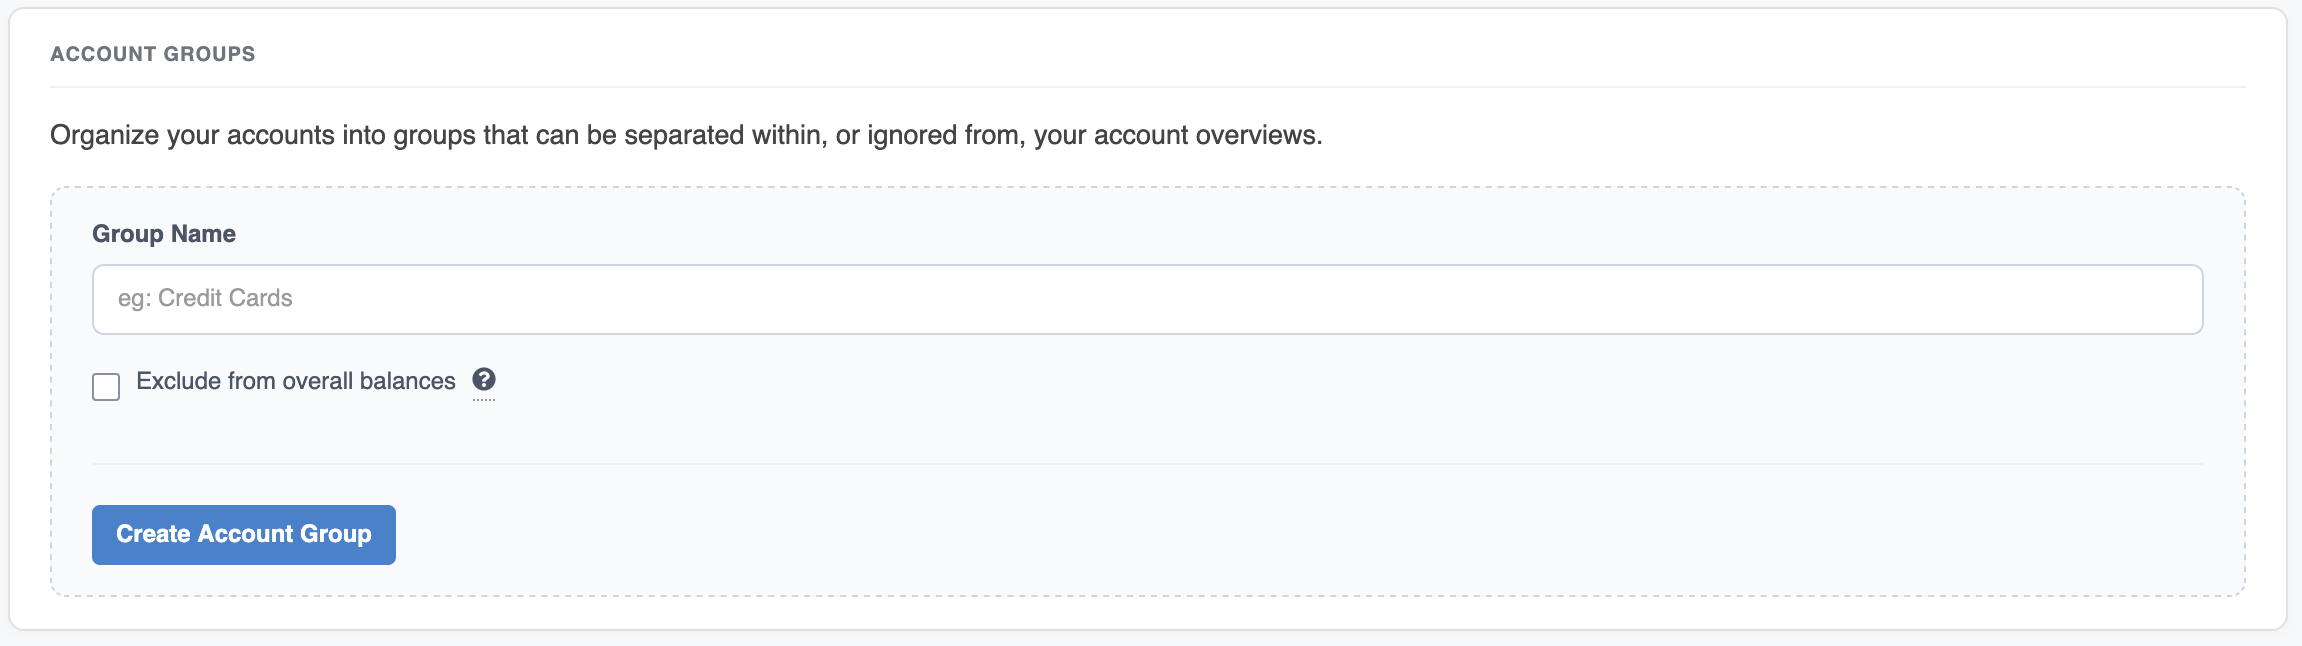
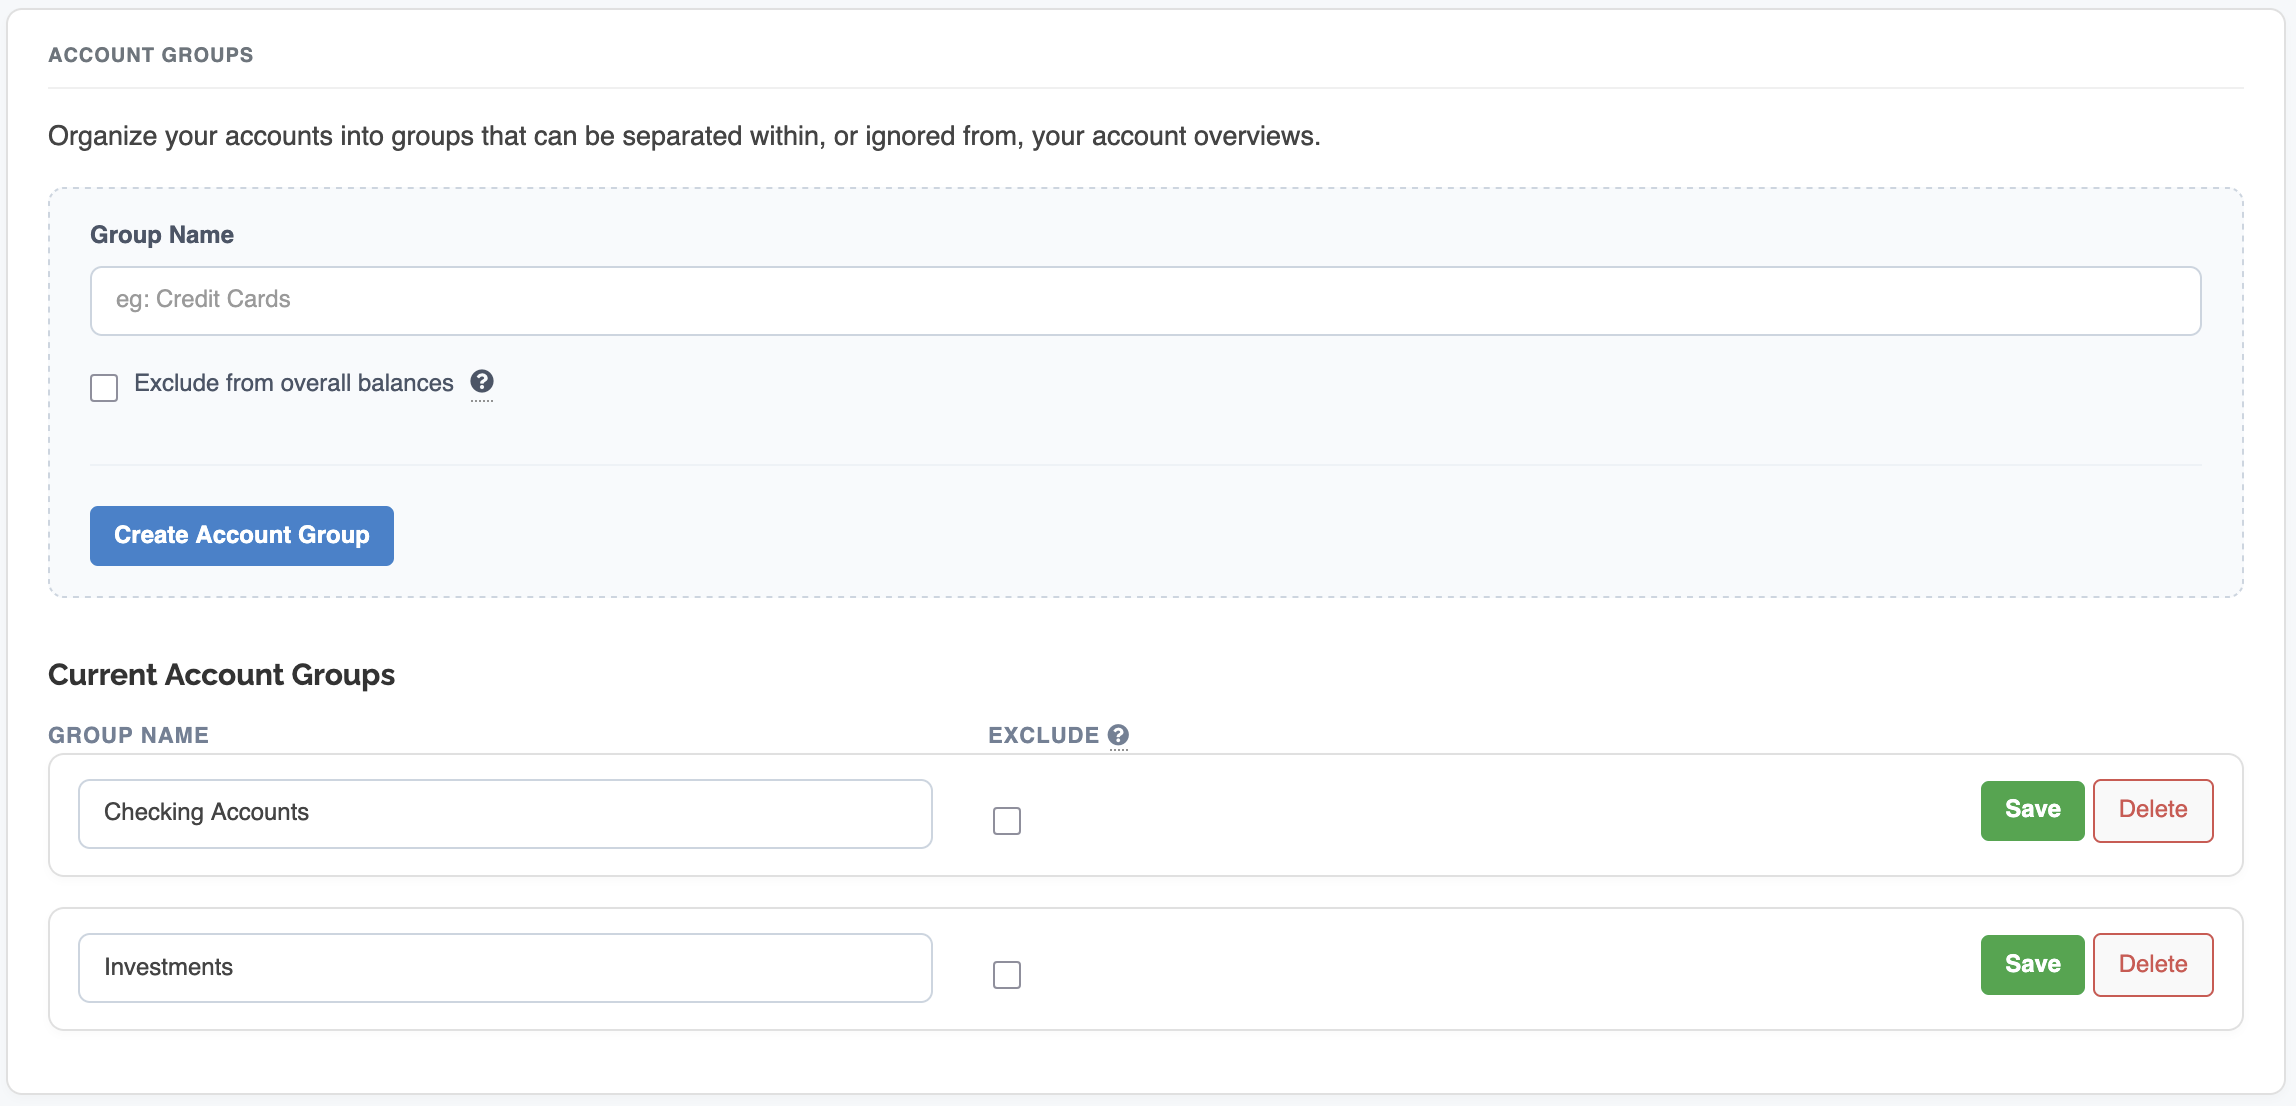
Account Groups let you organize your accounts into groups of your choosing. Any accounts added to a group will contribute to that group's balance in the Account Balances lists. You can also search via groups and run certain reports on account groups.
The Account Groups form only has two fields: Group Name - the name of the group. Exclude from overall balances - when checked, this option will exclude any accounts from this group from your overall balances.
Once you add a group, a list will appear below the Account Groups form that lists each group. You can edit or delete the groups as needed from here. If you delete a group, any accounts associated with that group will not be deleted.
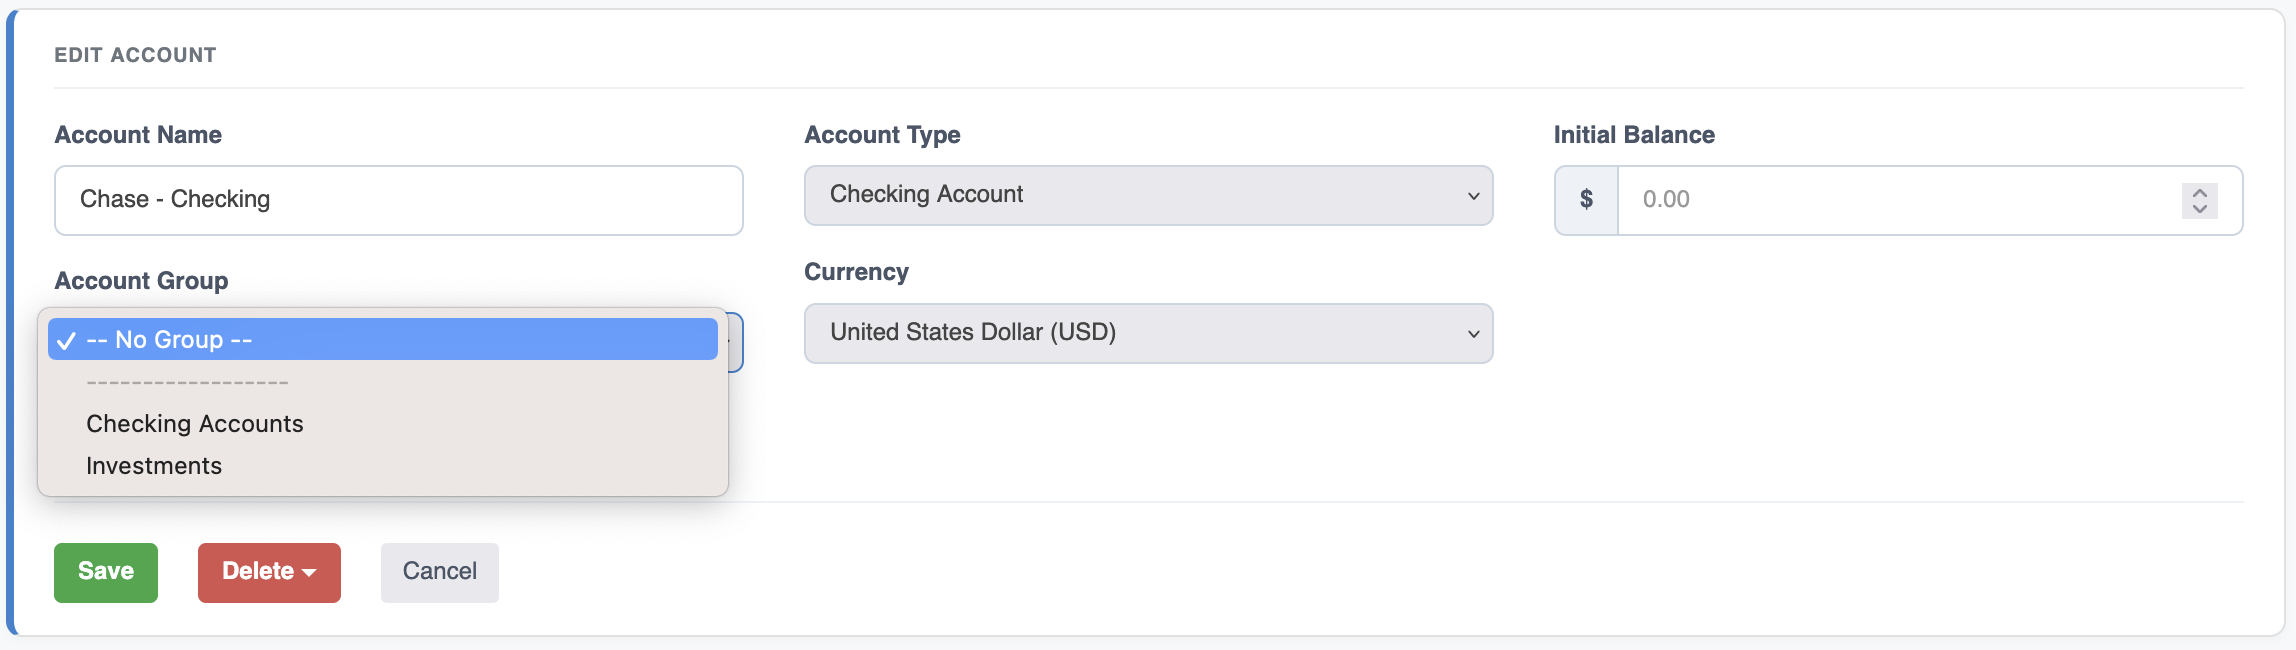
After a group has been added, you can now add accounts to the group through the Accounts List or when you add a new account.
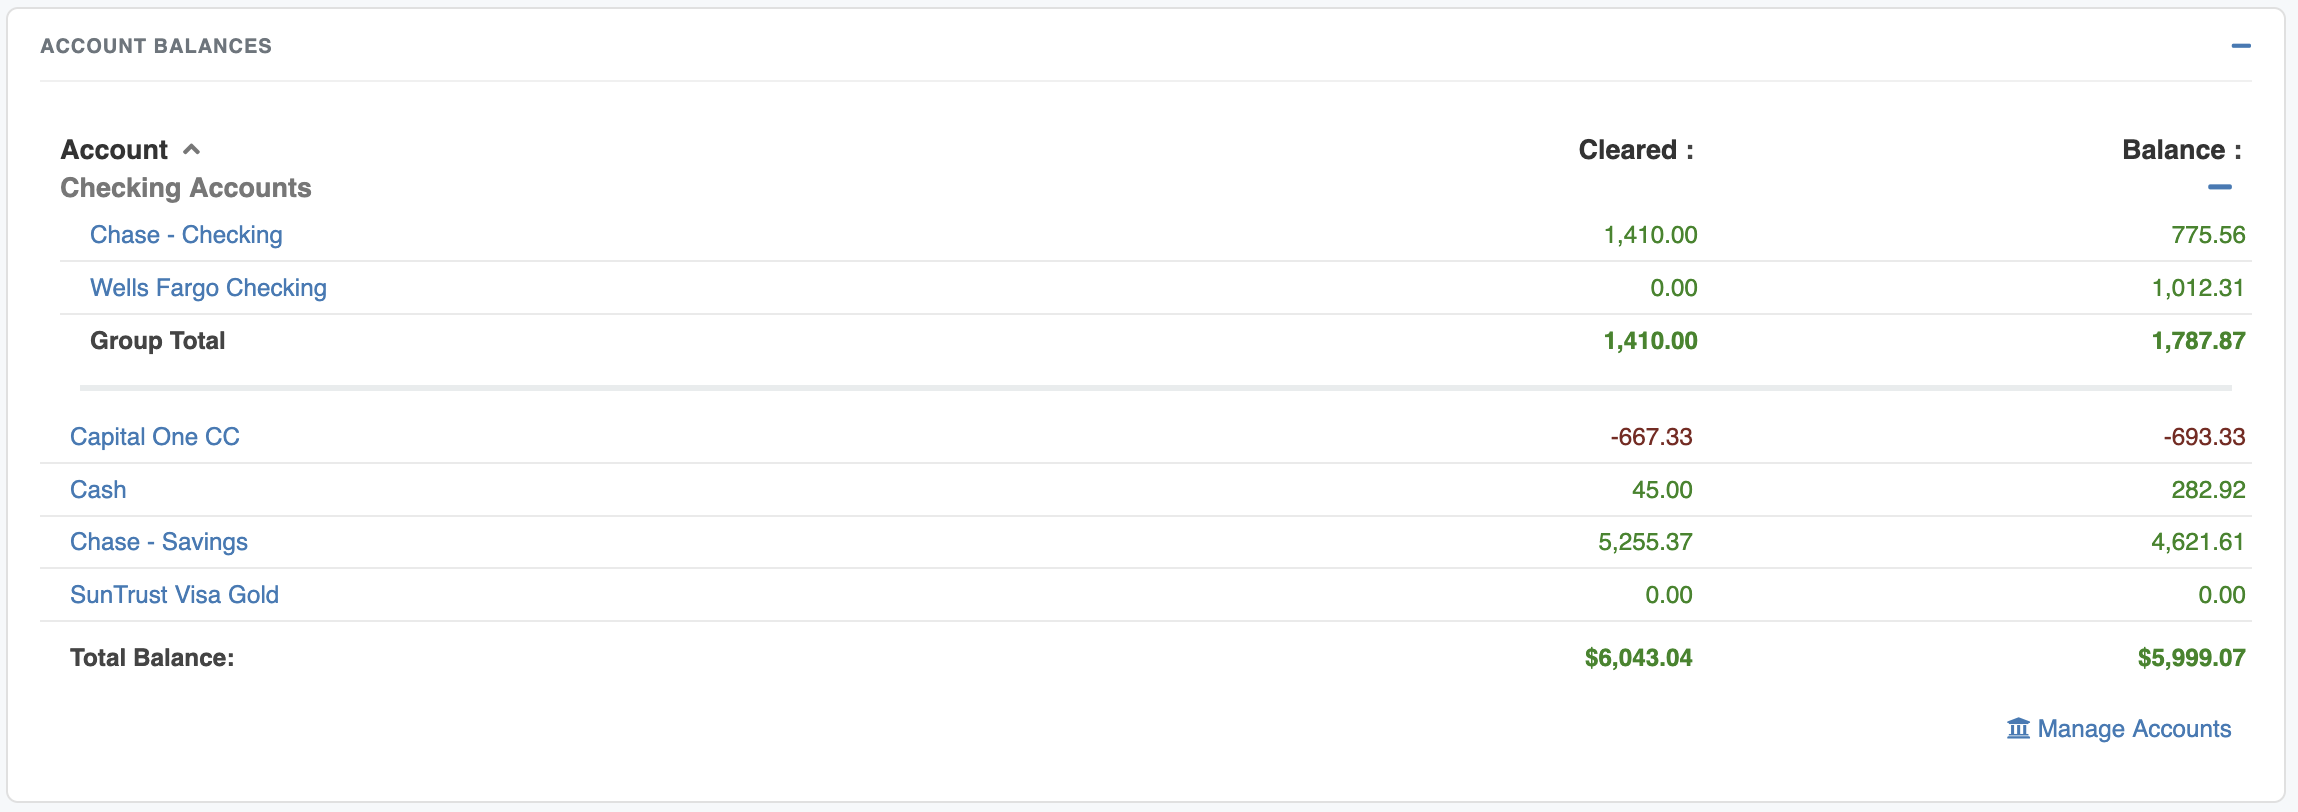
The groups and associated accounts appear separately in the Account Balances list as shown below.
The Global Default Currency affects how your amounts will be formatted. This is also the currency that all others will be converted to if you have accounts with multiple currencies.

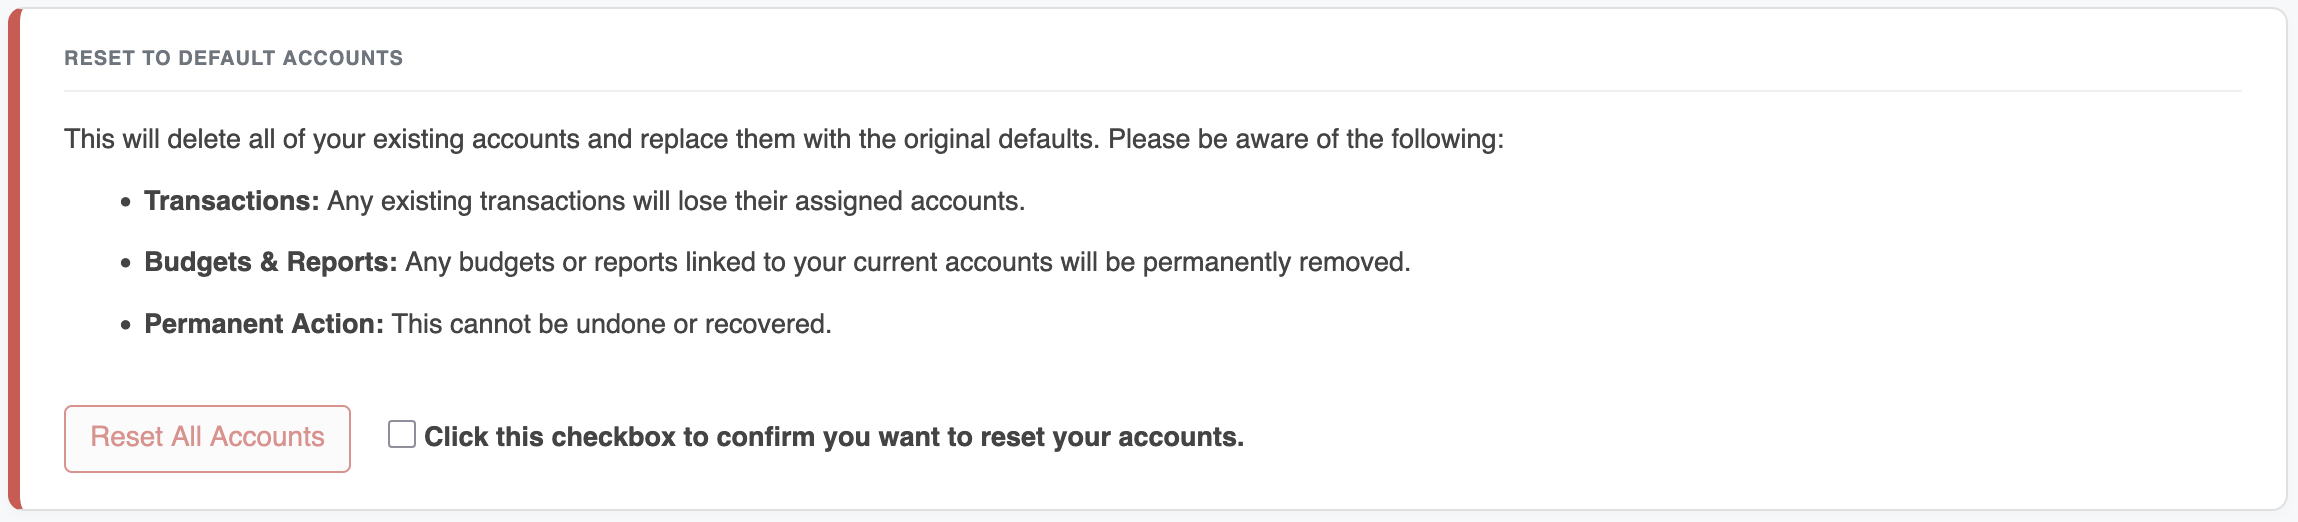
The Reset Accounts form will delete all of your existing accounts and restore them to the four default accounts that were created when you signed up for ClearCheckbook. Any transactions that are currently assigned to accounts will no longer have an account associated with them and will appear under the label No Account in your account balances list.
The initial balance for an account is necessary for ClearCheckbook to show the correct balance in your Account Overviews and Account Balances. If you don't enter your entire transaction history, the initial balance will be needed. You can enter and adjust the initial balance for your account(s) when you Add an Account or when you Edit an Account.
Your account balances are simply calculated by summing all of the transactions you've added to ClearCheckbook for your various accounts. As stated above, without all your transaction history, ClearCheckbook can't properly show your actual balance since there are transactions we don't know about. By adding an initial balance, you're essentially adding what the balance of the account was prior to starting to add transactions to ClearCheckbook.
We'll go through an example that shows you how to determine what your initial balance should be. This assumes you don't want to enter every transaction dating back to when you originally opened the account. If you do enter every transaction, you won't need to worry about an initial balance. While these numbers are made up, the process will be the same you'll use to figure out your initial balance.
| Sample account information: | |
|---|---|
| Date account physically opened | March 15, 2024 |
| Current account balance | $2,843.44 |
| Date you start adding transactions to ClearCheckbook | May 25, 2026 |
| Sum of transactions added to ClearCheckbook 1 (aka: ClearCheckbook account balance) |
$428.61 |
| Difference between current account balance and ClearCheckbook account balance | $2,843.44 - 428.61 = $2,414.83 |
| 1 This assumes you've entered all transactions from May 25, 2026 through today. | |
In the example above, there's a difference of $2,414.83 which is the sum of transactions between when you physically opened your account and when you started adding transactions into your ClearCheckbook account. Since ClearCheckbook doesn't know about those transactions, we can't show you the correct balance. To make your ClearCheckbook balance match your current bank balance, you need to enter the $2,414.83 value as your initial balance.
When you create an initial balance, it will add a new transaction to your register for that account aptly called "Initial Balance". You can also edit the initial balance transaction directly from the transaction register if you need to change the amount.
To edit an initial balance for an existing account, go to the Settings -> Manage Accounts page and find the necessary account in the Accounts List. Next, click the Manage link to the right side of the account. This will bring up the Edit Account form where you can update your Initial Balance.
We built a helpful Initial Balance Calculator so you can figure out what your initial balance should be so the ClearCheckbook account balance matches your bank. This calculator takes three inputs (current ClearCheckbook balance, your current bank balance, and what your current Initial Balance for the account is (if you have one set up). This will generate a new number to add as your Initial Balance. You can find the calculator in the section below.
The initial balance is used to set the starting balance for your account, prior to the transactions you added to ClearCheckbook. If you've added your entire transaction history for the account to ClearCheckbook, then you won't need to add an initial balance.
You can calculate your initial balance by taking the current balance on your bank statement and subtracting the sum of the transactions you have entered into ClearCheckbook that also appear on your bank statement.
Here is an example of how to calculate your balance:
In the example above, 750 is what you enter into the Initial Balance field.
To update the initial balance, follow the instructions for editing an account. The Edit Account form has a field for entering the initial balance.
No Account? In order to show a true representation of your balances in the Account Balances list and Overall Balance, we still need to include transactions even if they aren't associated with an account. To do this, we assign those transactions to a label called No Account which will appear in your Account Balances list.
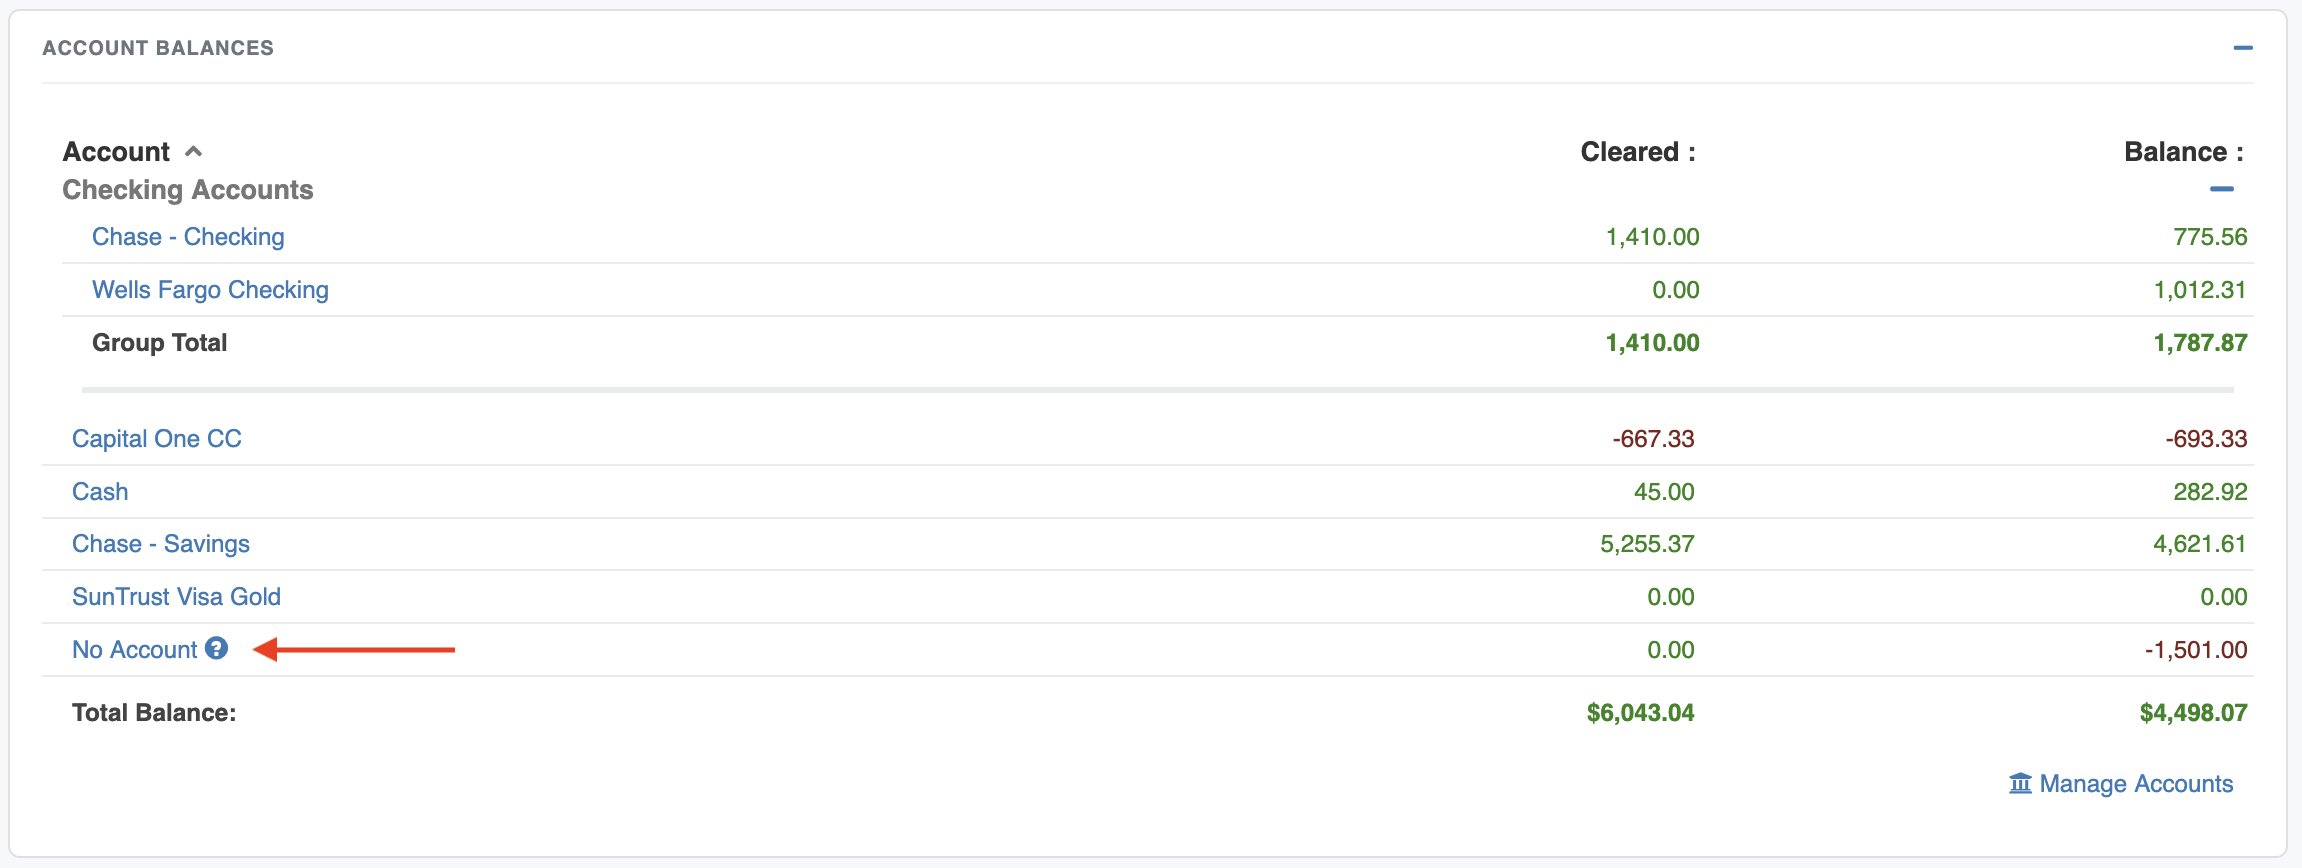
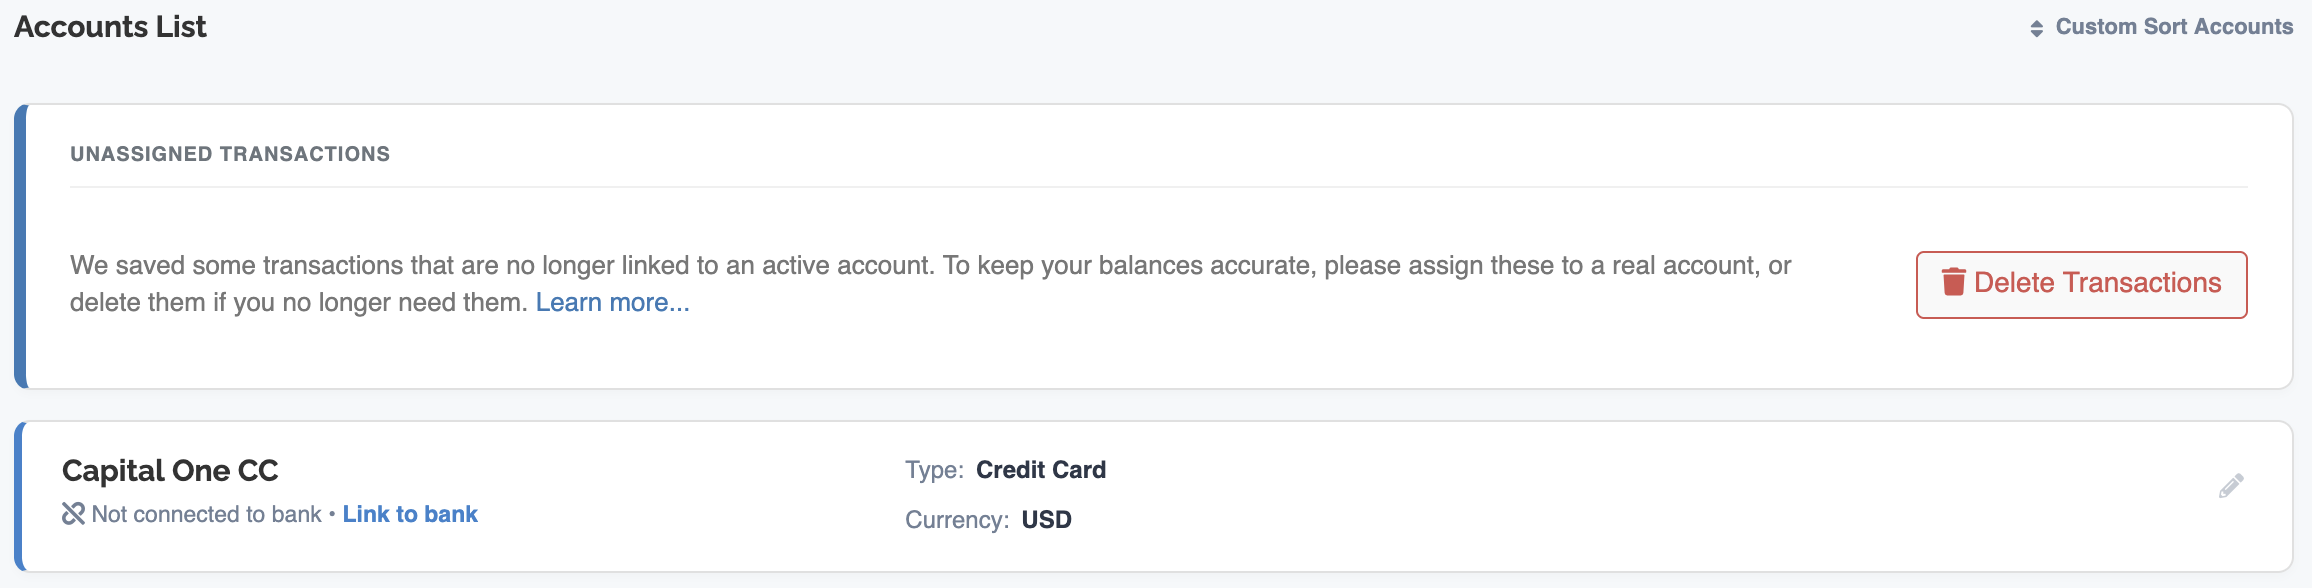
The No Account label will appear anytime you have a transaction or transactions that aren't assigned to an account. This can happen if you delete an account but opt to keep the transactions or if you mistakenly add a transaction but forget to assign it to an account.
To remove the No Account label you must either edit all the transactions that appear when you click on the No Account link and assign them to an account or delete the transactions. If you have any No Account transactions, a box will appear at the top of your Accounts List that lets you permanently delete all of them.