There are a few different ways to add transactions to ClearCheckbook:
There is no right or wrong way to add transactions and which method (or combination of methods) you use is entirely up to you. Some customers prefer to manually enter all of their transactions while others have all of their accounts connected for automatic syncing. A large percentage will manually enter many of their transactions while still syncing or importing as well.
Manually adding transactions:
The Add Transaction gadget is one of the default gadgets that appears on your Dashboard. If you add transactions from this gadget it will update any other gadgets that rely on transactions as well.

You can access the global Add Transaction form from any page by clicking the + sign at the top of the page, to the right of Tools.

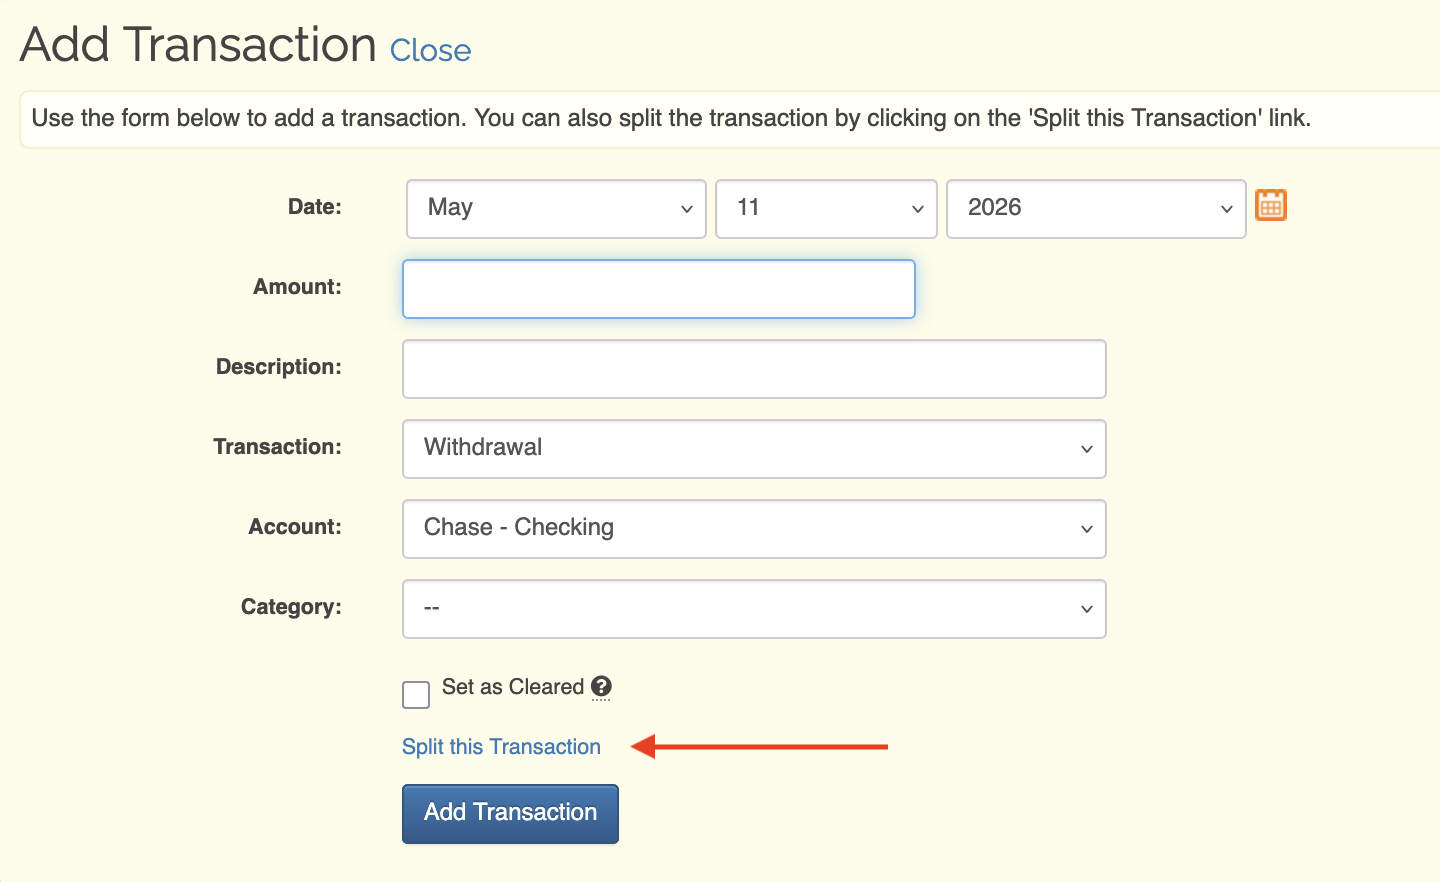
When you click the + sign, an Add Transaction form will appear. The current date will be populated by default. If you're viewing a specific account in the Transaction Register, that account will be set as the default in the Account drop down list.
The minimum information you must enter when adding a transaction are the date, amount and transaction type. All other fields are optional. When you're ready to add your transaction, click the blue Add Transaction button at the bottom of the form.
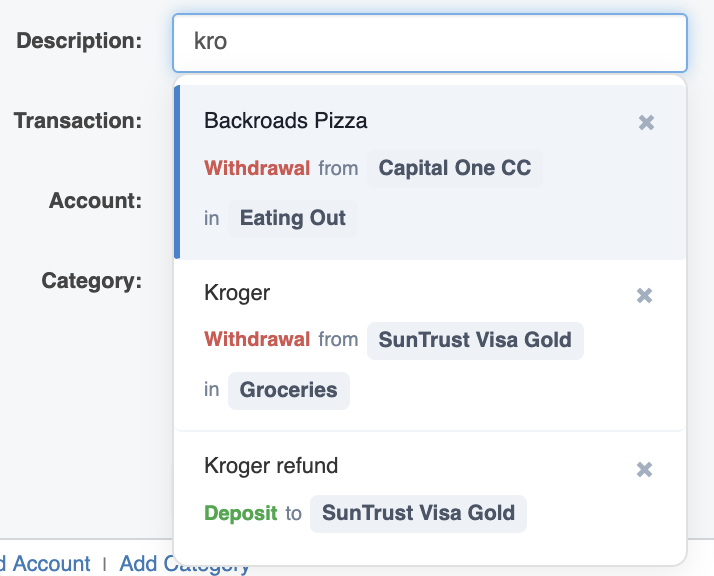
Auto-complete is a list of suggestions that appear when you are typing in the Description, Memo or Payee fields. A maximum of ten suggestions appear at a time with the most recently used details showing up first. The suggestions are based on what you're currently typing and will show what information will be auto-filled if you select that suggestion.
You can adjust what information auto-complete replaces or enable / disable auto-complete entirely via the General Settings page. To learn more about this, visit the Settings Manage Your... General Settings Knowledge Base section.
Splitting a transaction is an easy way to categorize a single transaction multiple different ways. The easiest scenario for splitting a transaction would be if you shopped at a big retailer that has both a grocery and clothing section. You can split the transaction to categorize each part separately so your reports and budgets properly reflect the amount spent.
To split a transaction, click the Split This Transaction link that appears above the Add Transaction button.
The split form loads two split children by default but you're not limited to the number of split children a transaction can have. To add a new split child, click the + Add Another Split link. You can also change the transaction type between a withdrawal and deposit by changing the drop down option to the left of the amount field.

When adding the split children details, make sure to enter the amount, description and select a category. If the split children amounts don't add up to the parent amount, you'll receive a warning message.

Once you add the transaction it will appear in your Transaction Register as normal but will have a «Split» identifier to let you know the transaction has split children.
If you click on the «Split» link a box will appear showing the details of the split children.

Note: When splitting a transaction, you should leave the Category of the parent transaction blank or else you risk experiencing double reporting in the reports and budgeting tools.
Watch this tutorial for more information splitting transactions in ClearCheckbook.
For more in-depth explanations of the clearing and reconciliation processes, visit the General Reconciliation Methods Knowledge Base section.
The simplest way to clear a transaction is to click the Cleared checkmark that appears with the transaction in the Transaction Register. When clicked, the transaction background will change color to dark green. To un-clear a transaction, simply click the cleared check mark again.


You can also select multiple transactions in the Transaction Register and then click the blue Clear or Un-Clear button at the top or bottom of the transaction list to update them all at once.

We suggest enabling Cleared Lock on your transactions. This setting, when enabled, prevents cleared transactions from being modified after a certain time period. This is helpful to prevent accidentally deleting, editing or un-clearing a transaction which might cause balancing issues. To learn more about this, visit the Settings Manage Your... General Settings Knowledge Base section.
You can edit transactions from the Transaction Register, Search results and, as a ClearCheckbook Premium member, the Latest Transactions gadget. From the Transaction Register and Search results you can either click on the transaction which will bring up an edit form or you can select the checkbox to the left side of the transaction and then click the blue Edit button at the top or bottom of the transaction list.
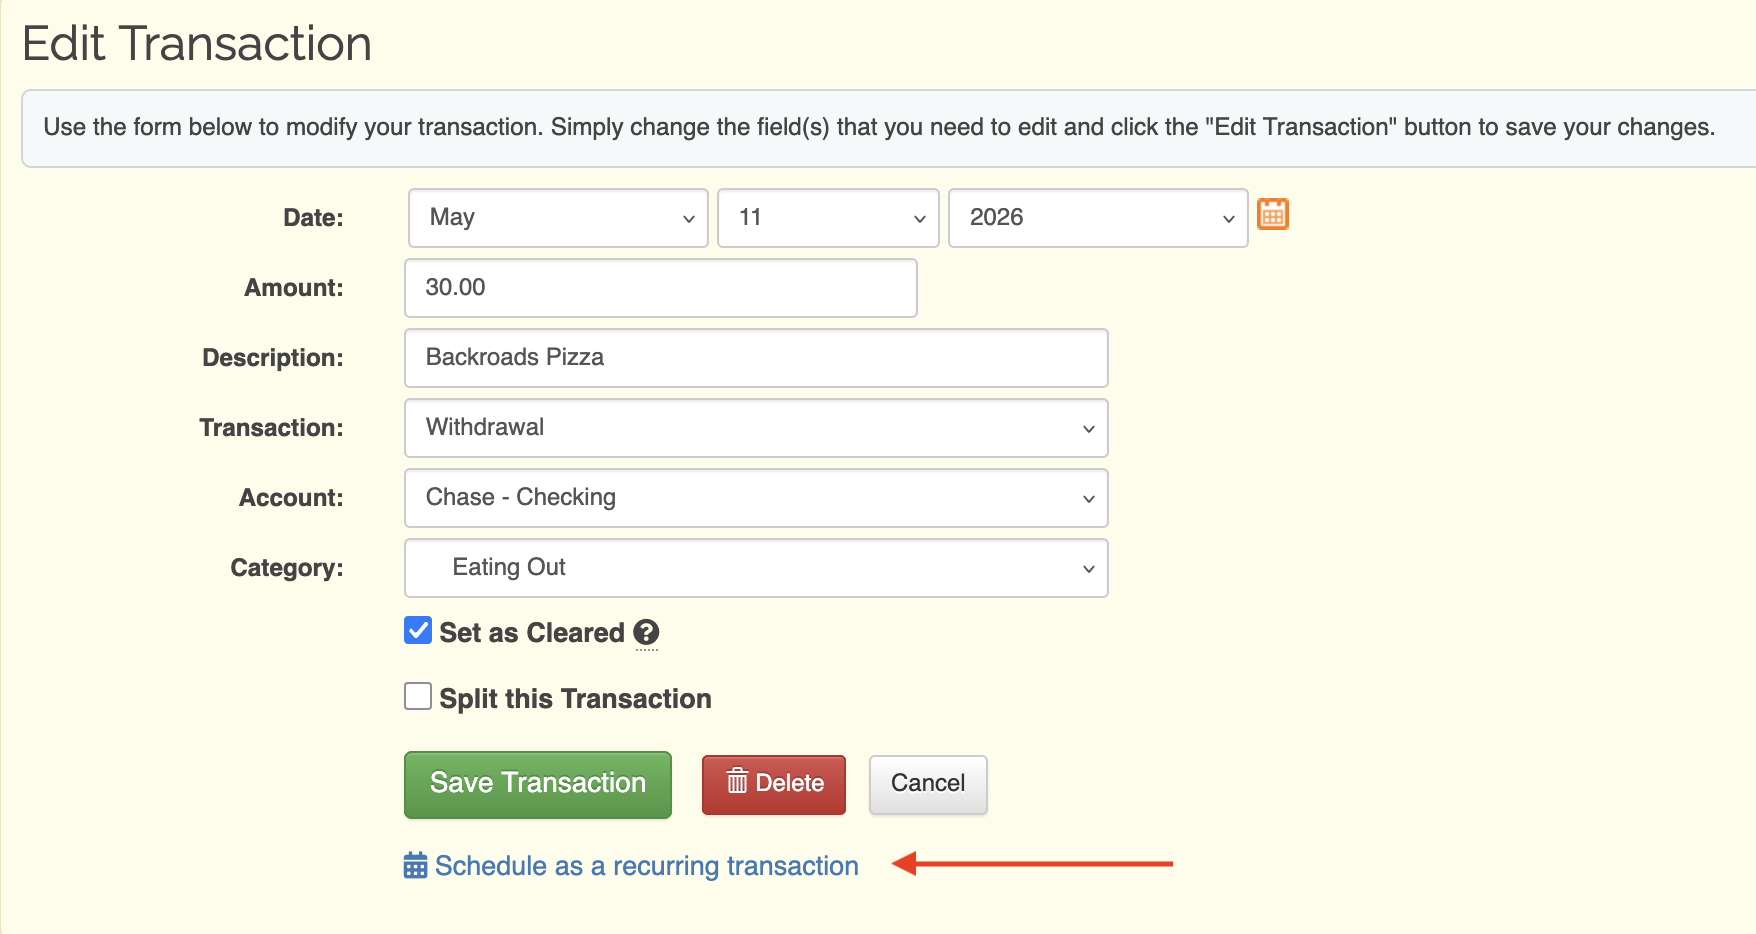
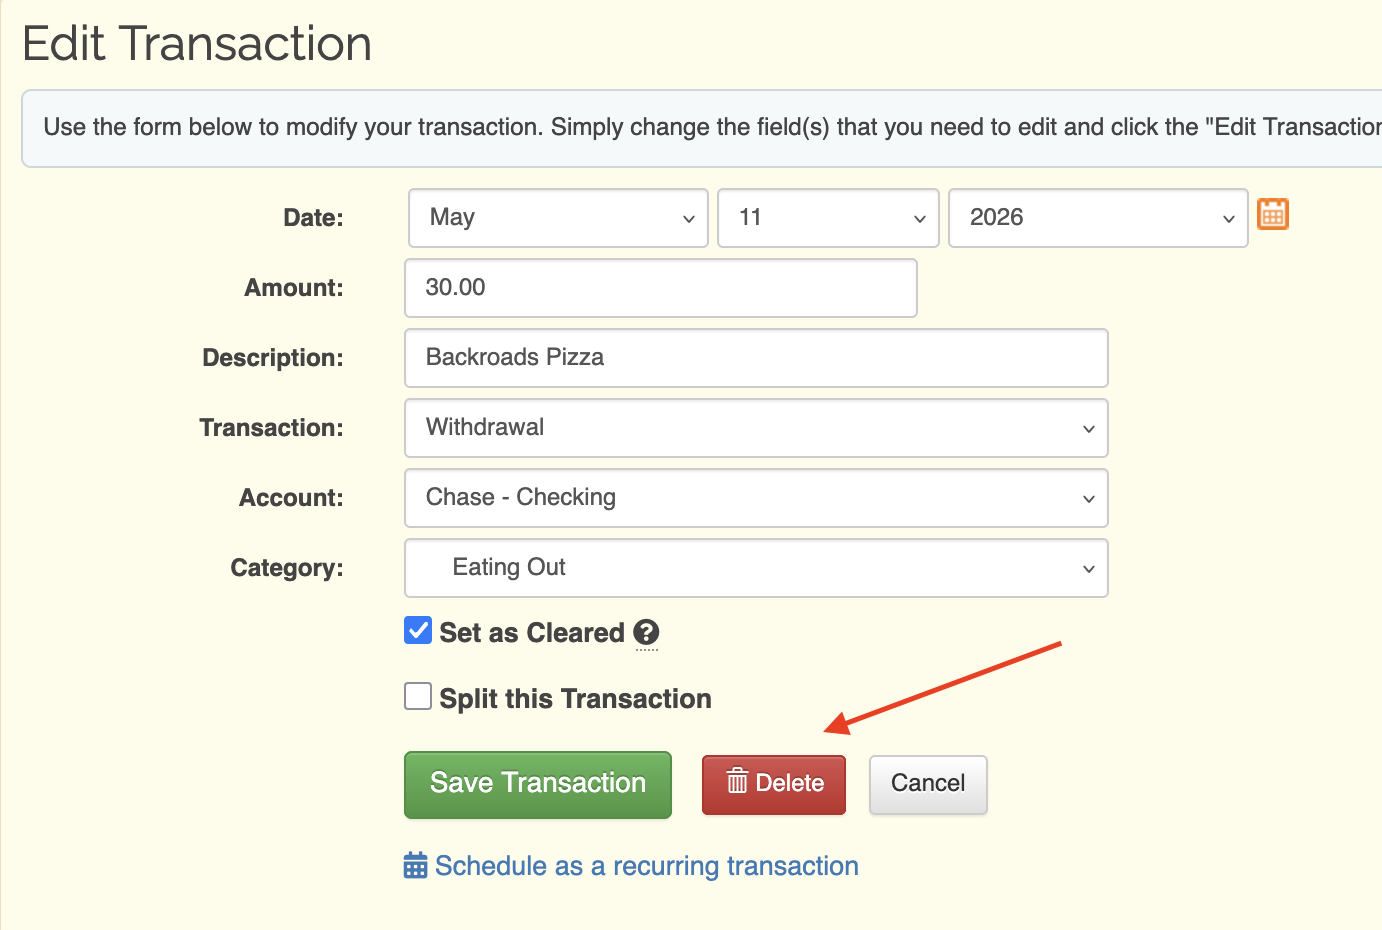
The Edit Transaction form looks just like the Add Transaction form and all of the same required fields are necessary. Make your changes and then click the green Edit Transaction button at the bottom of the form.


Rather than clicking on a transaction, you can select the checkbox on the left side of a transaction and then click the edit button at the top or bottom of the transaction list.


You have two choices to delete a transaction. First, you can click on the transaction from the Transaction Register or Search results to bring up the edit form, then click the red Delete button.
The next option is to select a transaction (or transactions) by clicking on the checkbox on the left side of the transaction, then click the blue Delete button at the top or bottom of the transaction register or search results.

If you want to delete all the transactions globally or for a specific account, you can do that through the Delete All Transactions setting. To learn more about this, visit the Settings Permanent Actions Delete All Transactions Knowledge Base section.
Transfers are a way to move money between accounts within ClearCheckbook without having to create two separate transactions. To add a transfer, change the `Transaction Type` of a transaction to `Transfer`. Once you do that, the Account and Category fields will change to an `From Account` and `To Account` field.
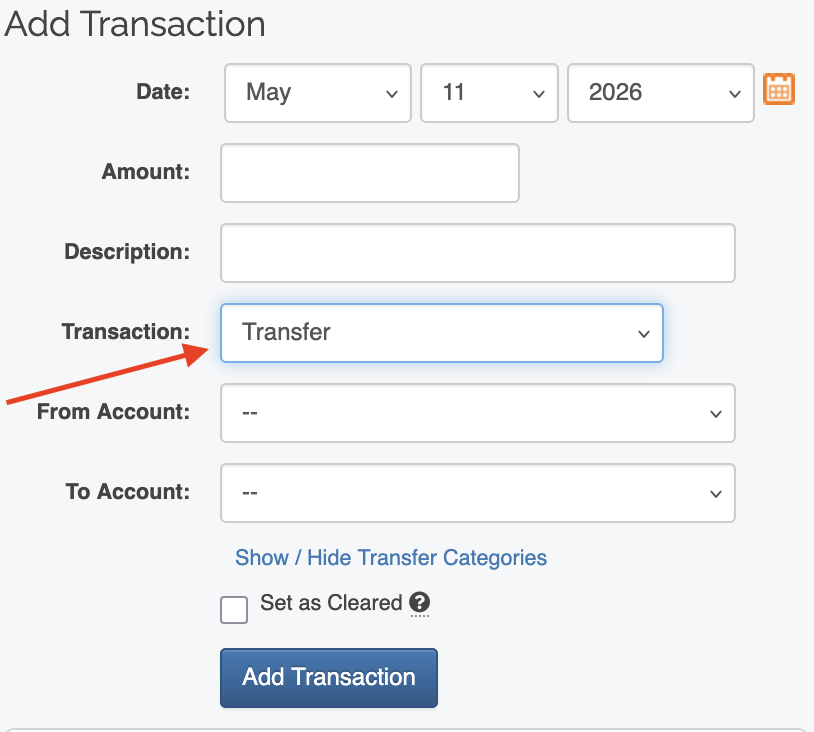
The `From Account` field is the account you're moving money from and will be entered in the register as a withdrawal. The `To Account` field is the account you're moving money to and will be entered as a deposit in the register.
You can also categorize transfers by clicking the `Show / Hide Transfer Categories` link.
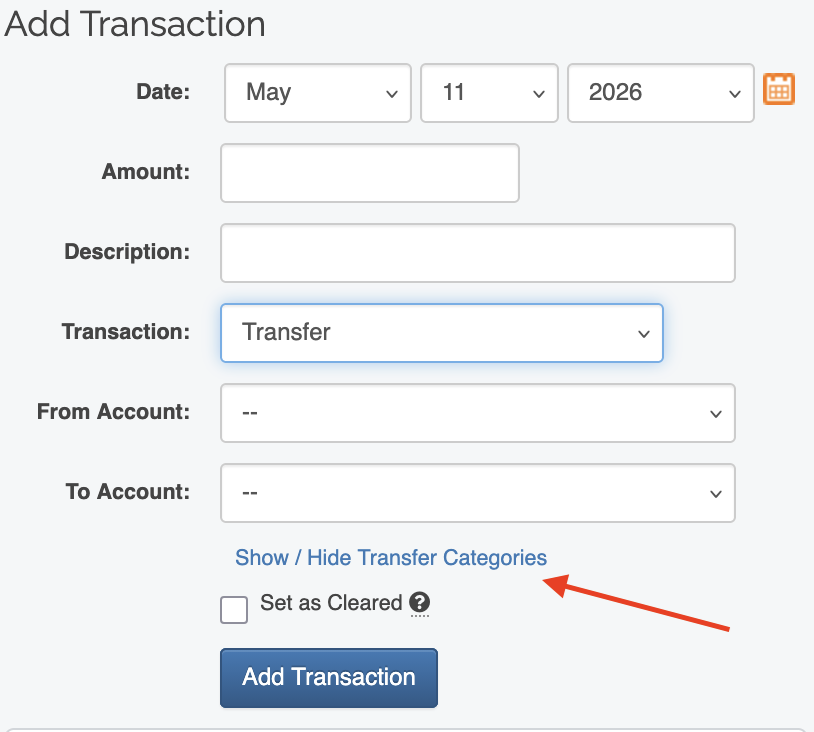
When clicked to show the categories, you'll see a category field appear under the `From Account` and `To Account` fields. You can categorize each part of the transfer as needed for your tracking purposes.

The ClearCheckbook Premium membership upgrade gives you access to additional fields for your transactions. When enabled, they will appear anywhere you can add or edit transactions. You can pick and choose which fields you would like enabled and don't need to enable all of them.
Check Number - The check number field lets you add text up to 25 characters to a transaction.
Memo - The Memo field acts the same as the Description and Payee fields. It's a great way to add additional information to a transaction.
Payee - If you want to keep track of the payee for the transaction, the Payee field is the place to do it. We also have a Tools Payee Management tool to help you manage your Payees.
File Attachments - File attachments let you attach a PNG, JPG, PDF and XLS file to your transactions. This could be anything from an invoice to a receipt.

To learn more about enabling these custom fields, visit the Settings Premium Membership Custom Transaction Fields Knowledge Base section.
The ClearCheckbook Premium membership upgrade lets you customize in which order the transaction form fields appear on the Add and Edit Transaction forms. To learn more about changing the order of the transaction form, visit the Settings Premium Membership Transaction Form Order Knowledge Base section.
If you don't see a transaction in your register after you added it, the first thing you should do is make sure you didn't add it for an incorrect date. This usually happens around the New Year when transactions get added with the previous year instead of the current one.
To find these missing transactions, use the Search tool to help you locate them. The first thing you should do is change the Date Range in the Search form to `All Time`. This will make sure you don't miss out on any transactions if the date was incorrect. You can then use a combination of the other search options mainly focusing on the keyword and amount range fields to help you narrow down the search.
We have an entire Knowledge Base section dedicated to searching for transactions. You can learn more at the General Search Tool Knowledge Base section.
As a ClearCheckbook Premium member you can turn existing transactions into recurring transactions. This will not affect the current transaction but will use the details from the transaction to pre-populate an Add Reminder form. To do this, find the transaction you want to turn into a recurring transaction from the transaction register list or search results page and click on it. Next, click the `Schedule as a recurring transaction` link at the bottom of the form.