If you haven't already created a ClearCheckbook login, you can do this through the app by clicking on the + Sign Up button when the app launches

+ Sign Up buttonYou will need to enter a valid email address, choose a username and enter a password. Once you filled out all the required fields and sign up, you'll be logged in and then you can start managing your finances.

Note: You can also create your ClearCheckbook login through the website here: Sign up for ClearCheckbook
To log in, enter your username (or email address) and your password into their respective fields and then click the Log In button.

Log In buttonOnce you sign in you will be taken to your accounts list that shows all of your account balances.
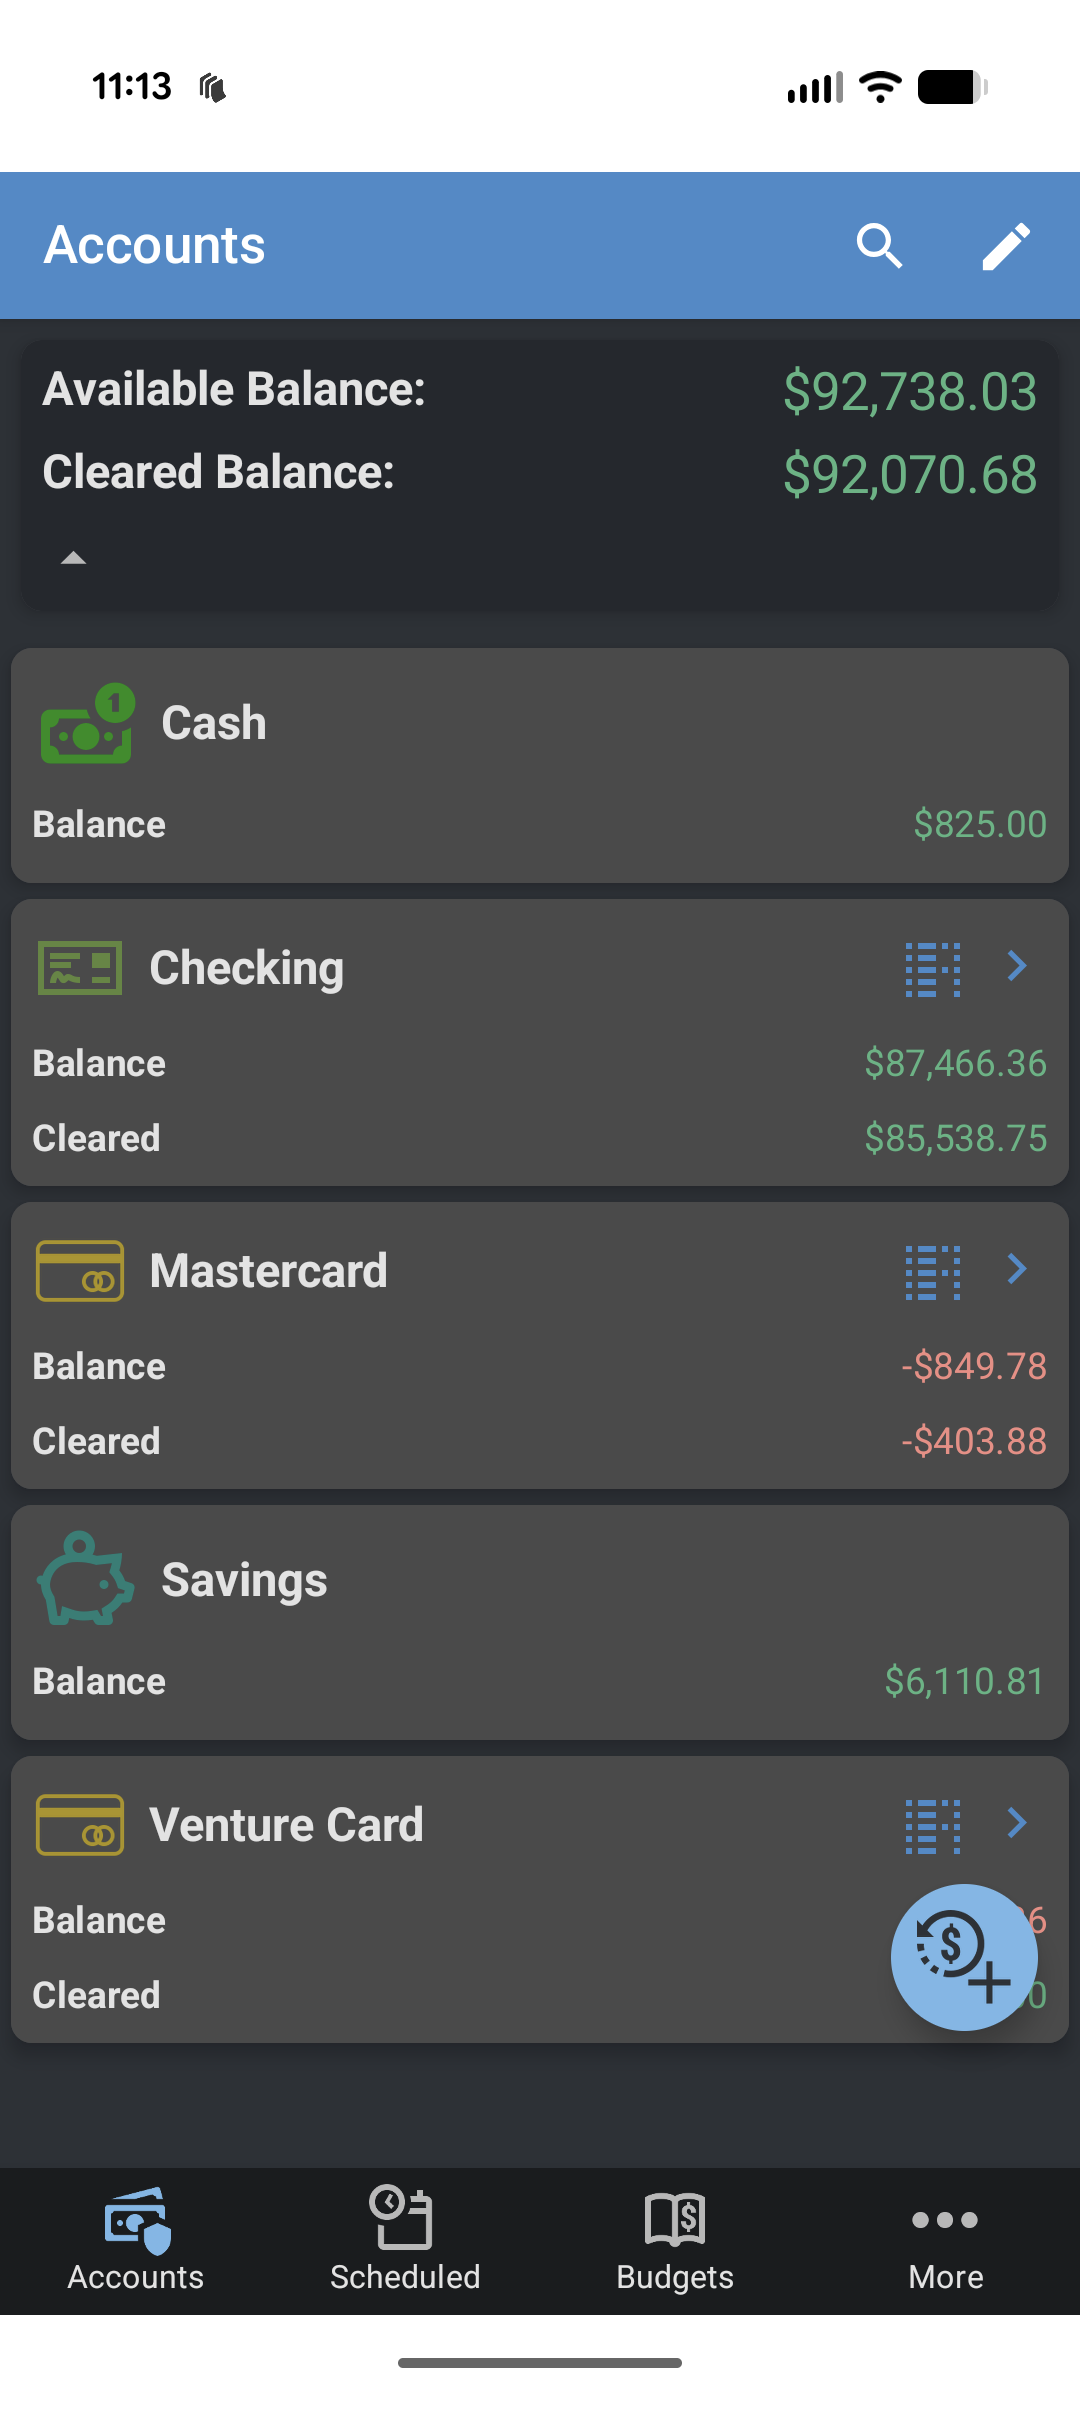
The Accounts list shows all of your accounts with their Cleared and Overall balances, plus your Total Cleared and Overall balances. Clicking on any of the accounts will take you to a list of transactions for that account.

If you set up credit limits for any of your credit cards, there will be an information block at the top of the Accounts list that shows your credit limit information. There will also be a small information block on the credit card account itself that shows the credit information for that specific card.

Clicking on the credit limit information block will expand it to show you more details about how much you've spent toward your credit limit.

If you have accounts with multiple currencies, the total of each currency will be listed separately at the top of the Accounts list.

As the ClearCheckbook Mobile App has grown, we felt there was a need for a quicker way to see all of your data at a glance. The Dashboard in the Mobile App works similar to the Dashboard on the website in that you can add and position gadgets on the page and see the important data without having to navigate to each tool or page separately.
You can enable the Dashboard from the More -> Settings page. The option to enable or disable the Dashboard is at the bottom of the Settings list.

Once enabled, you'll be taken to the Dashboard where all of the gadgets will be enabled. Enabling the Dashboard removes the bottom navigation menu. To view any tools, click on the tool gadget to go to that page. You can access your account information and settings via the person icon at the top right side of the Dashboard. Clicking on the three dots at the top right side of a gadget will bring up any settings to adjust the gadget appearance.


The accounts list can be expanded in the Accounts gadget to show a view similar to the old Accounts page. This shows you the account balances as well as any spending limit information for credit cards. Clicking on an account will take you to the transaction list for that account. If you need to manage your accounts, click the pencil icon at the top right side of the Account gadget.

To move or toggle gadgets or to disable the Dashboard, click the gear icon at the top right side of the screen.


You can add a new transaction from the Accounts list or from the Transactions list by clicking the green + circle at the bottom right side of the screen.


Once you click the Add Transaction button, the Add Transaction form will appear and you can enter the details of your transaction.

The Description and Payee fields will offer auto-complete suggestions based on the keyword you're typing. If you click on a suggestion, the description/payee, account and category fields will be populated based on the selected suggestion.

The Add Transaction form has the same required fields as the website. If you want to split a transaction, click the split icon to the right of the Amount field in the Add Transaction form.

To add a new split, click on the + button at the bottom right side of the screen. You can add as many splits as you need for the transactions. The totals of the splits will appear in the top right side of the Splits page. Once done, swipe back to the Transaction form and finish adding any other transaction details.


Transactions that contain splits will show that information below the amount in the Transactions List.

If you click on a transaction to edit it, you'll also see the number of existing splits the transaction has under the split icon. Clicking on the split icon will allow you to edit those splits.

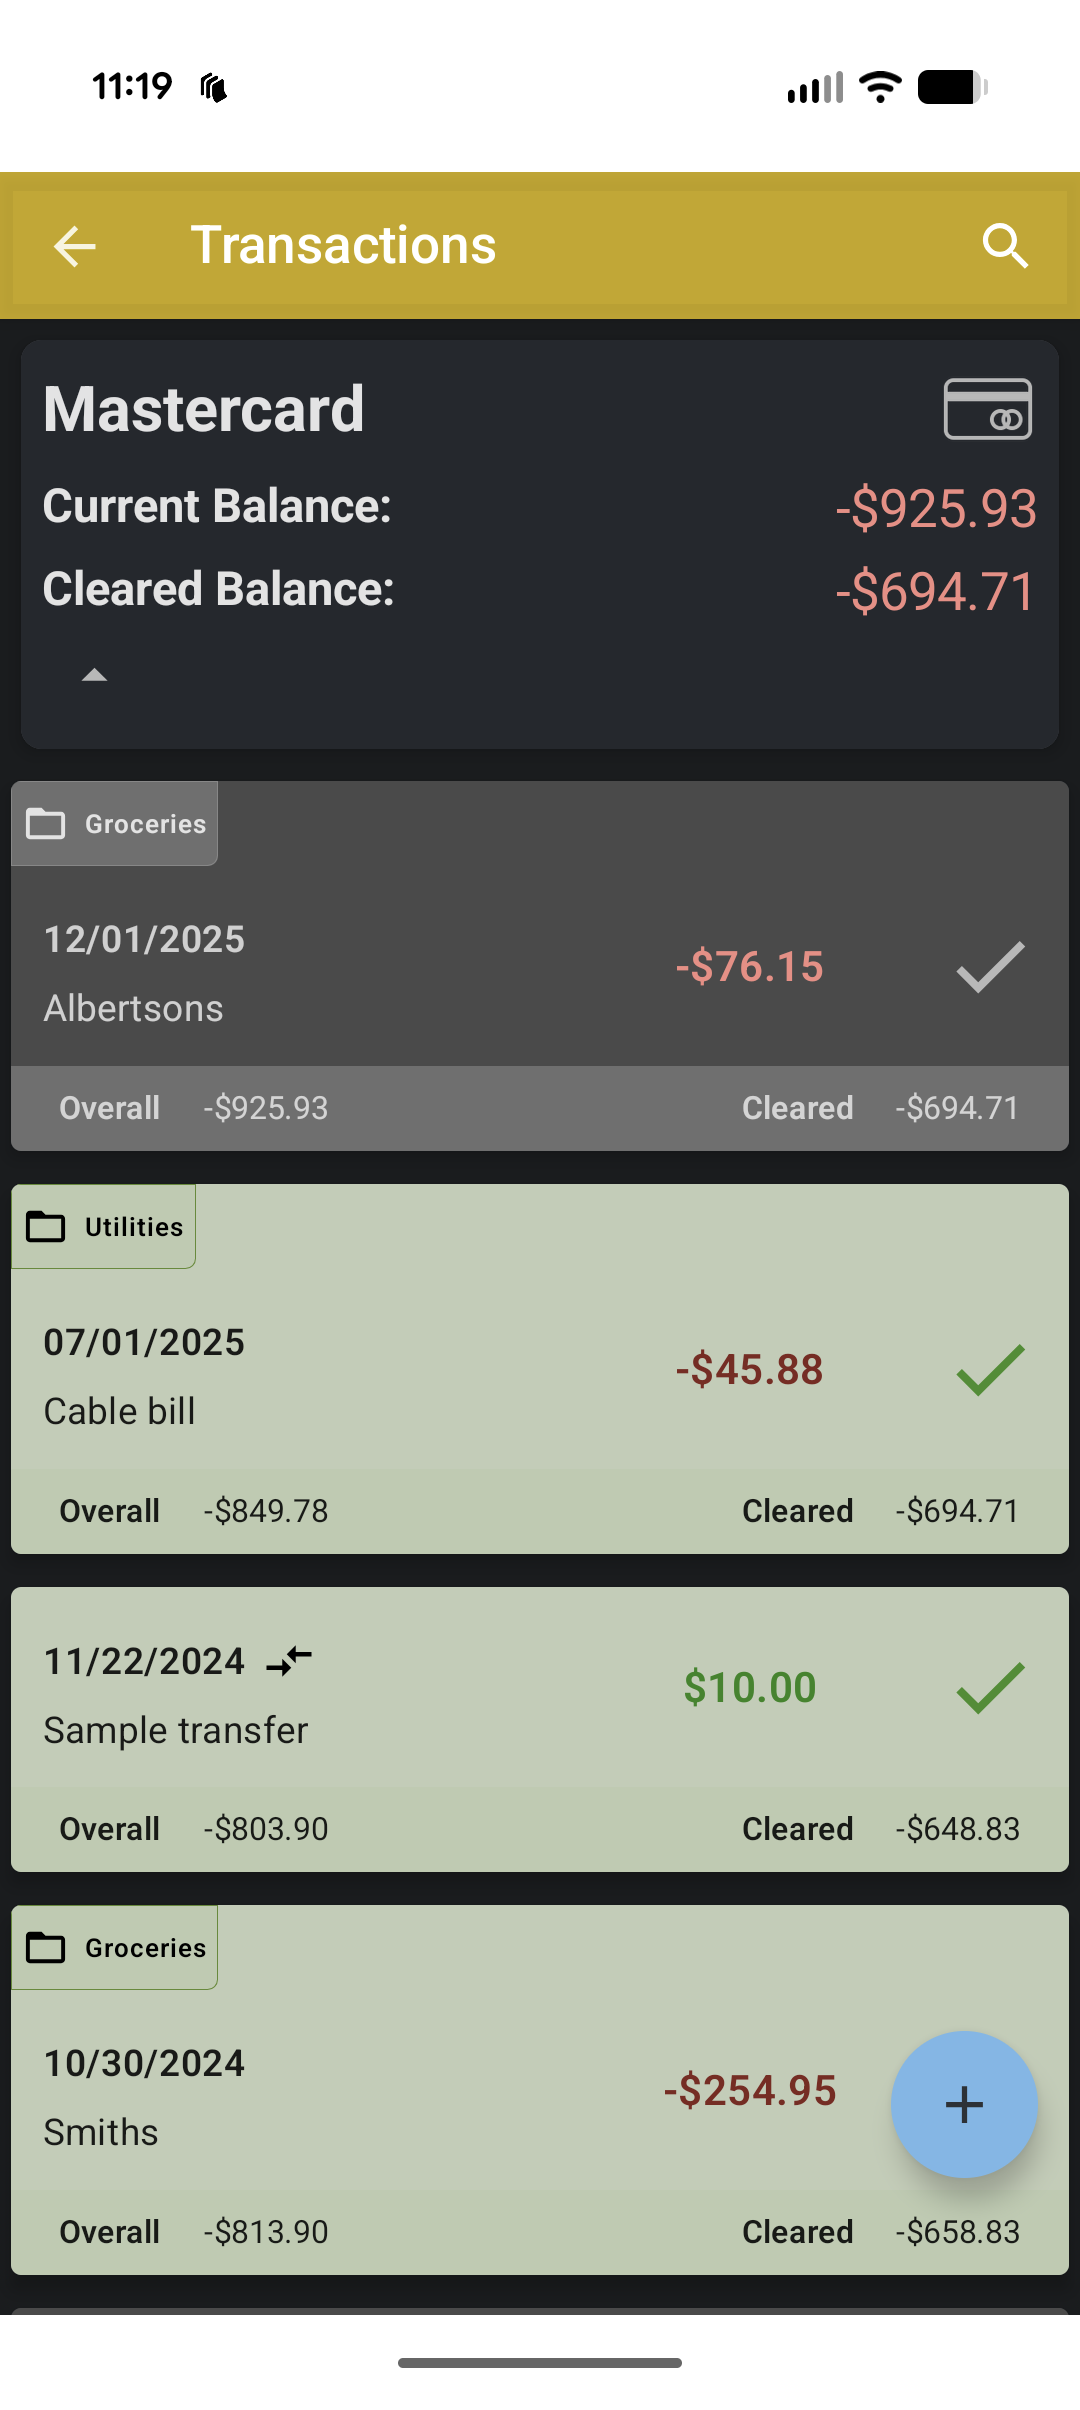
When you click on an account from the Accounts list it will take you to a transaction register that shows you all of your transactions for that account.

You can edit or delete a transaction by clicking on it from the list. This will bring up an Edit Transaction form where you can change any of the transaction details. To delete the transaction, click the Delete icon at the top right side of the screen.


The top of the list shows the account balance. You can click on the icon at the top right side of the screen to bring up a search filter.

If you have any post-dated transactions, clicking the icon at the top of the page will take you to the most current, non-future, transaction.
Our reconciliation mode lets you add, clear, edit and delete transactions in a separate mode without making actual changes until you're ready. This is similar to the Reconciliation tool on the website. You can find the Reconciliation tool by clicking on the Reconcile link next to the account you want to reconcile from the main Accounts list.

The Reconciliation mode will show all of the transactions for the account, giving you the option to clear, edit and delete them so the account shows up as reconciled.

Once an account is successfully reconciled in the Reconcile mode, you can click the Save icon at the top right side of the screen to save your changes and exit reconciliation mode.
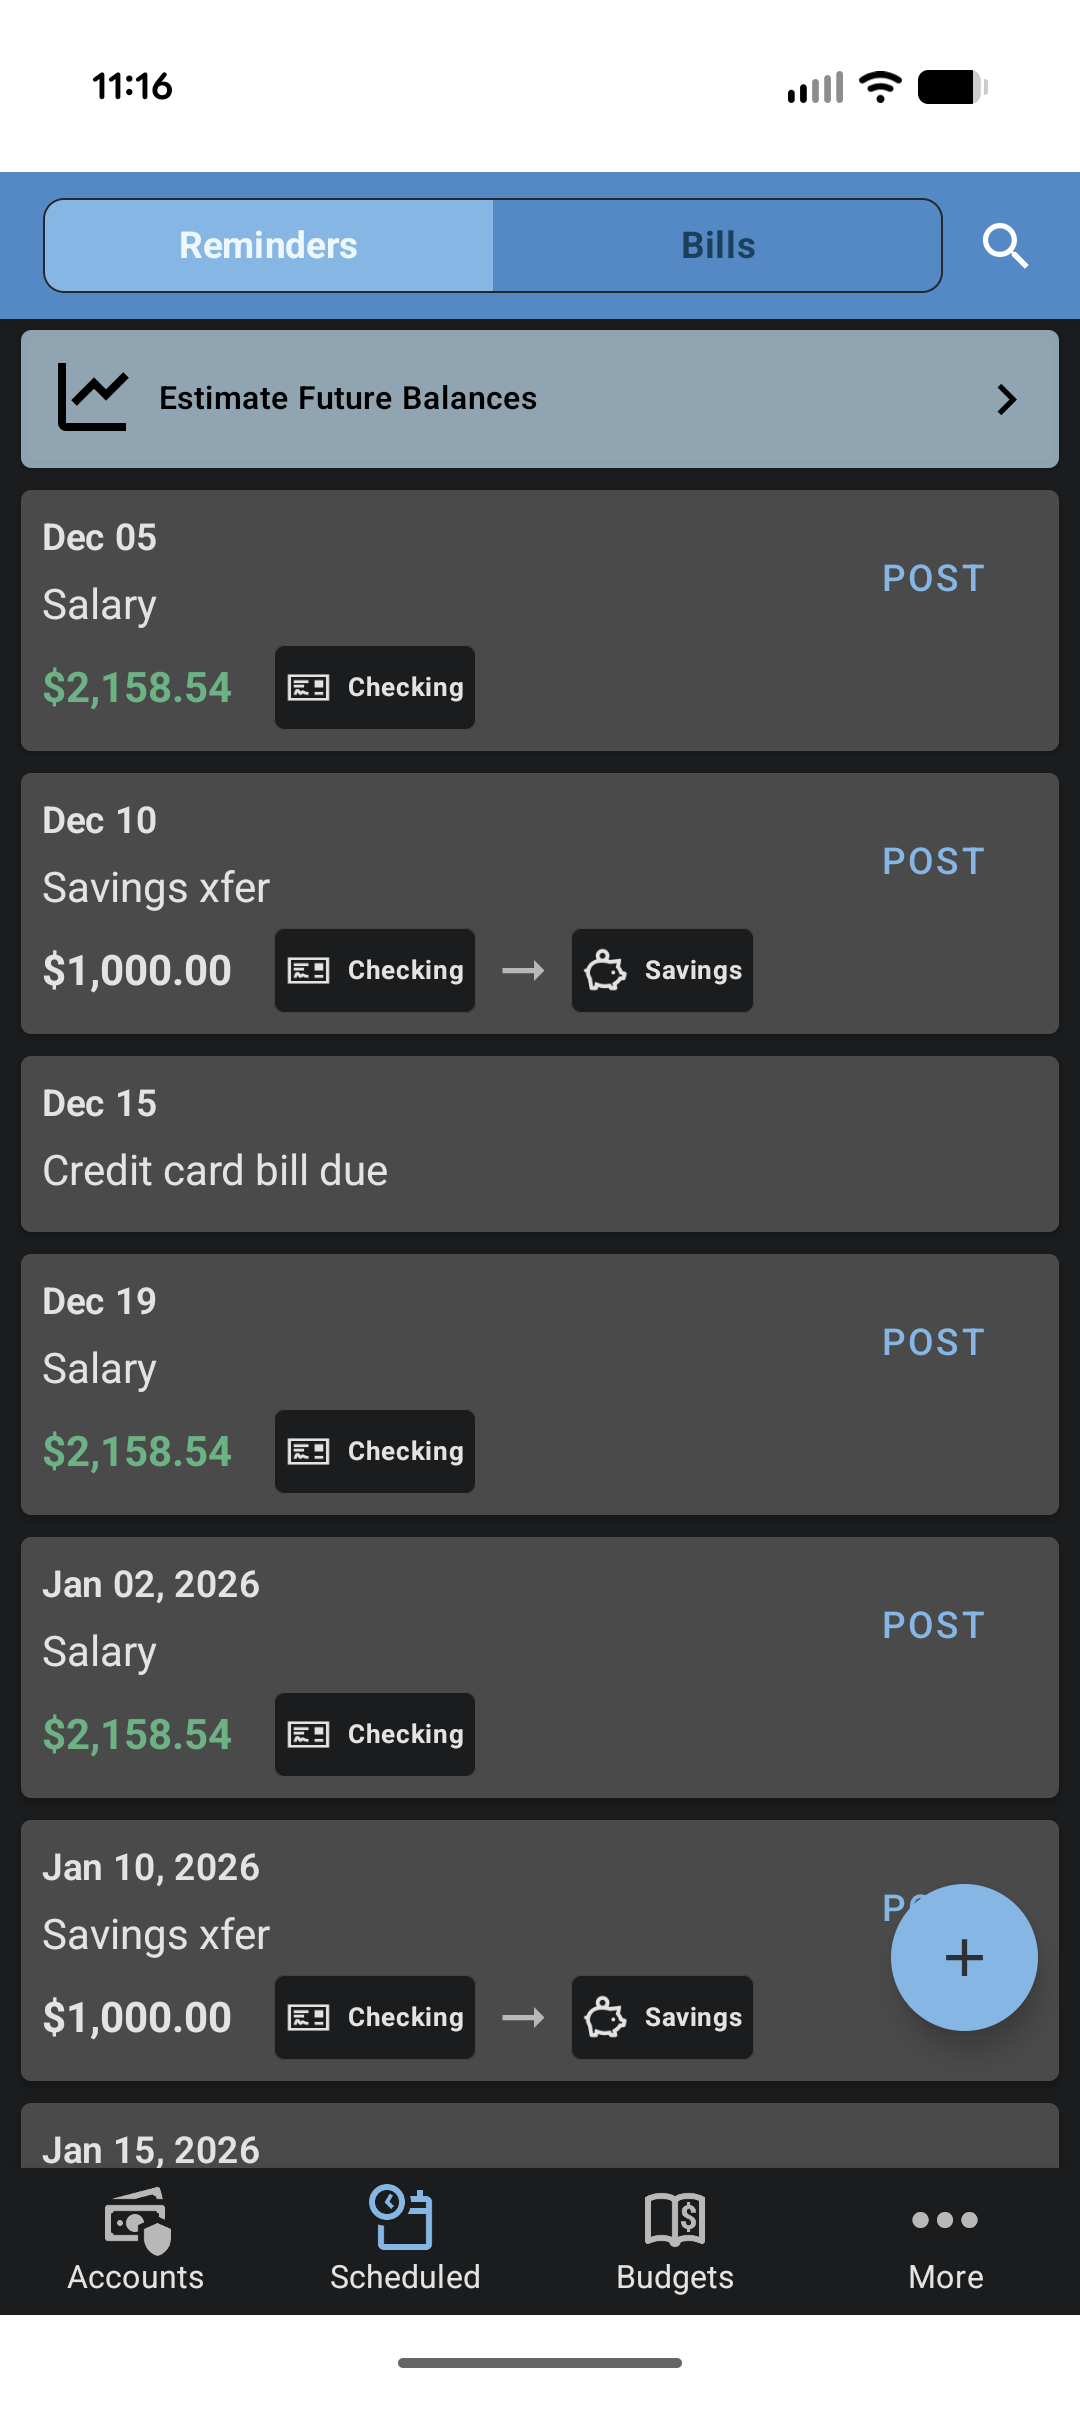
You can click on the Scheduled tab in the navigation at the bottom of the screen to access the Reminders and Bills pages. The first page that loads is the Reminders list which shows all of your upcoming reminders and recurring transactions. If you have an unposted recurring transaction, you can post it to your register at any time by clicking the Post button.

You can add a new reminder or recurring transaction by clicking the green + button at the bottom right side of the screen. Clicking on any existing reminder will let you edit the details for it. The Add Reminder form has fields to enter the name of the reminder, how it's set to occur, whether you want to be emailed ahead of the day it will occur and whether or not you want to associate a transaction with it.

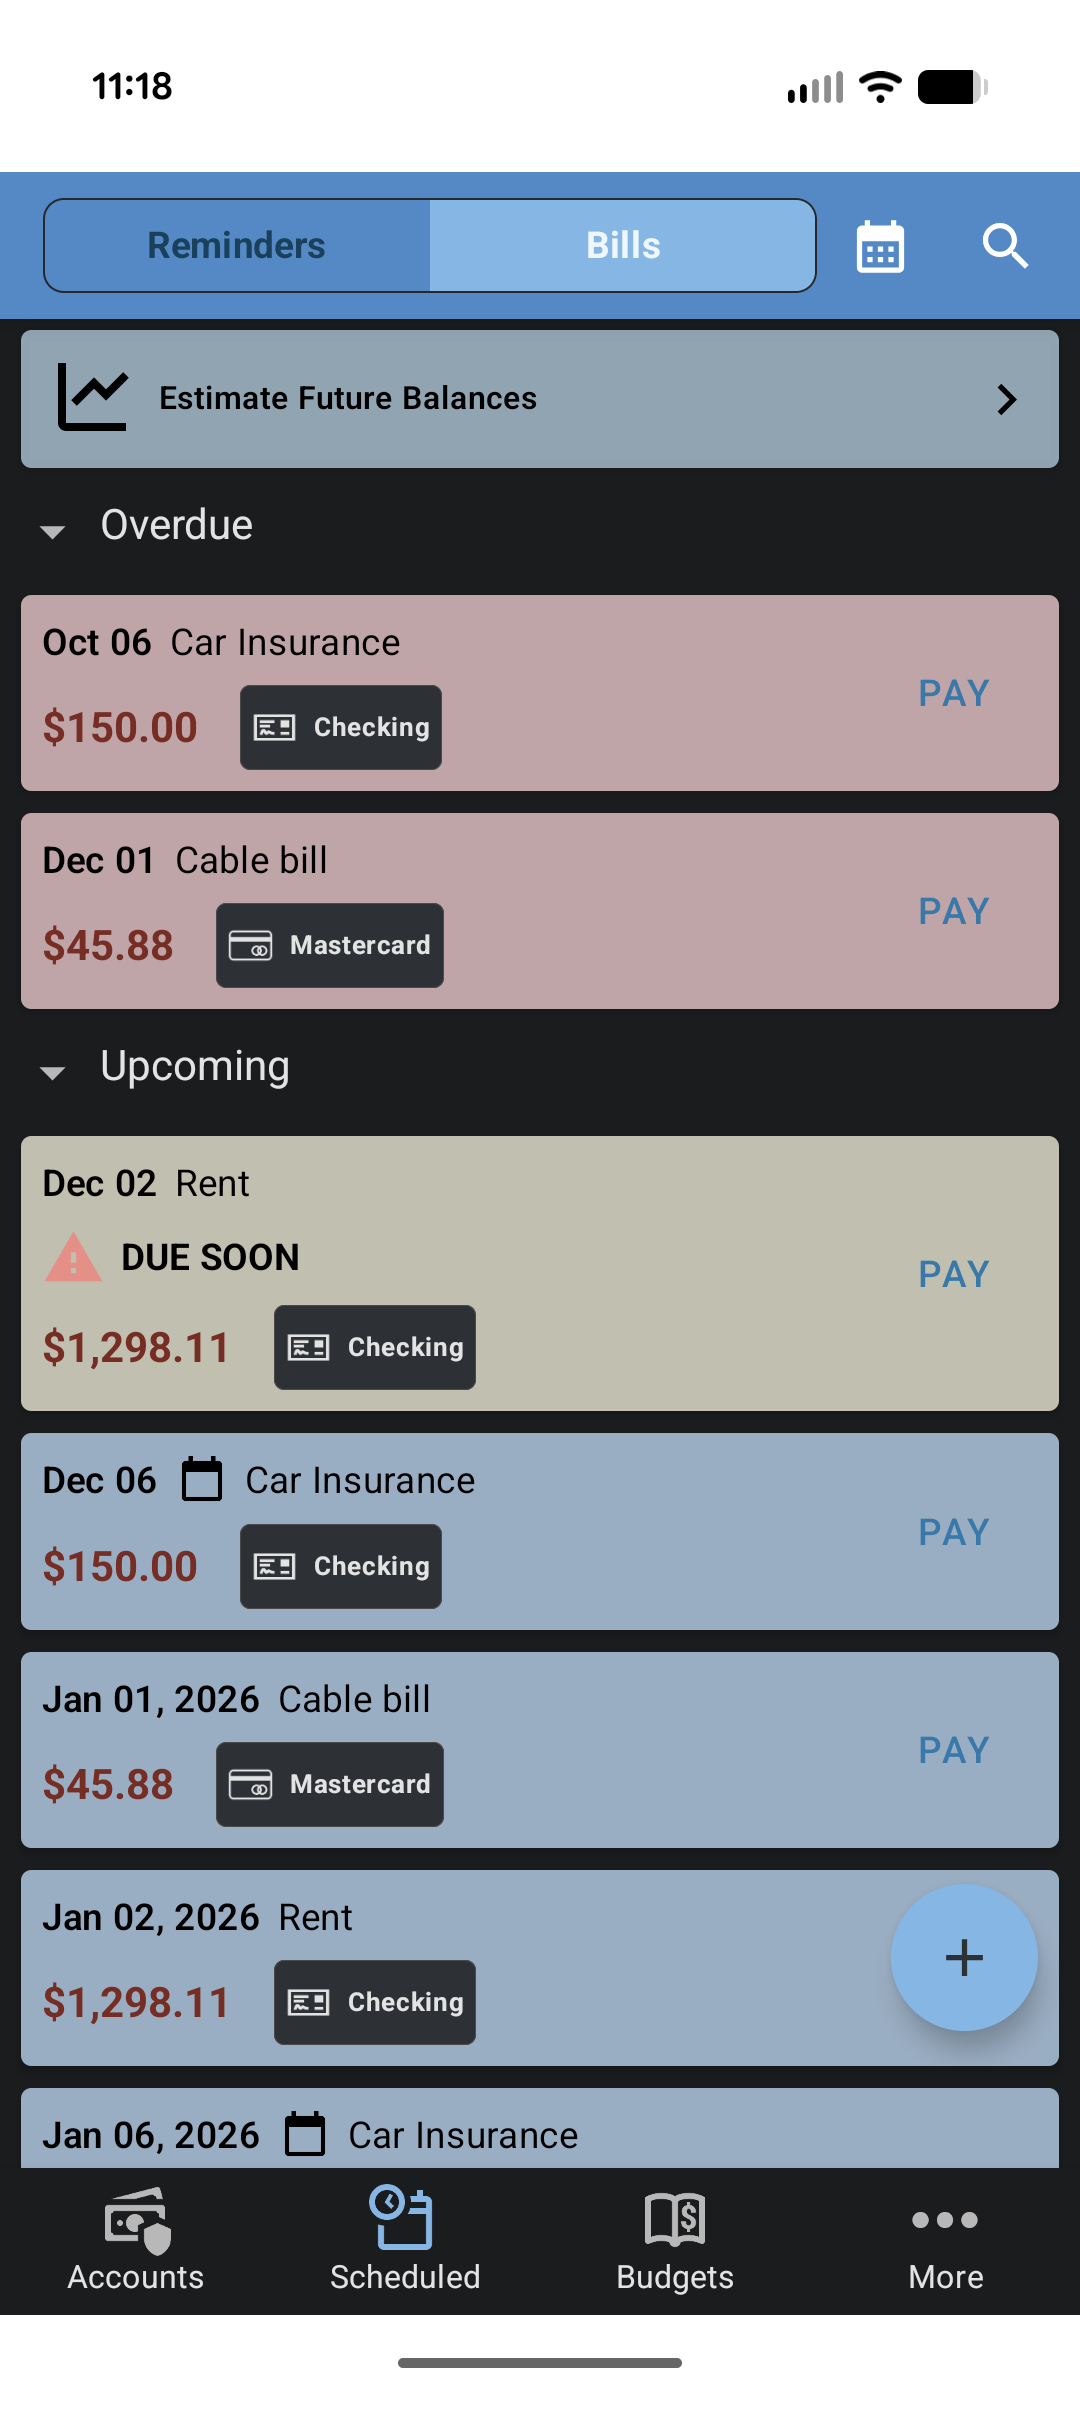
To view your Bill Tracker items, swipe the screen to the left to access the Bills screen.
The Bills screen lists all of your unpaid and upcoming bills. You can add a bill by clicking the green + button at the bottom right side of the list. To edit a bill, click on the bill you wish to edit and the edit form will appear.


Clicking the Pay button will let you pay the bill. You can choose to pay the bill by adding a transaction or to simply mark it as paid.


Estimate Future Balances is a tool that will project your balances to a future date based on post-dated transactions, unpaid bills and upcoming recurring transactions. The Estimate Future Balances tool can be found by clicking on the Estimate Future Balances button at the top of the Bills and Reminders pages.

When you open the Estimate Future Balances tool, you'll see options for the start and end dates and an Account selector.

After selecting the accounts, you'll see them appear by name.

When you run the report, a graph will appear showing your balance over time and then a list of the transactions that affect the balance.

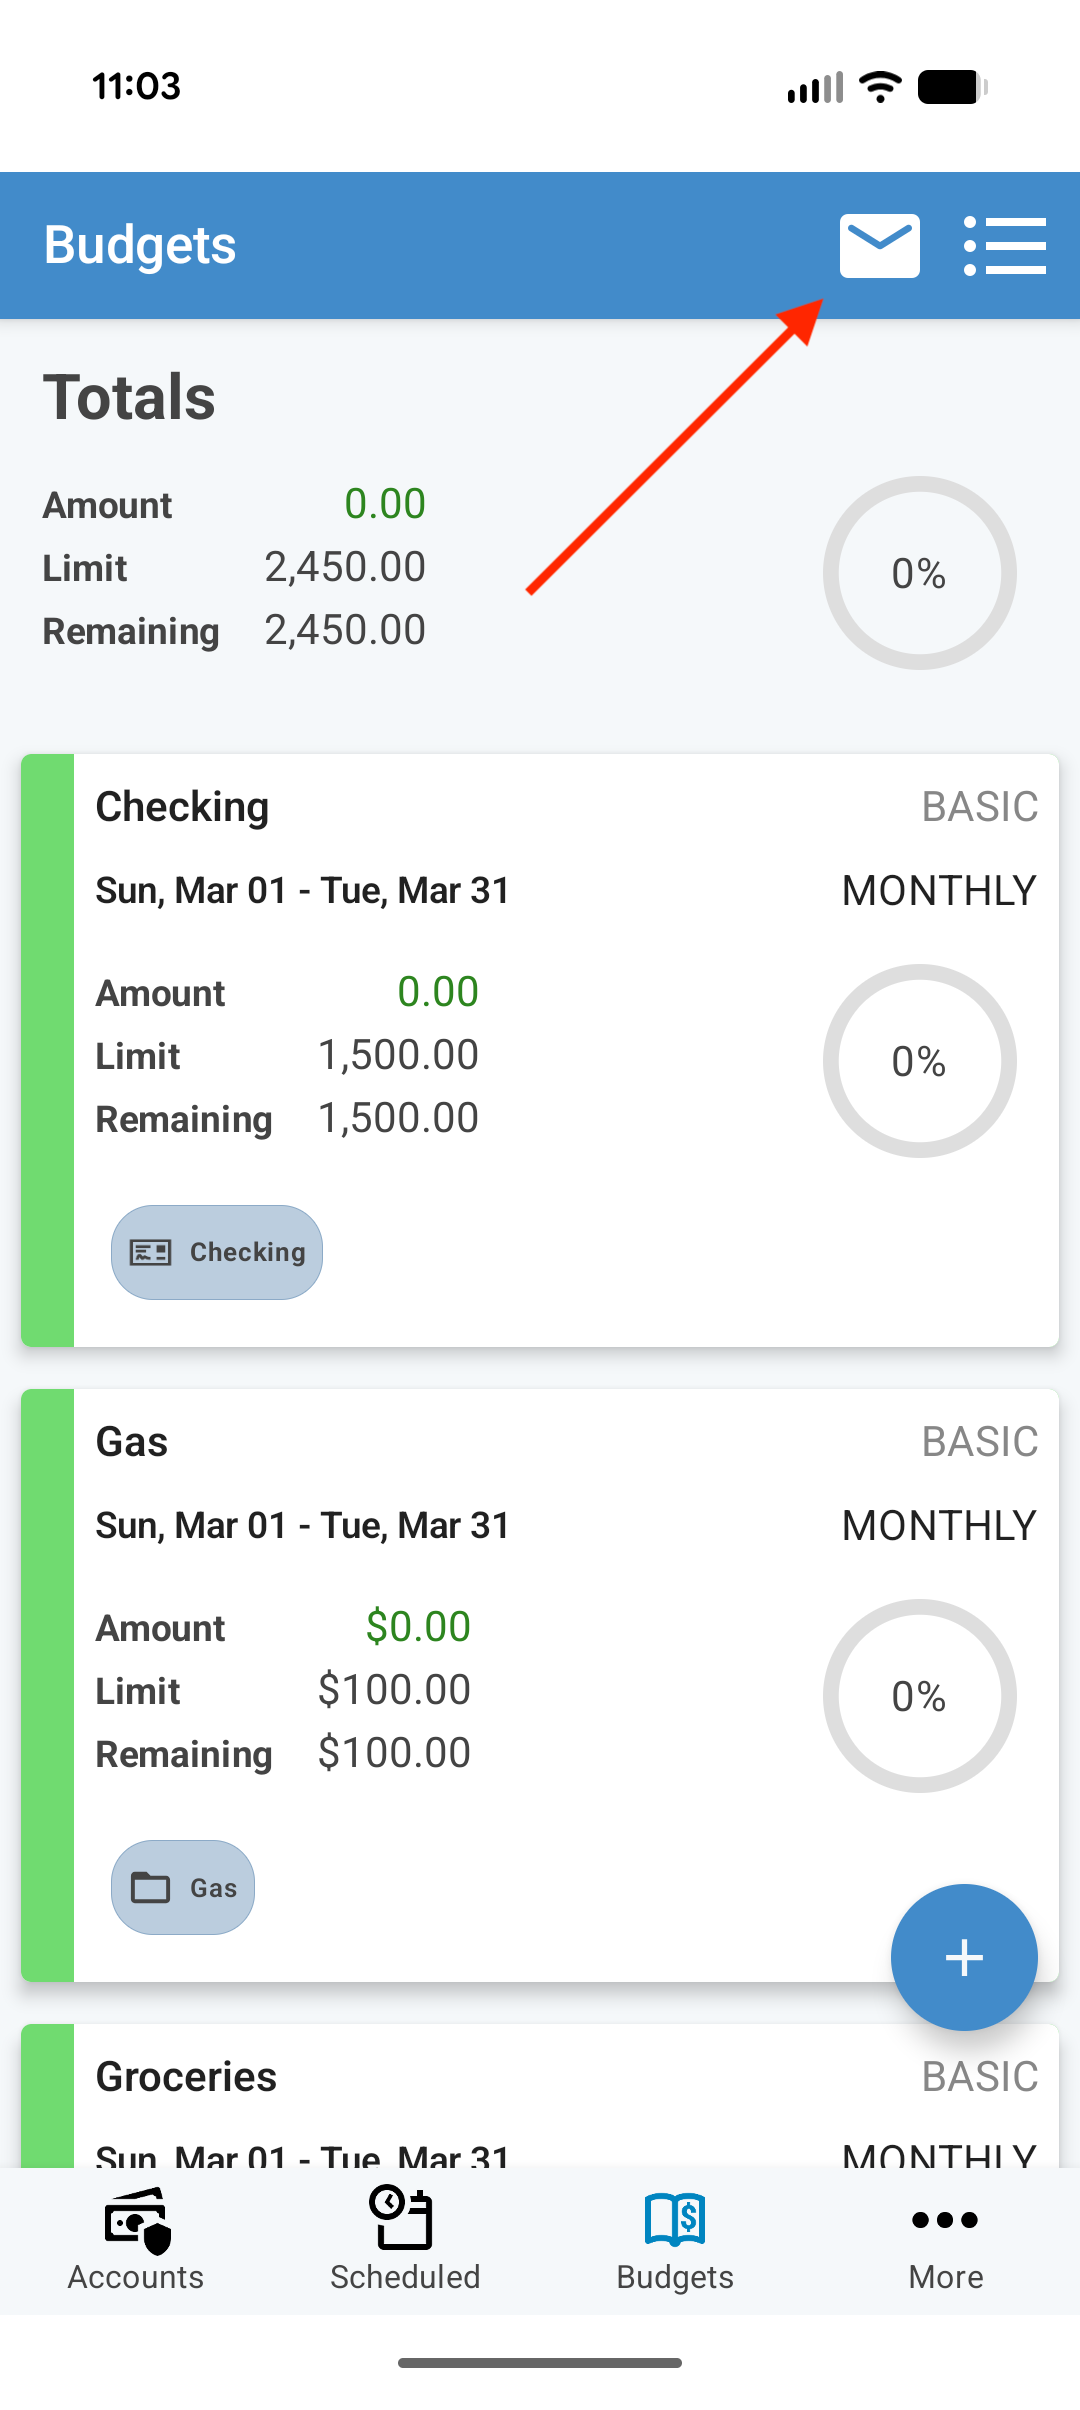
You can click on the Budget tab in the navigation at the bottom of the screen to access the Budgets page. The Budgets page shows the total of all your budgets at the top of the page and then each individual budget below that.
Clicking on the green + button at the bottom right side of the screen will let you create a new budget. Clicking on any existing budget will let you edit the details for it.

The Envelope Budgets tool is also available in the app. If you don't have the Dashboard enabled, you can find the Envelope Budgets by clicking on the Budgets tab and then click on the envelope icon at the top right side of the screen. Otherwise, you can click on the Envelope Budgets gadget from the Dashboard to go open the Envelopes tool.
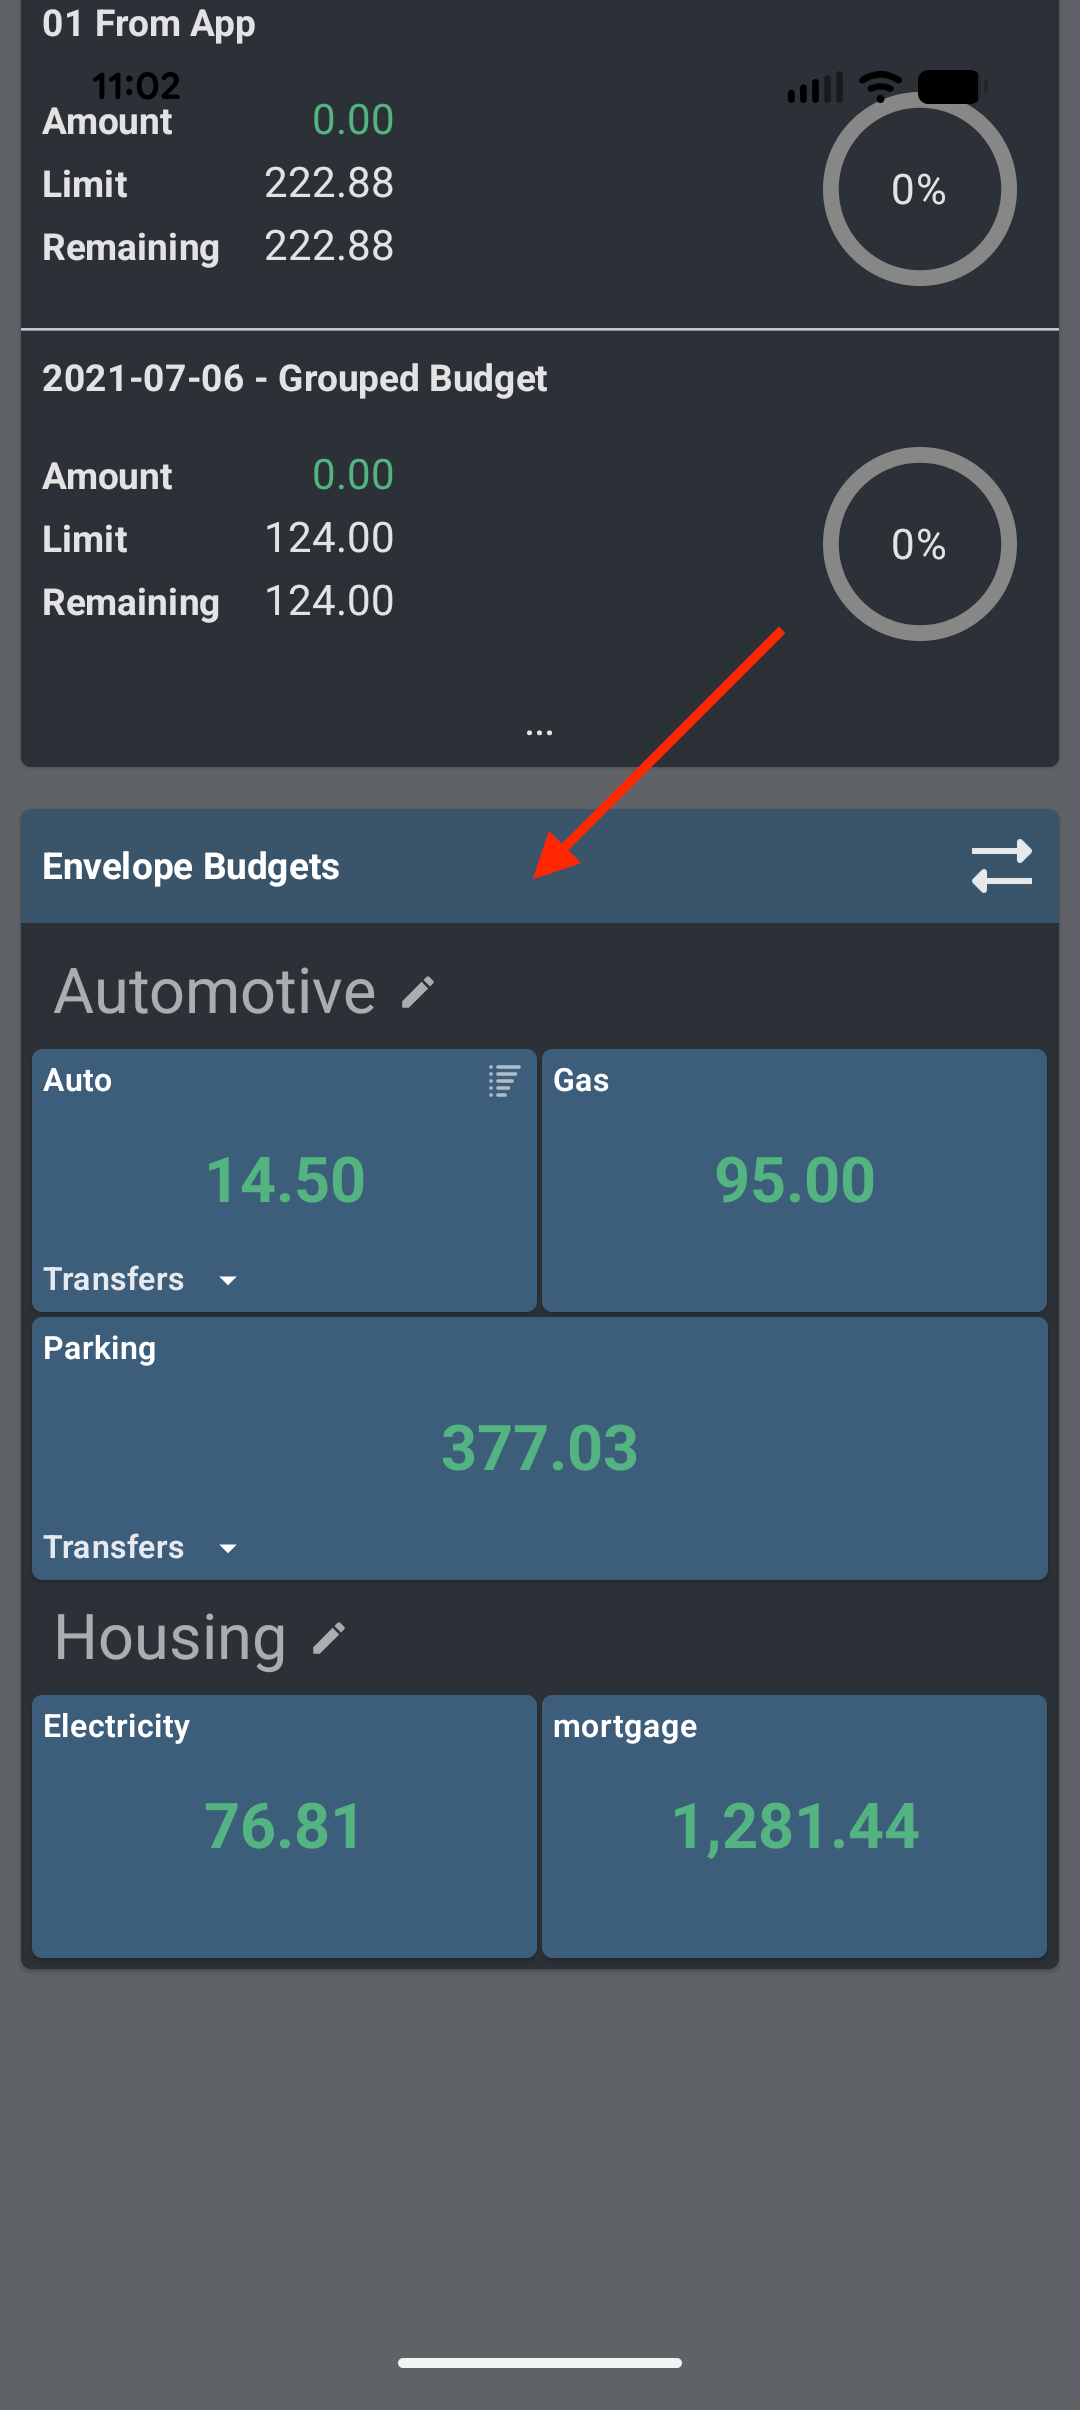
After entering the tool, you'll see all of your envelopes and their values. If you set up Envelope Groups, the envelopes will be shown under their respective group.
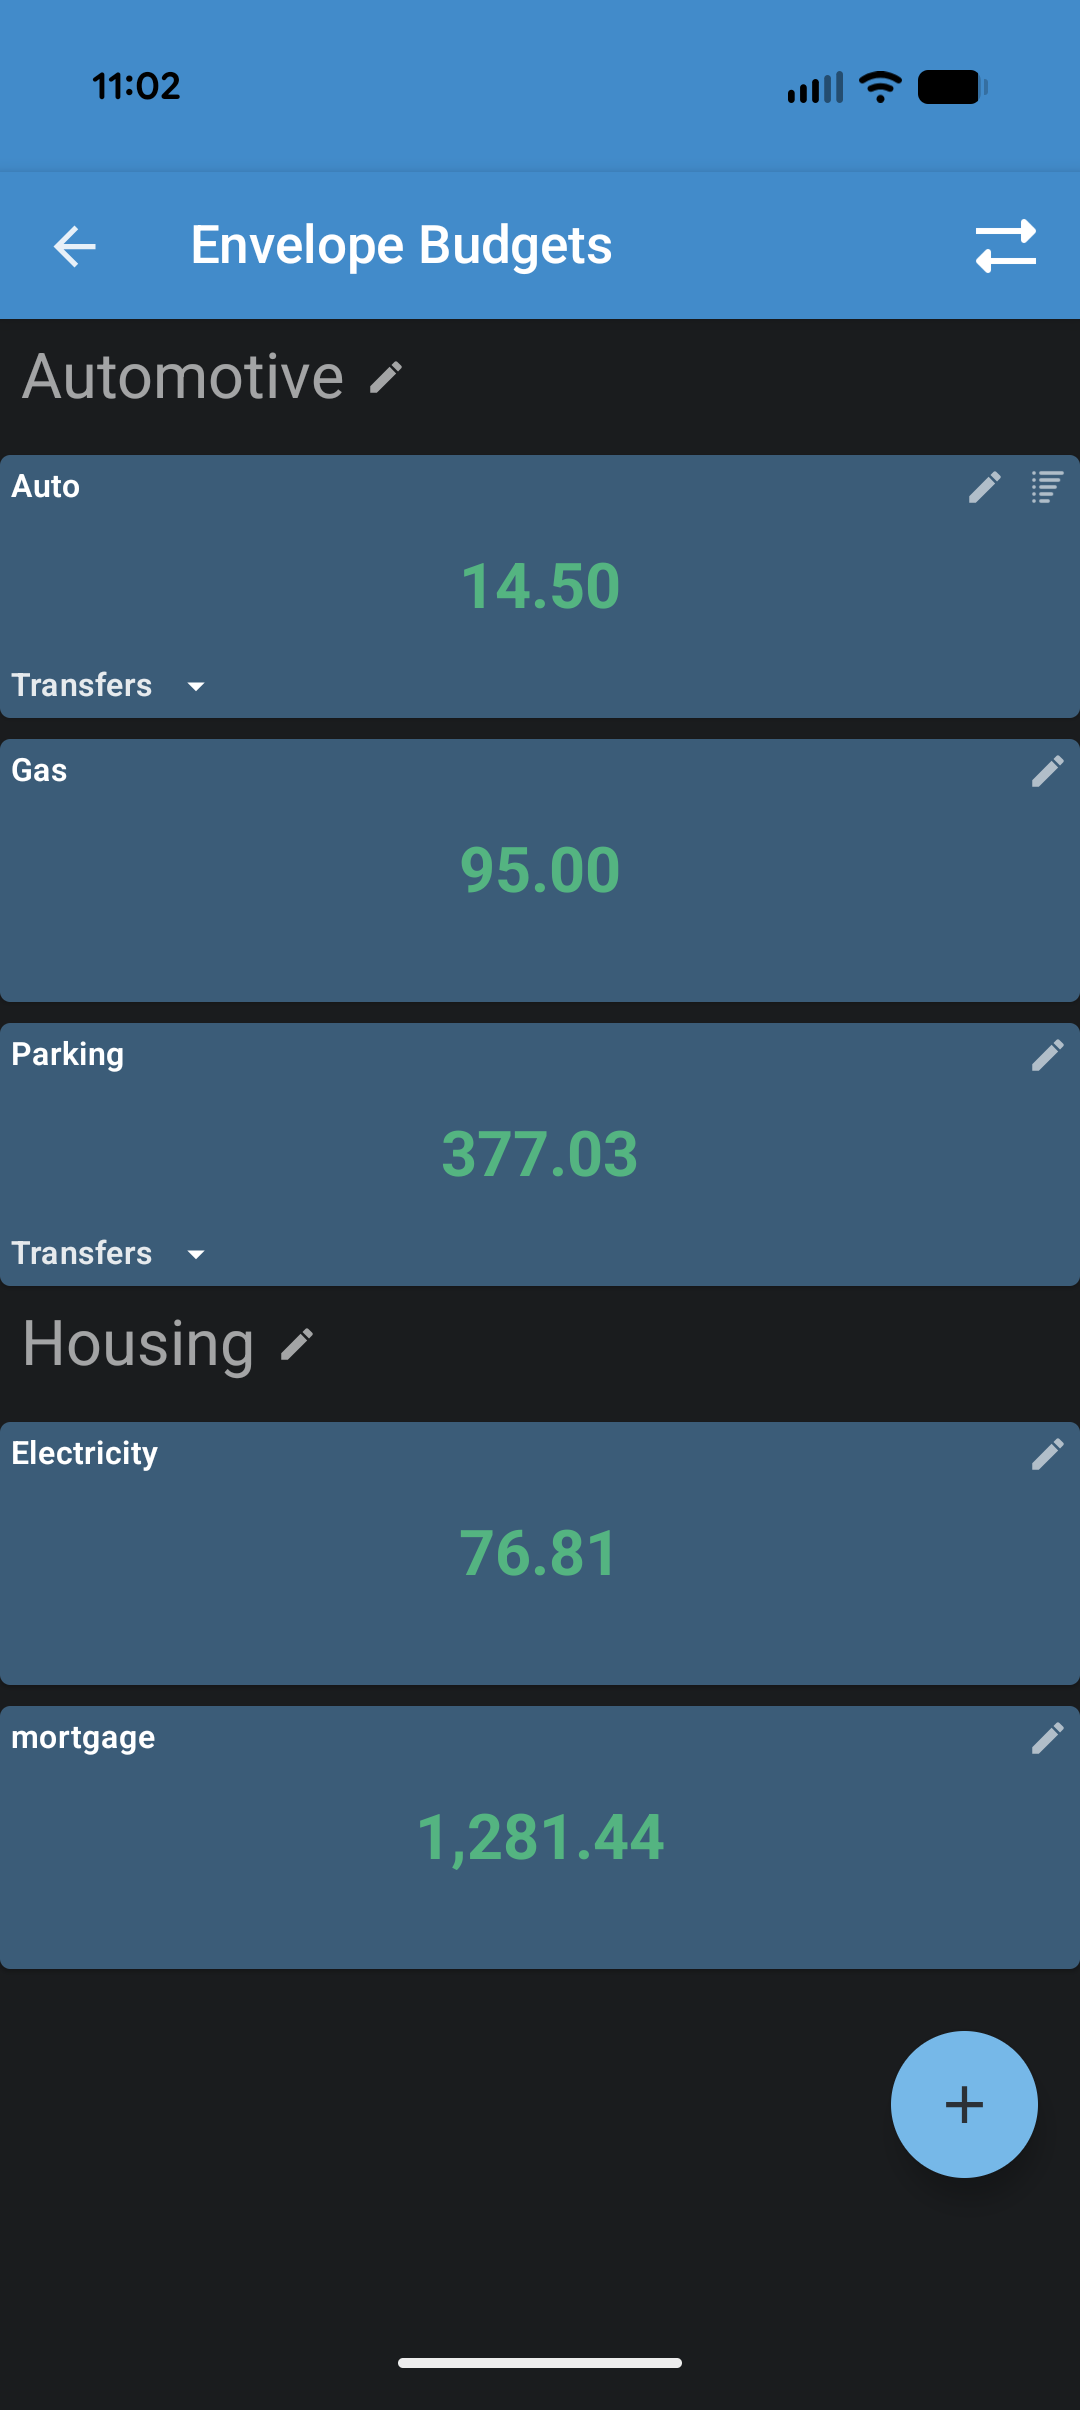
To add a new envelope budget or group, click the + circle at the bottom right side of the screen. This will give you the choice of adding either a new envelope or group.

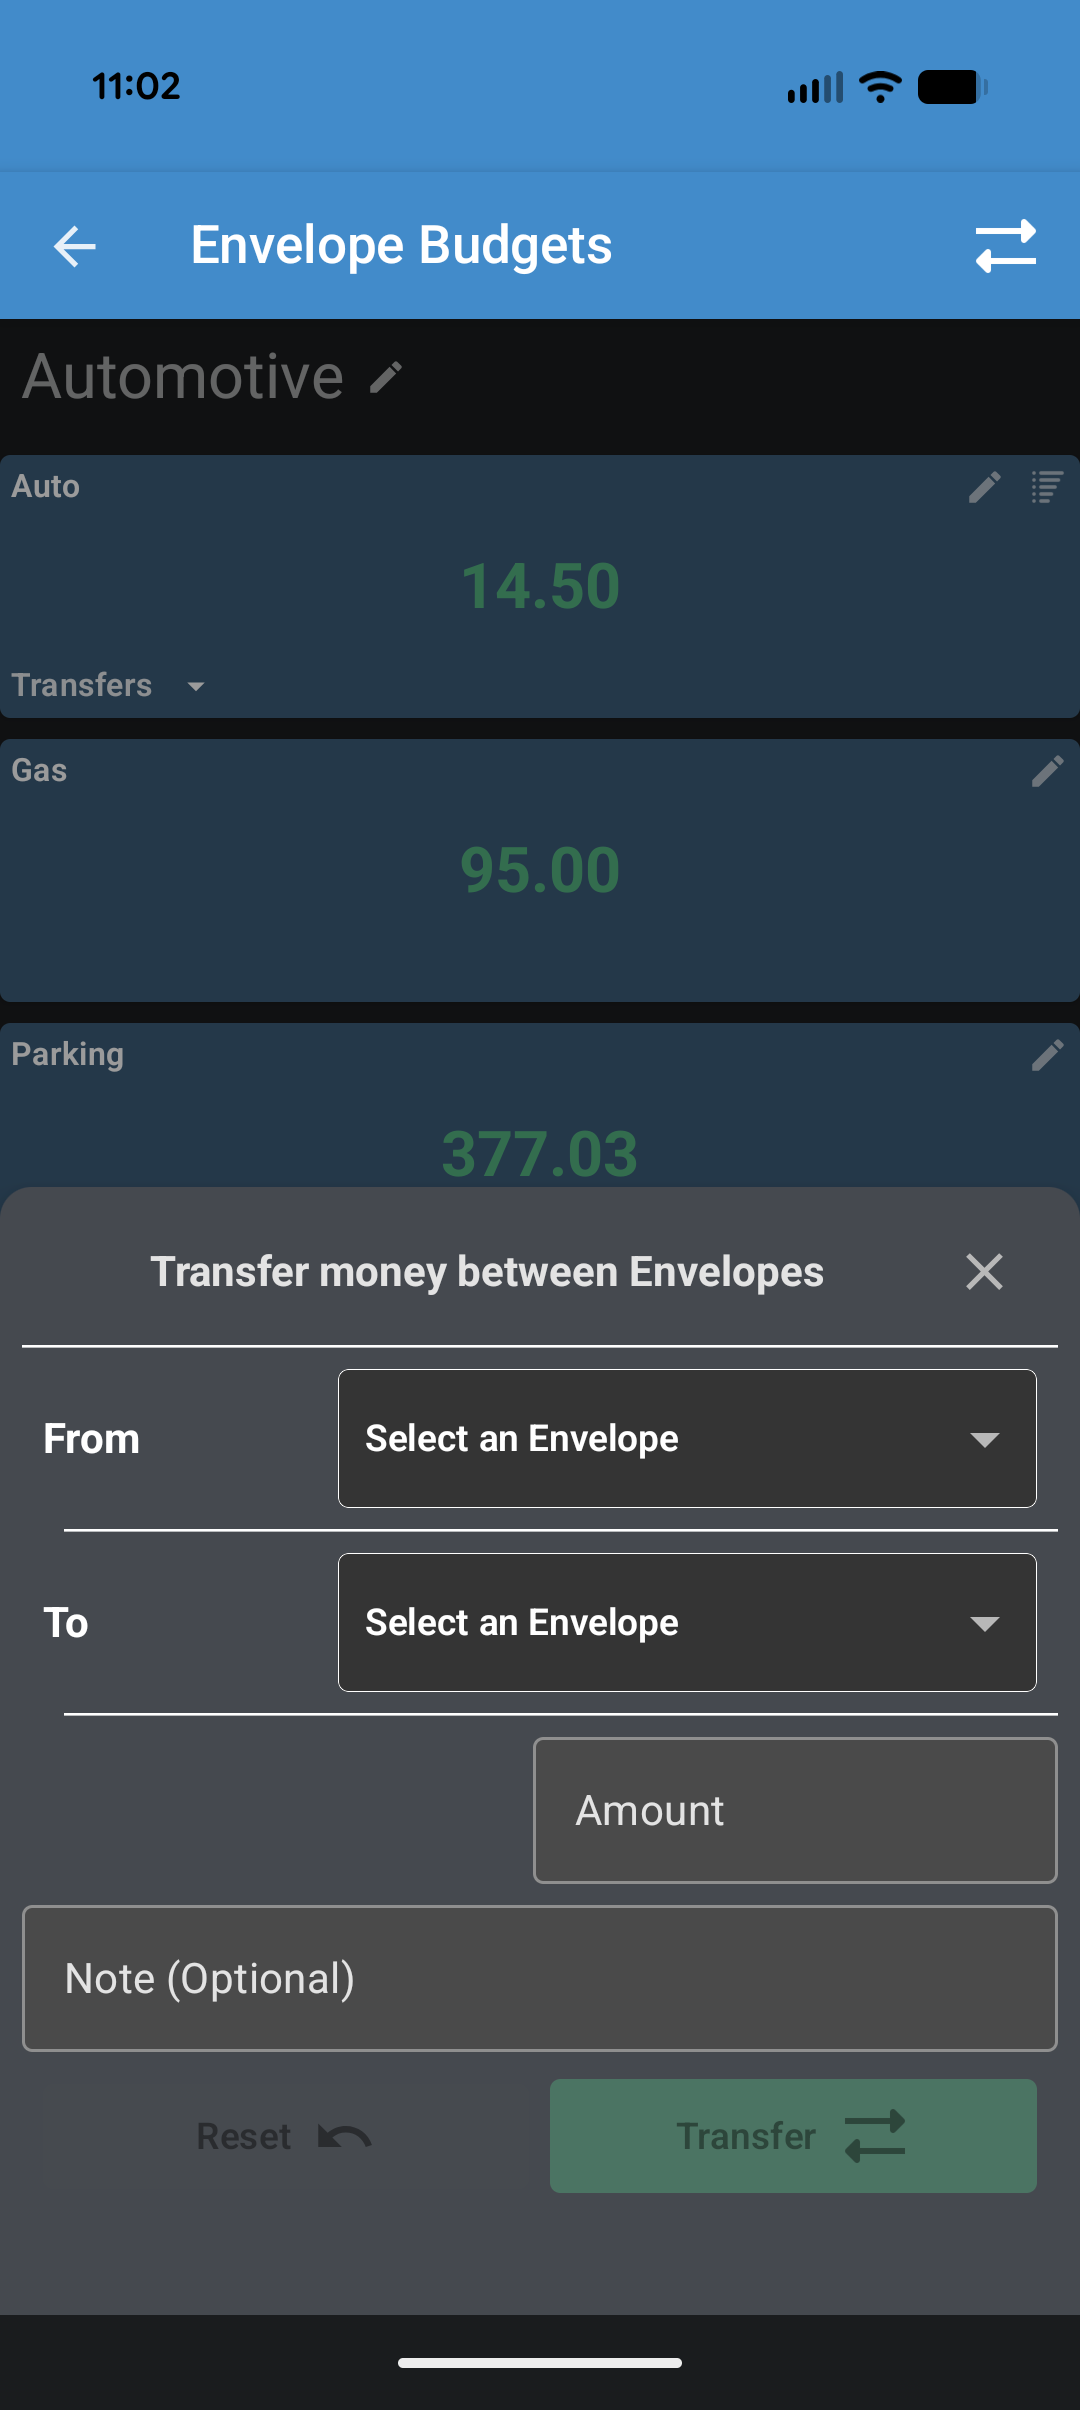
You can transfer funds between envelopes by clicking the transfer icon at the top right side of the screen. This will open the Transfer form where you can select which budgets you're transferring to and from as well as how much is being transferred.
The Spending Tracker will help you get a handle on your spending habits by showing your spending on a daily or weekly basis, breaking it down by account and/or category, and helping you quickly find problems so you can correct them early. You can find the Spending Tracker by navigating to the Budgets section of the app.

If you haven't set up the spending tracker yet, you'll be asked a few questions to get your tracker set up. This includes your yearly take-home amount, additional spending and a few options that affect the results.


Once you've set up the Spending Tracker, you'll see a list of various time frames and how your spending compares to the calculated budget. The budgets are calculated based on your take-home income, normal spending amounts as well as any additional spending you entered.

Clicking on any time frame will show a breakdown of your spending that's being calculated into the values.

After setting up the spending tracker, you can view tracking for Today and This Week directly from the Budgets page. Clicking on the tracker will open the entire list.

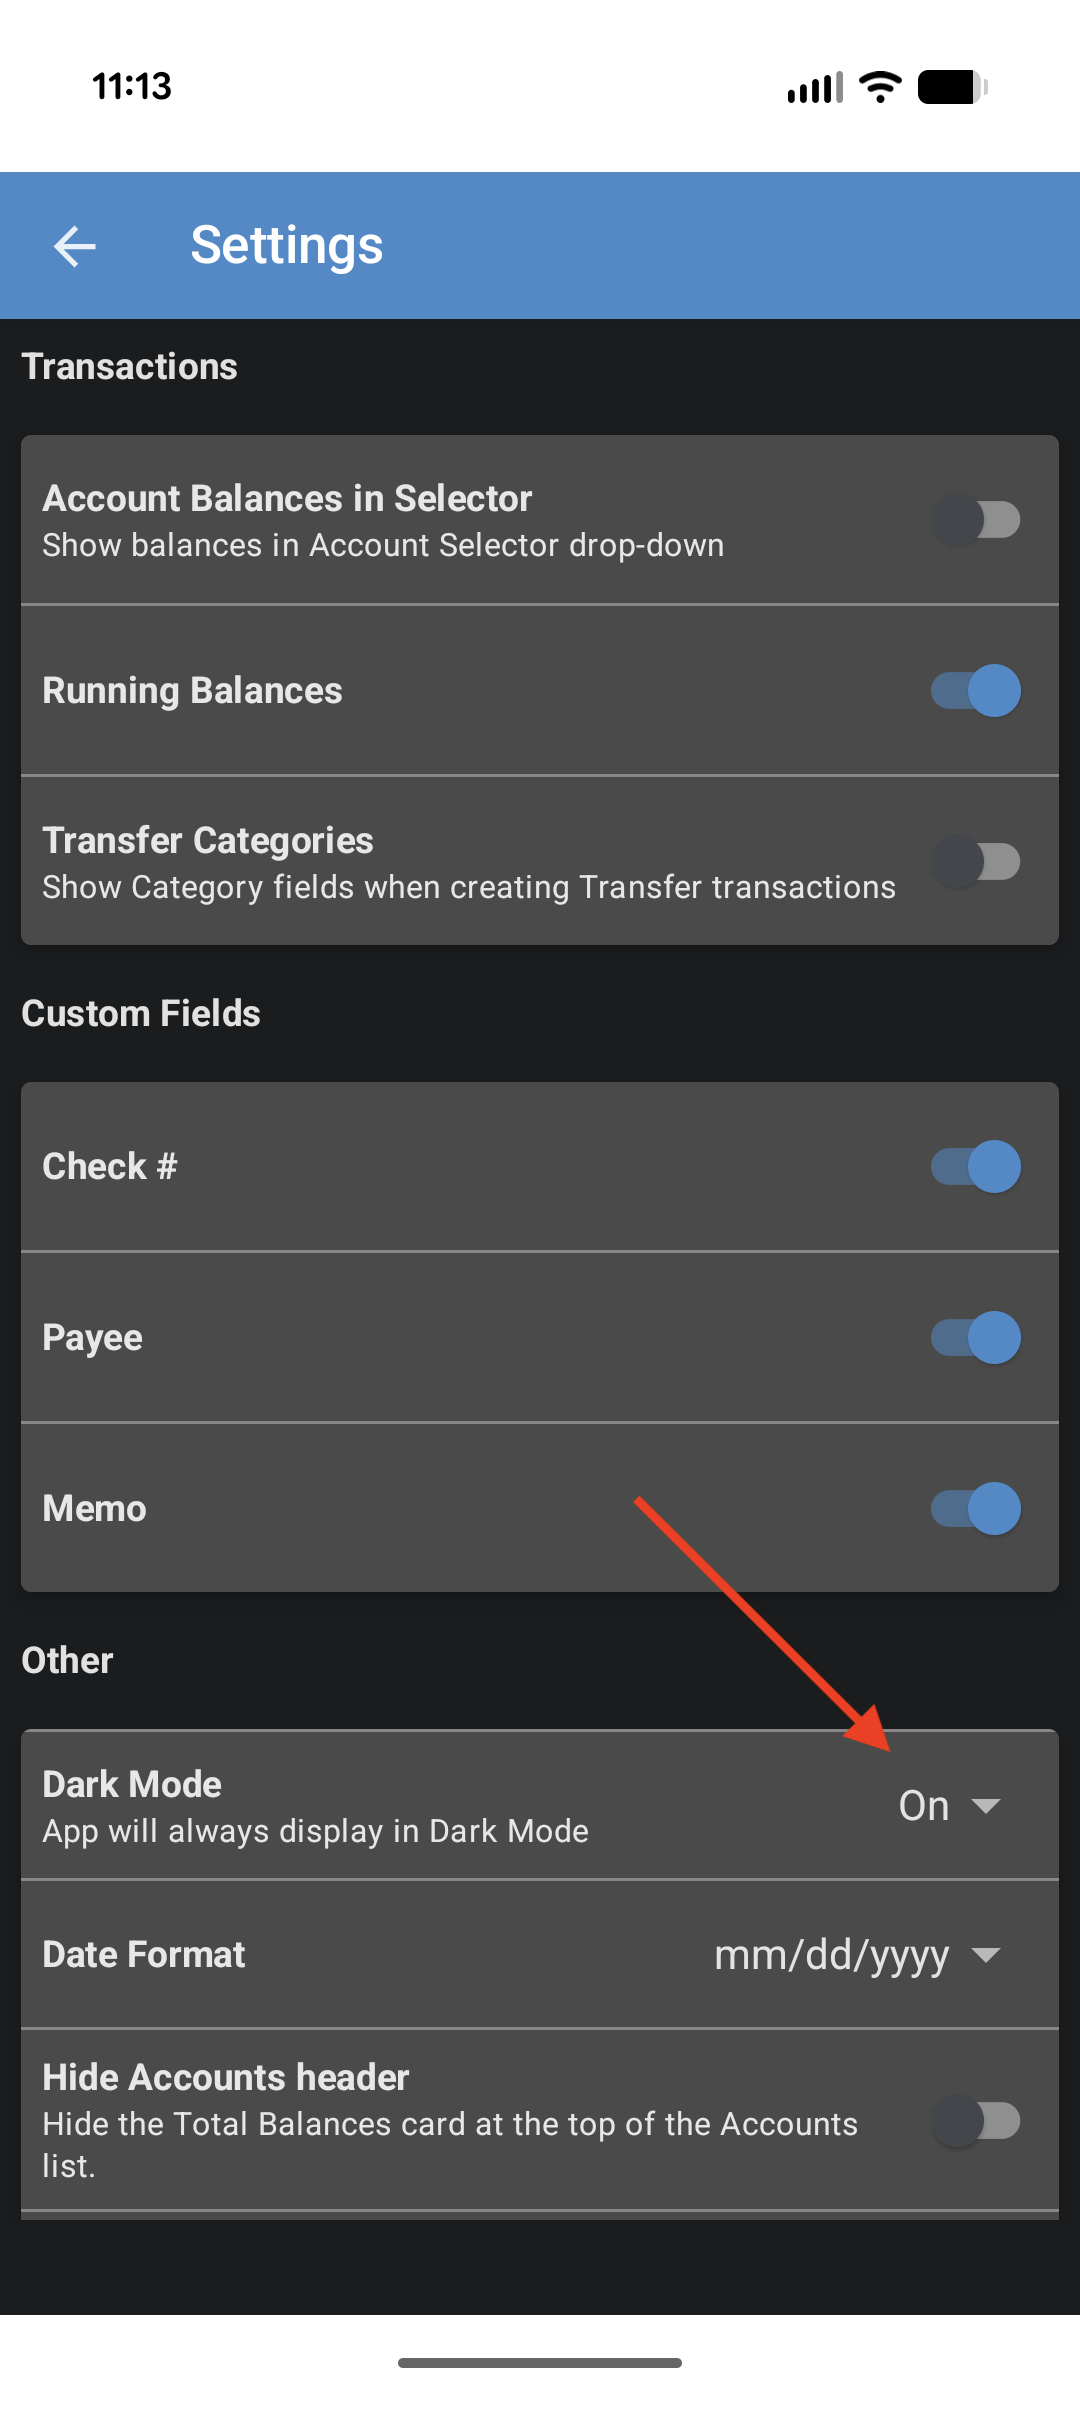
There's a dedicated dark mode which can be enabled in the More -> Settings page. Dark mode will make the app easier to use in low light situations by darkening many of the elements on the screen.
The dark mode options are Off (default), On and Auto. If you set dark mode to Auto, the app will use the dark mode setting on your phone to determine whether or not to use dark or light mode.

If you want to add a new account or edit or delete an existing account, you can do this by clicking on the at the top right side of the Account list.

Clicking on the green + button at the bottom right side of the screen will let you create a new account. Clicking on the pencil icon at the right side of an existing account will let you edit the details for it, while clicking the red trashcan icon will delete the account.

When you edit an account, you'll see a form similar to this one pop up with all of the details of your account. You can change any of the fields as needed. To save the changes, click the check mark icon at the top right side of the screen.

If you want to add a new category or edit or delete an existing category, you can do this by clicking on the Pencil button at the top right side of the Accounts screen and then click on the Manage Categories menu option.


Clicking on the green + button at the bottom right side of the screen will let you create a new category. Clicking on any existing category will let you edit the details for it or delete it.


Account Groups are a way to separate your accounts into various groups. Account Groups can be minimized on the Account Overviews screen if you have an account group that you don't use very often.
You can manage your Account Groups by clicking on the at the top right side of the Account list and then click on the Edit Account Groups button.

Next, click on the Edit Account Groups button to manage your Account Groups.

If you haven't already set up any Account Groups, you'll see a notification with some instructions on how to create one. To create a new Account Group, click on the + button at the bottom right side of the screen.

When you click the + button, a form will appear at the top of the page where you can enter the name of the Account Group and set whether or not you want the accounts associated with this group excluded from your overall balances.

In this example, we created a group called Credit Cards. We added our two credit cards to the group (explained below). Any accounts that haven't been assigned to a group yet will appear under the No Group section.

When you click on a group name, a form will appear where you can edit the group name and whether or not the group total should be excluded from the overall balances. You can also delete the group by clicking the Delete Group button. Deleting a group will not remove any accounts associated with that group. Any accounts associated with the group will simply be assigned to No Group.

You can assign an account to a group by clicking on an account and then selecting the group it should belong to. You can also drag an account to the group you want it to belong to.

Another way to assign an account to a group is in the normal Edit Account form. You can select which group the account should be assigned.

If you chose for a group to be excluded from the overall balances, that group will appear with a red eye icon next to it ().

After you've set up account groups and assigned an account to them, the groups will appear in your Account Overviews with each of the accounts belonging to that group shown below it.

To minimize a group, simply click on the group name and the group and associated accounts will be hidden from display.

Your security and privacy is very important to us. In order to keep your data as private as possible we provided a way to lock the app when it gets closed. To set up this security, click the More button at the bottom right side of the screen and then click on the Lock App menu option.

Depending on what kind of sensors and features your phone has, you can set up a biometric or face scan which is backed up with a PIN or you can simply set up a PIN. When the app is opened, rather than asking you to log in, you will be prompted to give your fingerprint, scan your face or enter your PIN.
You can disable the app lock at any time by clicking on the Lock App menu item and then following the instructions for disabling the lock.
The ClearCheckbook app gives you the option to sync all of your data from our servers to your phone. Having all of your data on your device will help improve auto-complete suggestions and make the search filter work better.
Depending on how many transactions, reminders, budgets and bills you have, your data might automatically download. You can re-sync your data at any time by clicking on the More button at the bottom right side of the page and then click on Re-Sync All Data.

If you have many years worth of transactions and a lot of reminders or bills, this syncing process could take up to a couple minutes. The app will show you the progress as it's downloading your data.
Note: Logging out of the app will delete all local data.
You can access and control the behavior of the app by clicking on the Settings link.

The settings are broken up into different sections and will change based on your ClearCheckbook Premium status.

Explanation of the settings:
| Setting | Description |
|---|---|
Account Balances in Selector |
When enabled, the Account selector when adding or editing transactions will show the account balances under the account name. Example of this option enabled. |
Running Balances1, 2 |
Enable or disable the running balances from showing up in the Transaction list. |
Check #1, 2 |
Enable or disable the check number field from the add/edit transaction forms and the transaction list. |
Payee1, 2 |
Enable or disable the payee field from the add/edit transaction forms and the transaction list. |
Memo1, 2 |
Enable or disable the memo field from the add/edit transaction forms and the transaction list. |
Dark Mode1 |
Set whether the app appears in light or dark mode. The options are Off (default), On and Auto. |
Date Format2 |
Select your preferred date format. The options are mm/dd/yyyy, dd/mm/yyyy and yyyy-mm-dd. By default, this setting is pulled from your chosen format on the website. |
Hide Accounts Header |
When turned on, the account balances will not appear at the top of the transaction list when viewing the transactions for an account. |
Dashboard1 |
Select whether you want the Account Dashboard enabled. The options are Off, and On. |
This is a permanent action and should only be clicked if you really want your ClearCheckbook login and all of your associated data permanently deleted. Again, this is PERMANENT and cannot be undone.
You can find this option by by clicking on the More button at the bottom right side of the page and then click on Delete ClearCheckbook Login.

When clicked, a screen will appear telling you exactly what is about to happen. From here, you have the option to cancel or continue.

Continuing the deletion process requires you to enter your login password to confirm this is what you want to do. You can still back out by clicking the back button or using your gestures to swipe back.

Note: Having this option is a requirement put in place by Google for any apps that contain login data.
If you're a ClearCheckbook Premium member, you will get some additional features on the app.
We offer a specific ClearCheckbook Mobile Premium upgrade for a one time $4.99 in-app purchase. This upgrade will give you access to all of the premium features whenever you're signed into your account on the ClearCheckbook app. You can find the upgrade button by clicking on More at the bottom right side of the screen. The upgrade link will be below your login information. Note: The Mobile Premium upgrade only provides premium features on the app, not on the website.
Running balances will appear below every transaction that shows how the current transaction affects your overall balance at that point in time.

Any custom transaction fields (check number, memo or payee) that you have enabled will also appear when adding, viewing and editing transactions in the app.

You can tell if your account has been upgraded to ClearCheckbook Premium if it says Premium Member under your login details in the More page.

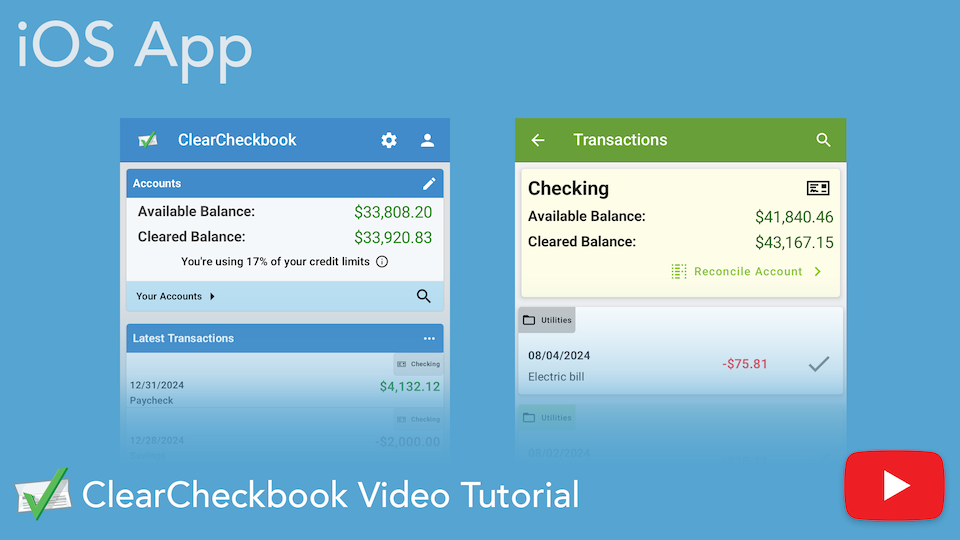
Learn how to navigate and make the most of the ClearCheckbook iOS app with this quick walkthrough. The video highlights key features like transaction management, budgeting, bill tracking, and more to help you stay on top of your finances from your mobile device.
Direct link to YouTube