If you're having trouble connecting your bank to ClearCheckbook, it might be a problem with the financial institution or the API. Some common connection errors can be found on Plaid's website.
We are able to retrieve a maximum of 24 months worth of data, when available. If you have more than 24 months of data in your bank account, we will create a starting balance that makes up the difference.
New transactions typically sync once per day, although some financial institutions send updates several times per day, while others may take a few days to process. You can find information about the last sync by hovering over the icon in your account overviews or by hovering over the Connected and syncing transactions text under your account in the Settings -> Accounts management page.
We do! Learn how to connect your bank to ClearCheckbook and automatically sync transactions using Plaid. This video covers setting up connections, managing sync settings, categorization tools, and handling duplicates between manual and synced entries.
Before explaining the various connection methods, you need to choose which one fits your needs. This section will help you decide which method to use by answering a few questions.
Question 1: Have you already created the account in ClearCheckbook?
If you see the account in your Accounts list, this would be considered an existing account and you would answer Yes to this question.
If the answer is No, follow the instructions in the Connecting new accounts section below.
If the answer is Yes, continue to Question 2.
Question 2: Do you already have any other accounts connected to the same institution?
An institution refers to a bank, credit union, credit card comapny, etc. If you want to authorize more accounts with an institution you already have a connection with, you'll want to answer Yes.
If the answer is No, follow the instructions in the Connecting existing account section below, focusing on the New Institution block.
If the answer is Yes, follow the instructions in the Connecting existing account section below, focusing on the Existing Institution block.
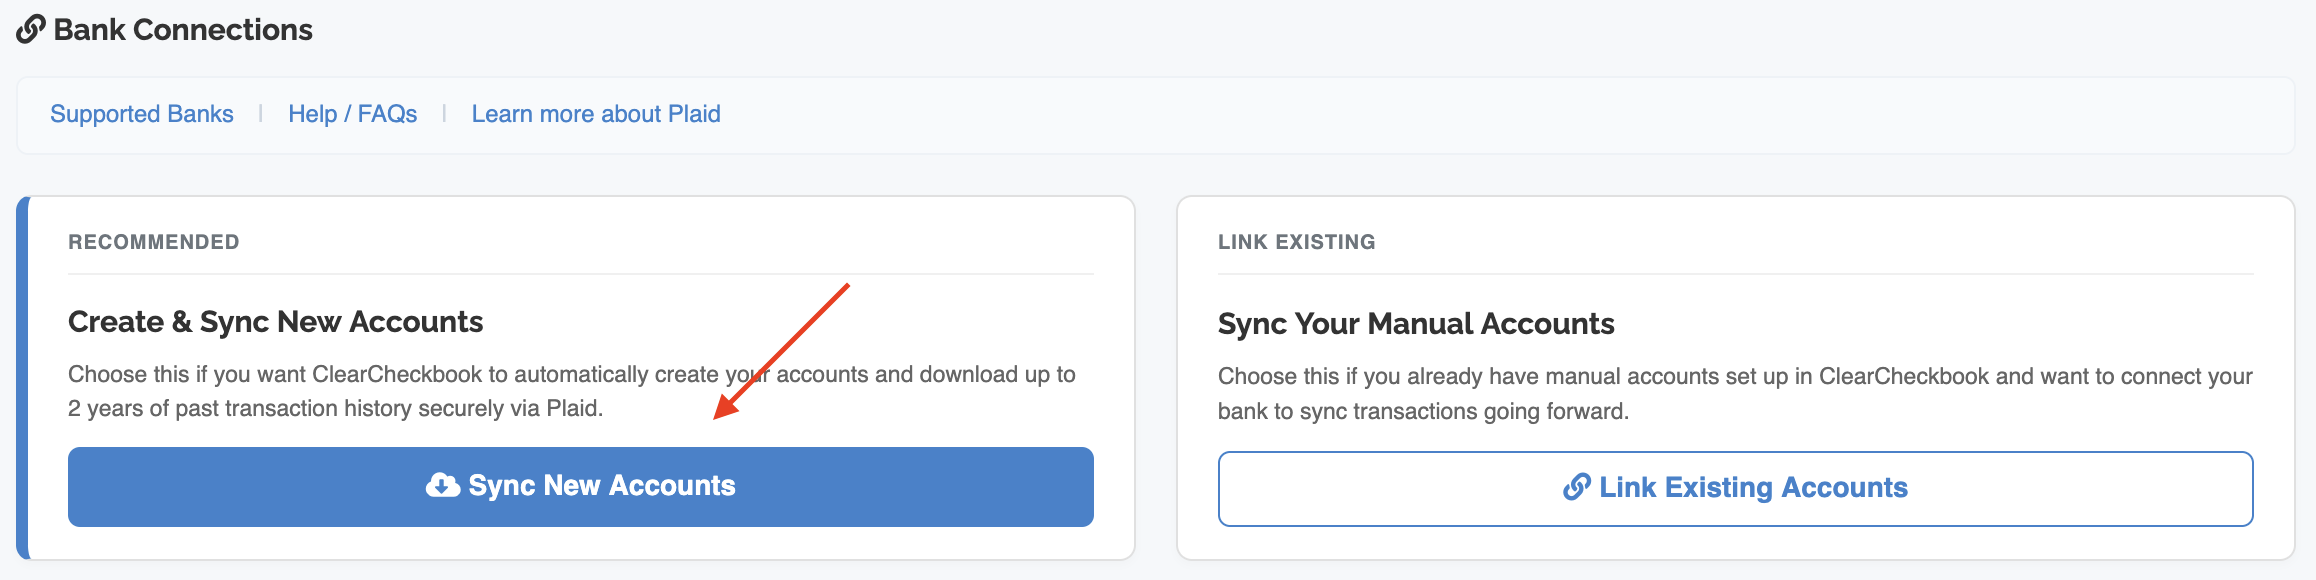
This section explains how you can connect to a bank and have the selected accounts created at the same time. If you haven't already added the account(s) in ClearCheckbook, click the Sync a Bank Account button in the Create Account form, or as Option 1 in the Bank Connections section.
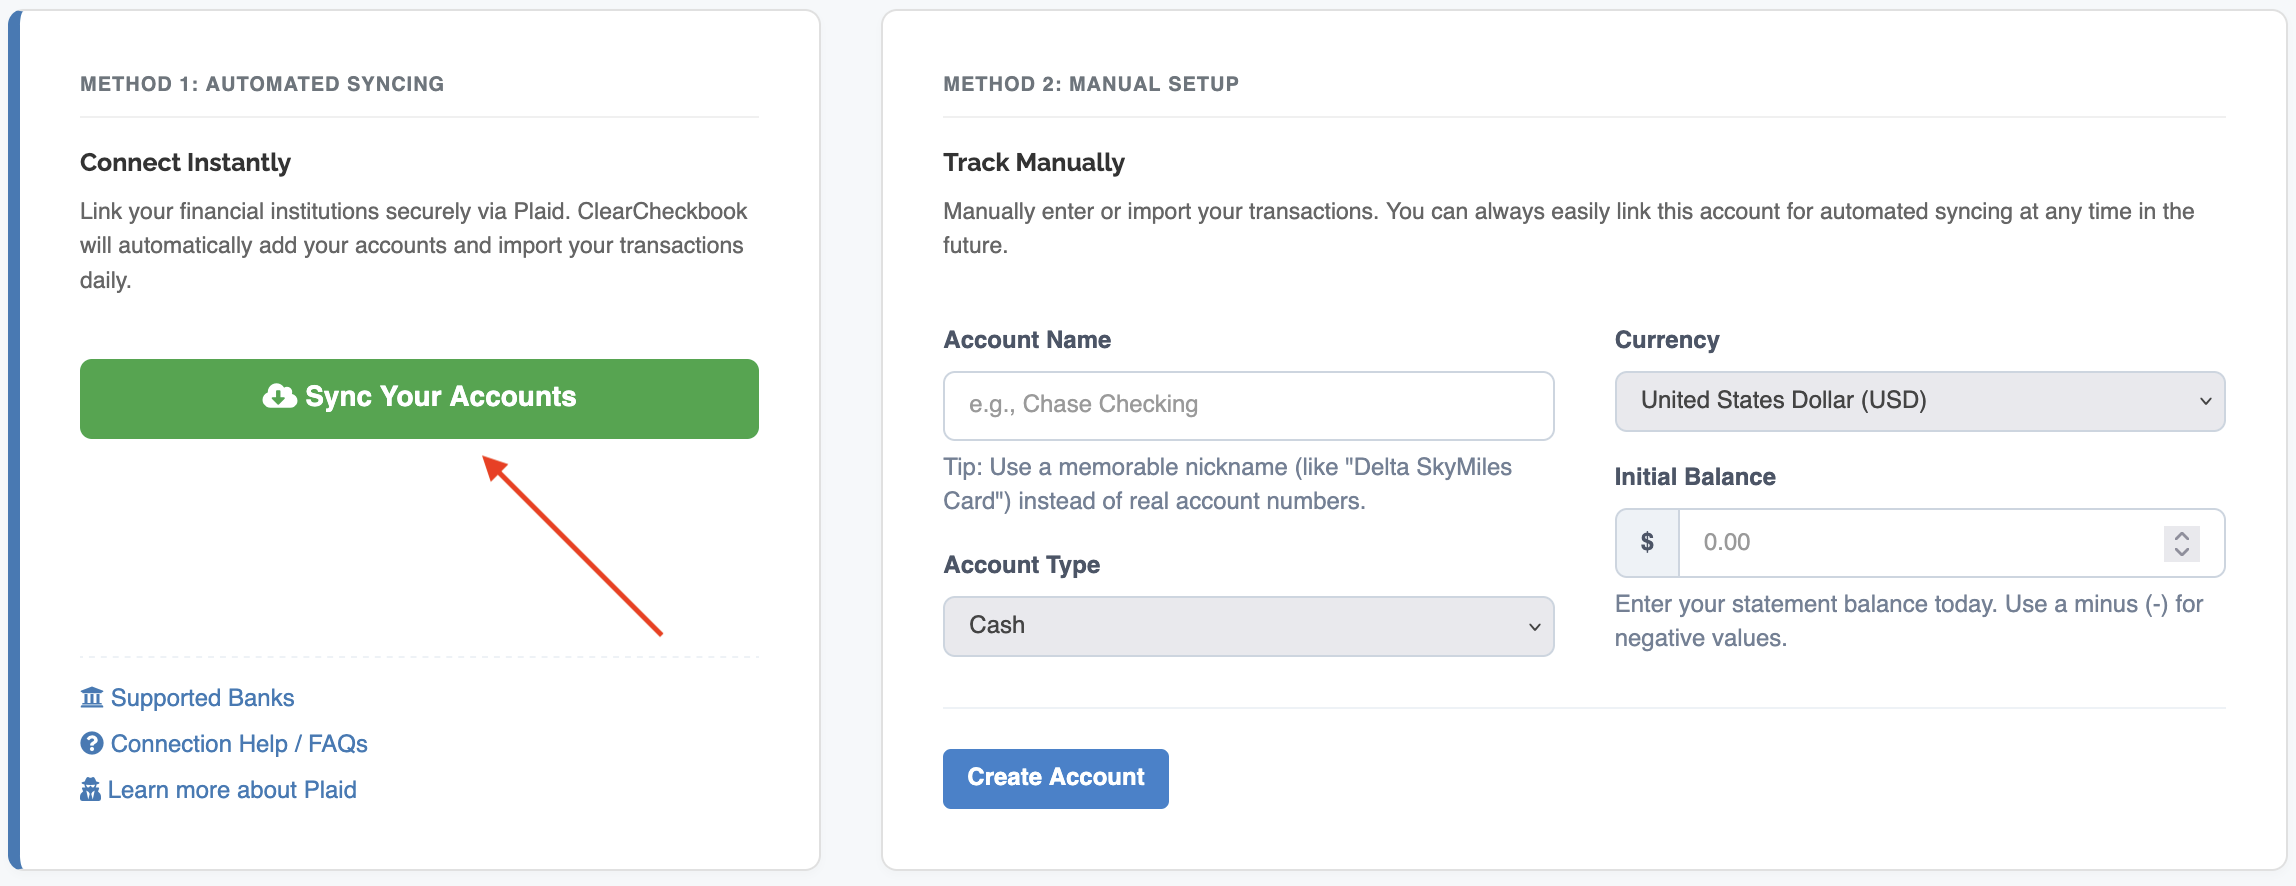
Clicking the Sync a Bank Account button will launch the connection process. Once you complete the process, any accounts you authorized will be added to ClearCheckbook and your transaction history will start to download as soon as it's available.
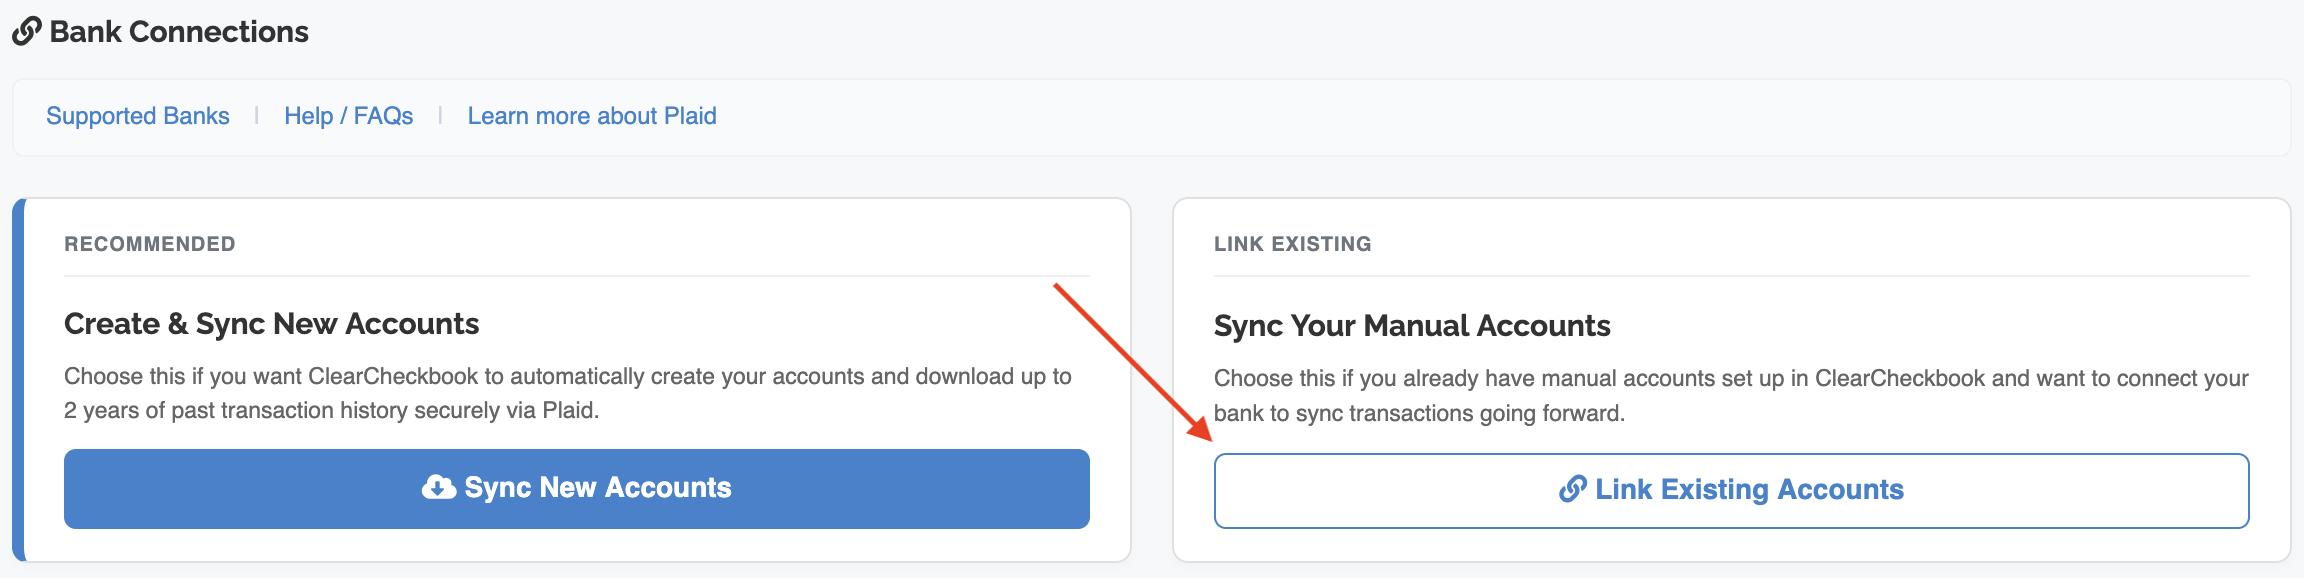
If you've already set up and have been adding transactions to an account within ClearCheckbook, you can still connect it to your bank. This is a two step process where you first need to authorize a new bank connection and then pair the authorized account with an existing ClearCheckbook account.
When it comes time to make a connection to your bank and authorize accounts, you have two choices. If you haven't connected to this institution before, follow the New Institution instructions. If you already have a connection to this institution and need to update which accounts are authorized, follow the Existing Institution instructions.
New Institution:
If you don't have a connection to this institution, this will be a new institution connection. An institution refers to a bank, credit union, credit card comapny, etc.
The first thing you need to do is create a new bank connection and select which accounts ClearCheckbook can have access to. To do this, find the Bank Connections section in the Account Settings and then click the Authorize New Bank button next to Option 2.
If you want to connect additional accounts to an institution that you've already made a connection with, this will be an existing institution connection. An institution refers to a bank, credit union, credit card comapny, etc.
If you need to authorize additional accounts at an institution that's already connected to ClearCheckbook, you can click the Update authorized accounts link next to the bank name in the Bank Connections section.
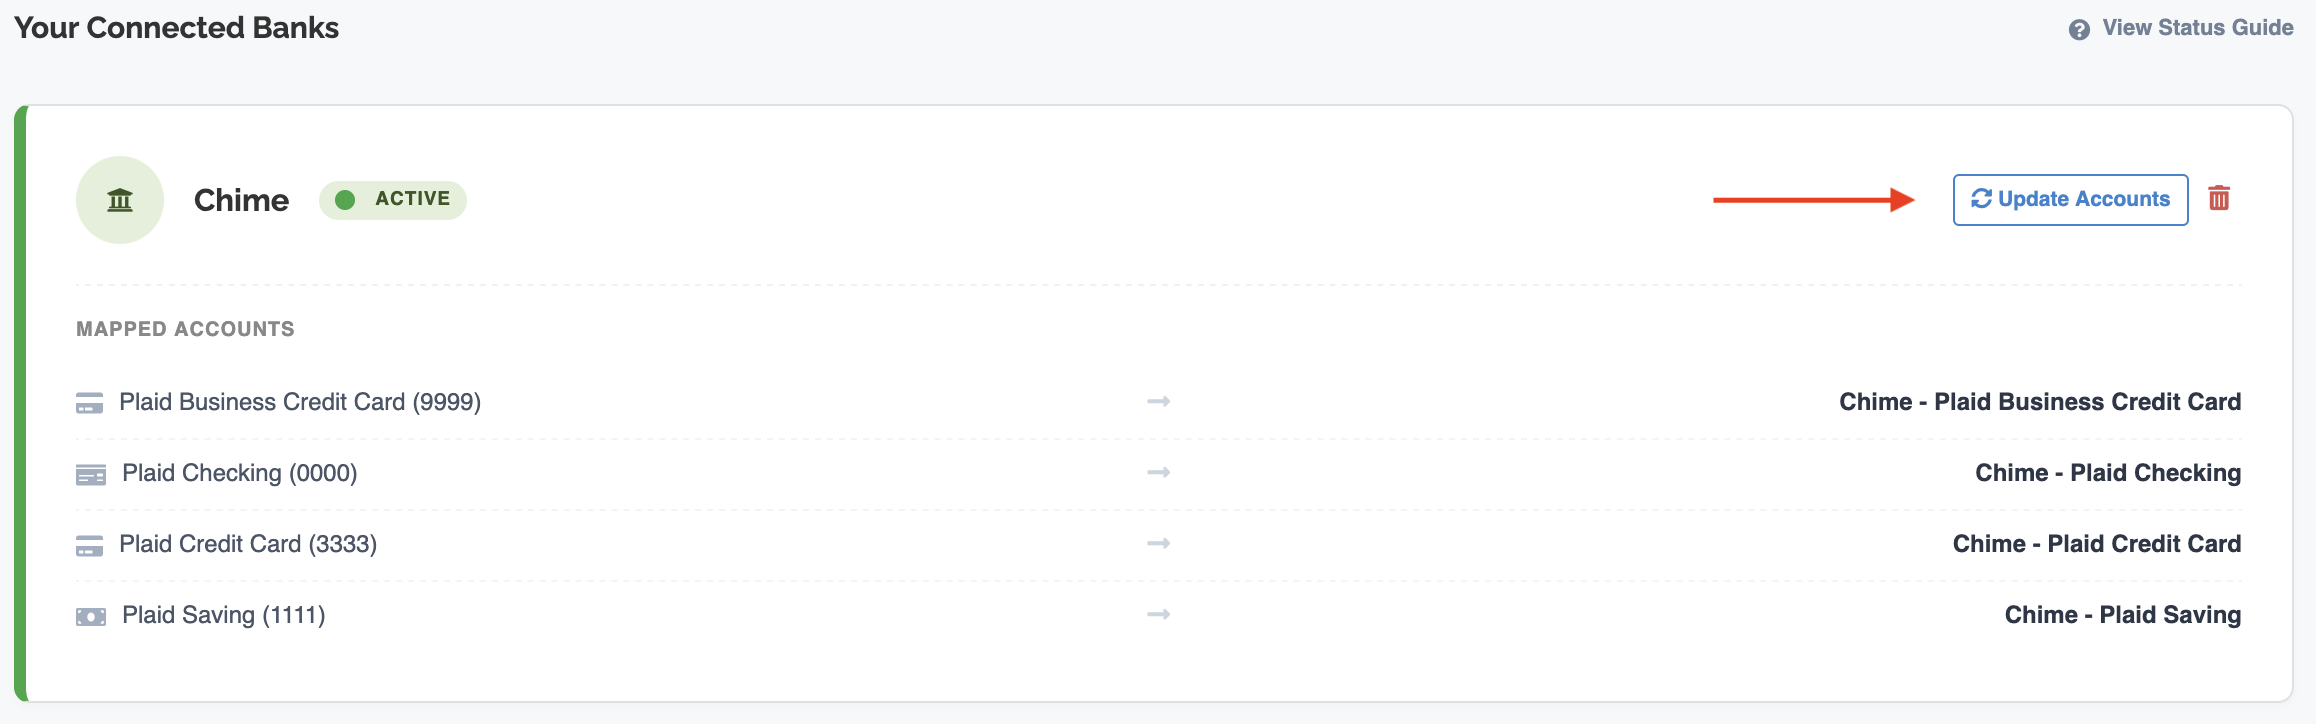
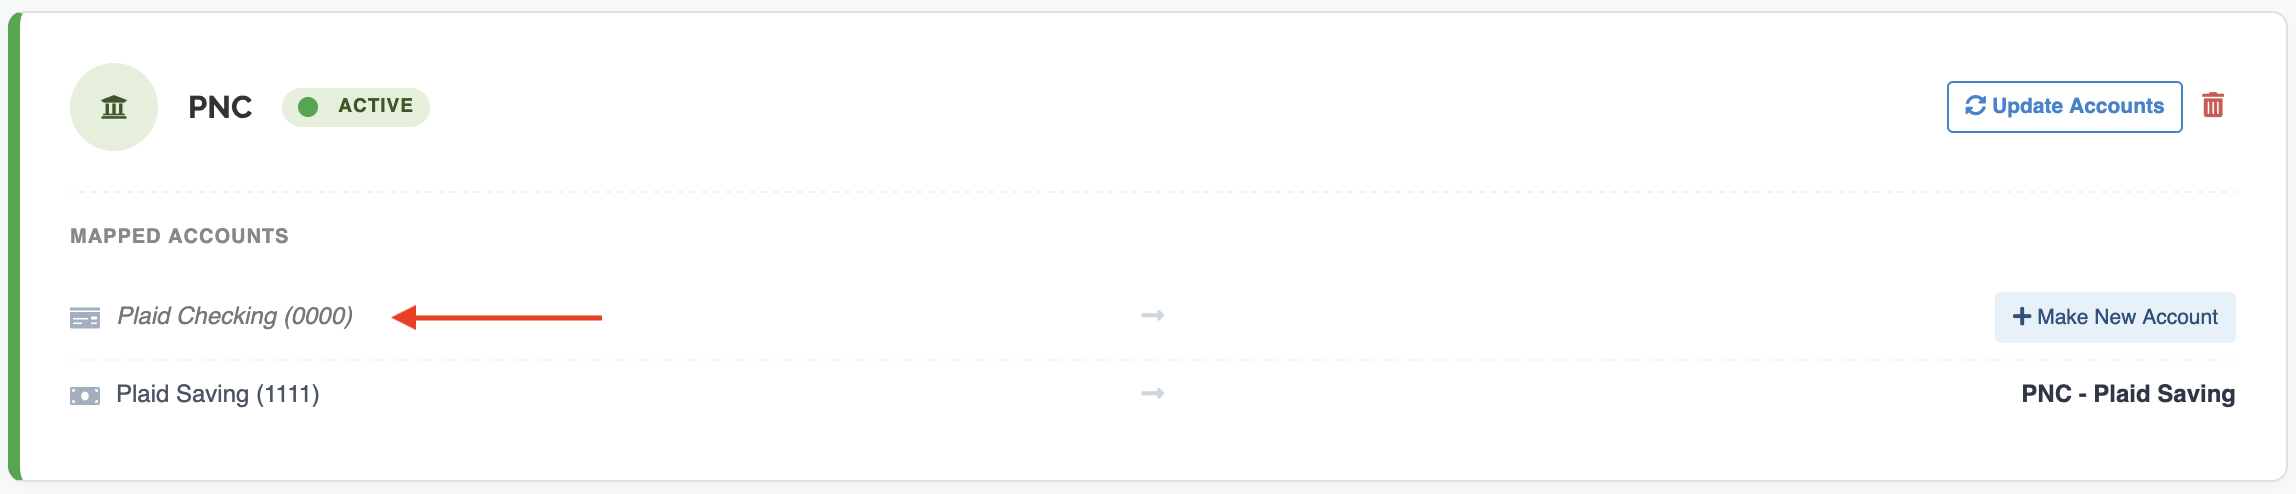
After authorizing account(s), they will appear in the Bank Connections section. The name of the bank, the authorized accounts and their paired ClearCheckbook accounts will show up. If the authorized accounts haven't been paired to a ClearCheckbook account, they'll appear grey and italicized.
As stated above, if you need to authorize more accounts at an already connected bank, you can click the Update Authorized Accounts link next to the bank name.
After you have authorized an account using Step 1: Connecting your bank above, you'll need to pair the authorized accounts with their ClearCheckbook counterparts. If you skip this step, your transactions will not download since they aren't associated with a ClearCheckbook account.
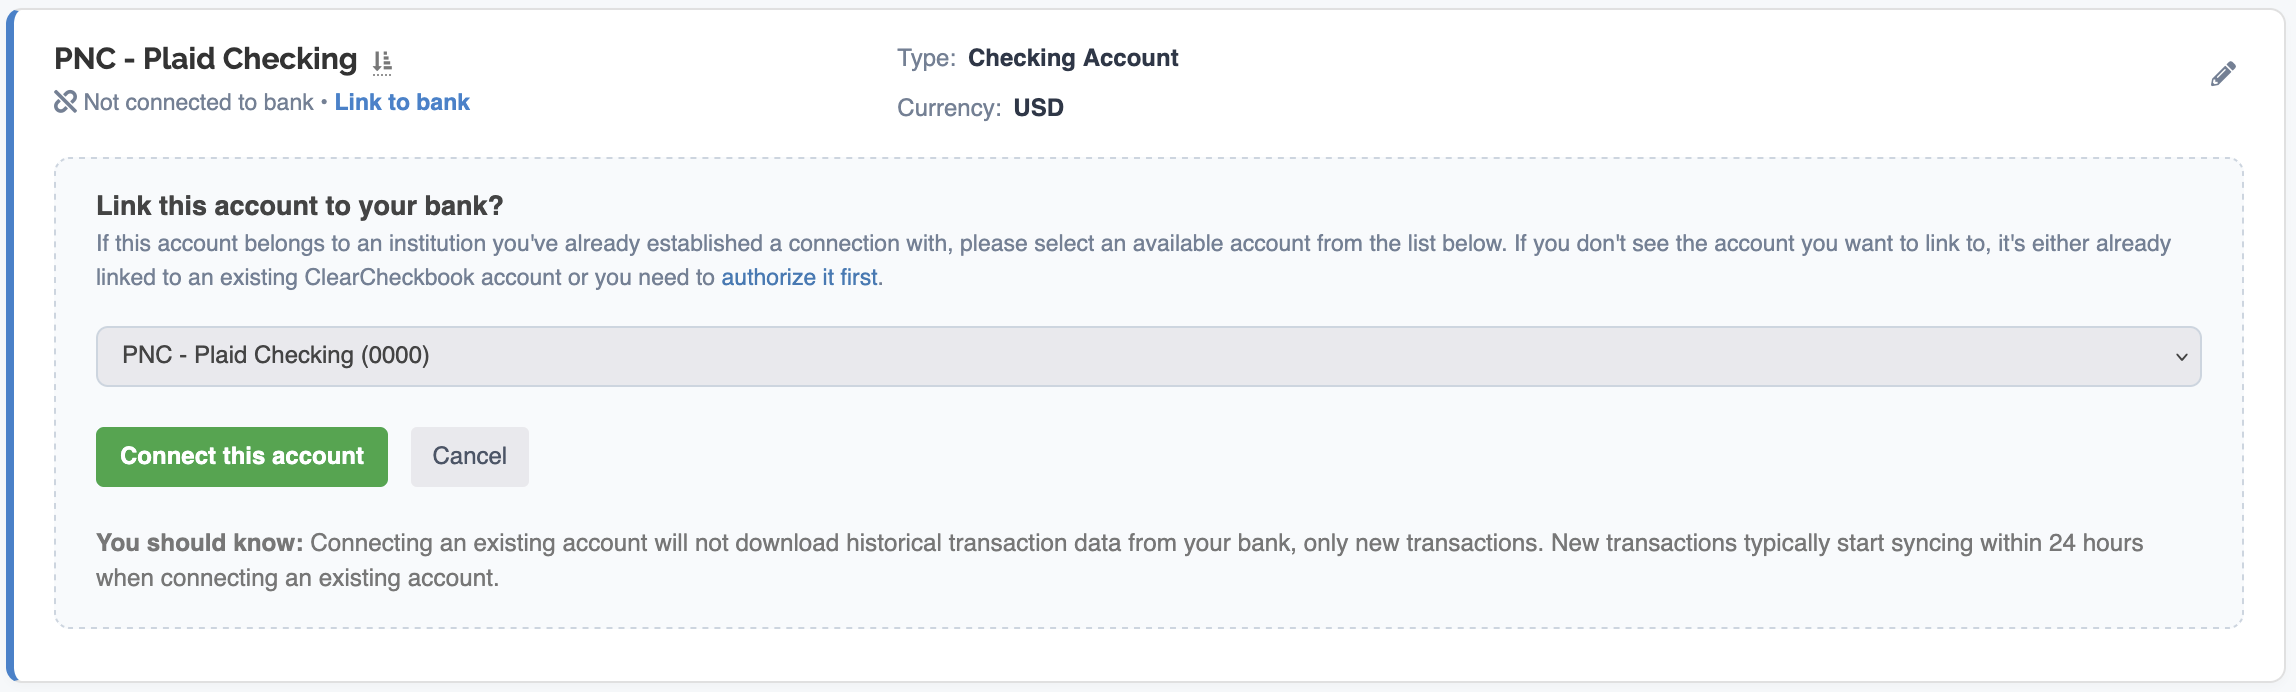
To pair an existing ClearCheckbook account with an authorized account, click on the Link to bank link under the ClearCheckbook account you want to pair with an authorized account. This will open a form where you can select an unpaired account. Once you select an authorized account from the drop down list, click the Connect this account button to complete the process.
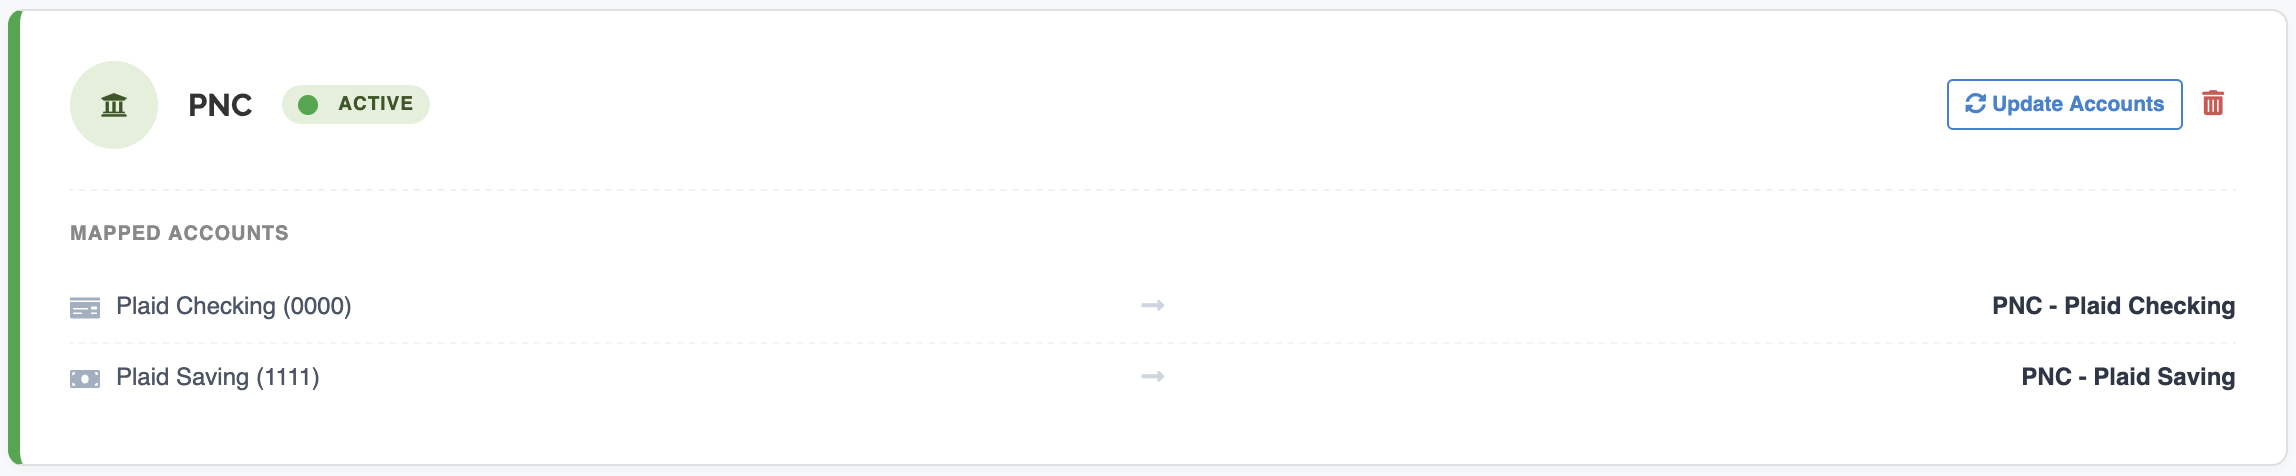
Once you pair a ClearCheckbook account and an authorized account, the account in the Accounts List will update and the information in the Bank Connections section will show this new pairing.
When you initiate a connection for a new or existing account, the process for establishing a connection with your bank is the same and is explained below. This process is handled securely by Plaid.
The first screen you see lets you know the connection process is about to begin.

The next screen is where you choose the financial institution you want to connect with.

Next, enter your login details for that financial institution. Note: Some institutions will launch a new window to their own website where you can enter your login details and authorize ClearCheckbook to access your accounts.

Finally, select the account(s) you want to give ClearCheckbook access to and click the Continue button.

After selecting which accounts to authorize, you will be redirected back to ClearCheckbook. What happens next will depend on how you opened the connection process. More information on the different results are detailed here:
| Reason for connection | What this does | Result |
|---|---|---|
| Adding new account(s) through the Create Account form | This creates a new connection between a bank and ClearCheckbook | New ClearCheckbook accounts are created for all authorized accounts for this new connection. The account(s) have been given default names and the transactions for those account(s) are starting to download. |
| Authorizing a new bank connection from the Bank Connections section | This creates a new connection between a bank and ClearCheckbook | Authorized accounts you selected are available for pairing to existing ClearCheckbook accounts. Transactions will not start syncing until an authorized account has been paired to a ClearCheckbook account. More info here. |
| Updating authorized accounts | Changing which accounts ClearCheckbook has access to at a specific bank | If you open a new account at an existing bank, you can update the account authorizations so ClearCheckbook gets access to it. You'll still need to pair any newly authorized accounts to their ClearCheckbook counterparts before any transactions start syncing. More info here. |
| Fixing a connection error | Your bank connection encountered an error | The connection has been fixed and your transactions will resume syncing again |
You will see different messages depending on the status of the account in question. The table below explains what each status means and any actions that need to be done.
| Status | Meaning | Required Action |
|---|---|---|
Connected and syncing transactions |
The account is connected to your bank and recieving transactions. You can hover over the text for details of the last sync. | No action needed |
Connection failed - Reauthentication needed |
The login details of your account have changed (credentials, MFA, or required user action) and a reauthentication is required to fix the connection. | Click on the Fix Connection link to reauthenticate the connection to your bank. |
Link to bank |
The account is not linked to any banks. | To link this account, click the Link to bank link. |
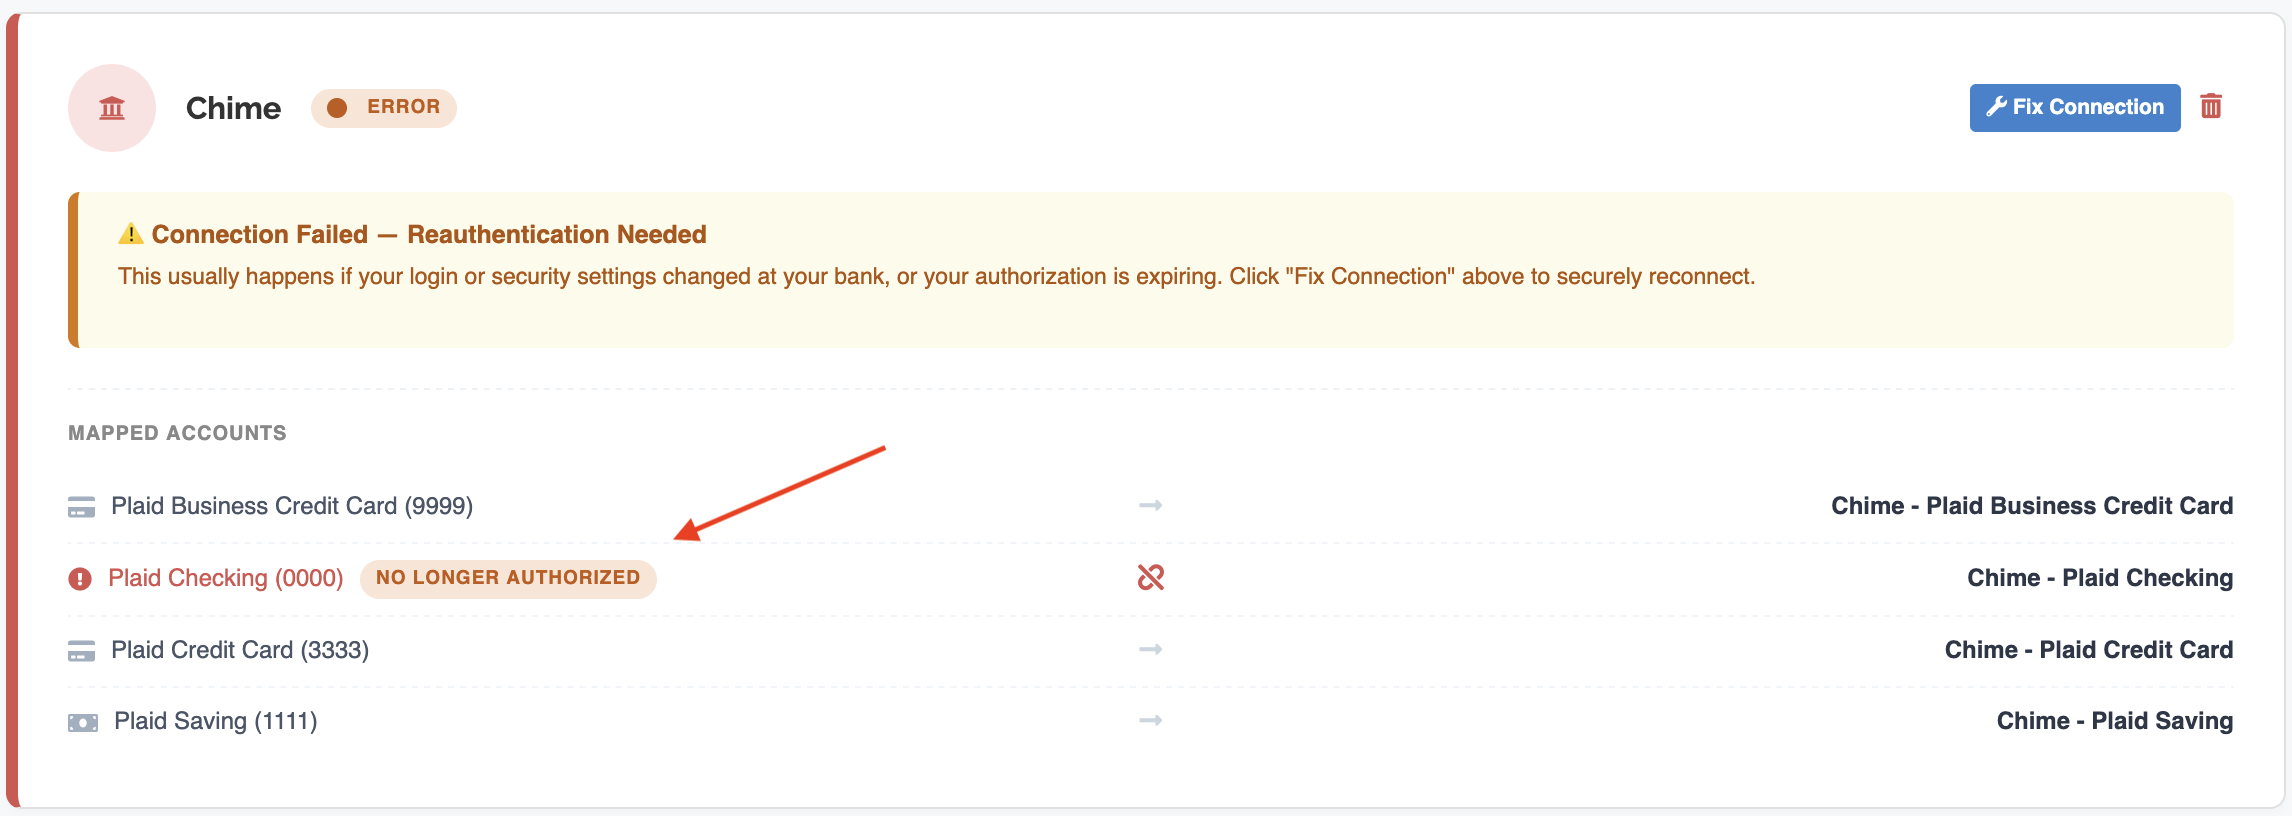
There are times when a connection to your bank will fail and you'll need to reauthenticate with your bank in order to restore the connection. To fix a broken connection, go to the Bank Connections section in the Settings Manage Accounts page. Find the account with a broken connection and then click the Fix Connection link. This will open a dialog where you reauthenticate with your bank.

For your security, some banks routinely require you to re-verify your connection every few months. When this happens, accounts that were previously authorized may lose that authorization and stop syncing with ClearCheckbook.
When we detect a previously authorized account has lost its authorization, we put up an alert for that account in the Bank Connections section of the Account Settings.
Option 1: Unpairing a ClearCheckbook account with an authorized account.
You can unpair a ClearCheckbook account from an authorized bank account at any time by going to the Settings -> Manage Accounts page and clicking the Unlink link under any connected account. This will prevent any more transactions from syncing to this ClearCheckbook account but will not completely remove the bank connection.

Option 2: Removing an entire bank connection.
If you want to completely remove a bank connection from ClearCheckbook, you can do that from the Settings Manage Bank Connections section by clicking the Remove Connection link next to the bank name.
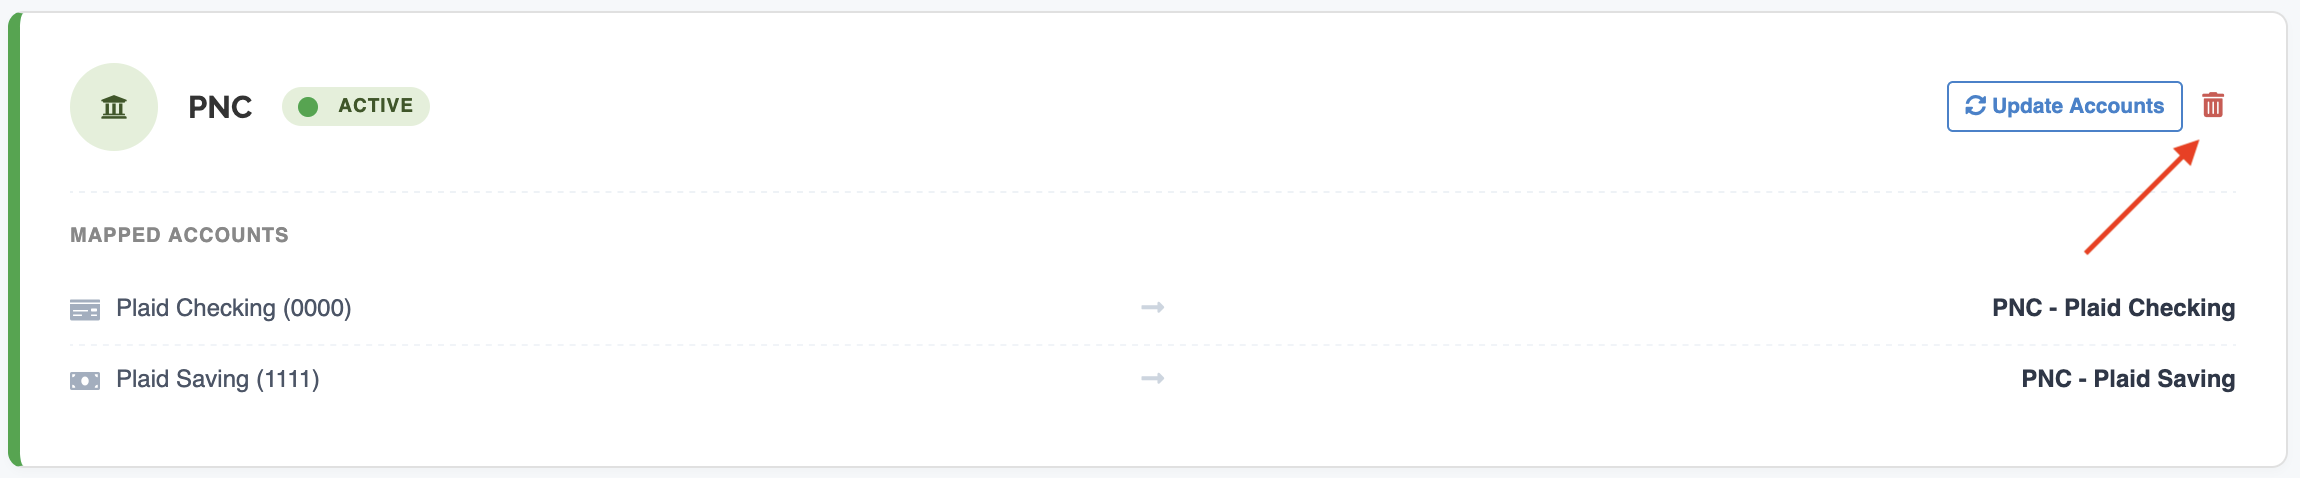
Removing a bank connection will stop transaction syncing for any and all accounts belonging to that bank.
Depending on how you connect your account, you may not receive any historical transactions automatically downloaded for it. In that case, we will store the transaction history in a separate area where you can decide if you want to transfer it to your account or not. If an account has transaction history associated with it which can be added to your register, there will be a small icon next to the Authorized Account name in the Bank Connections section.
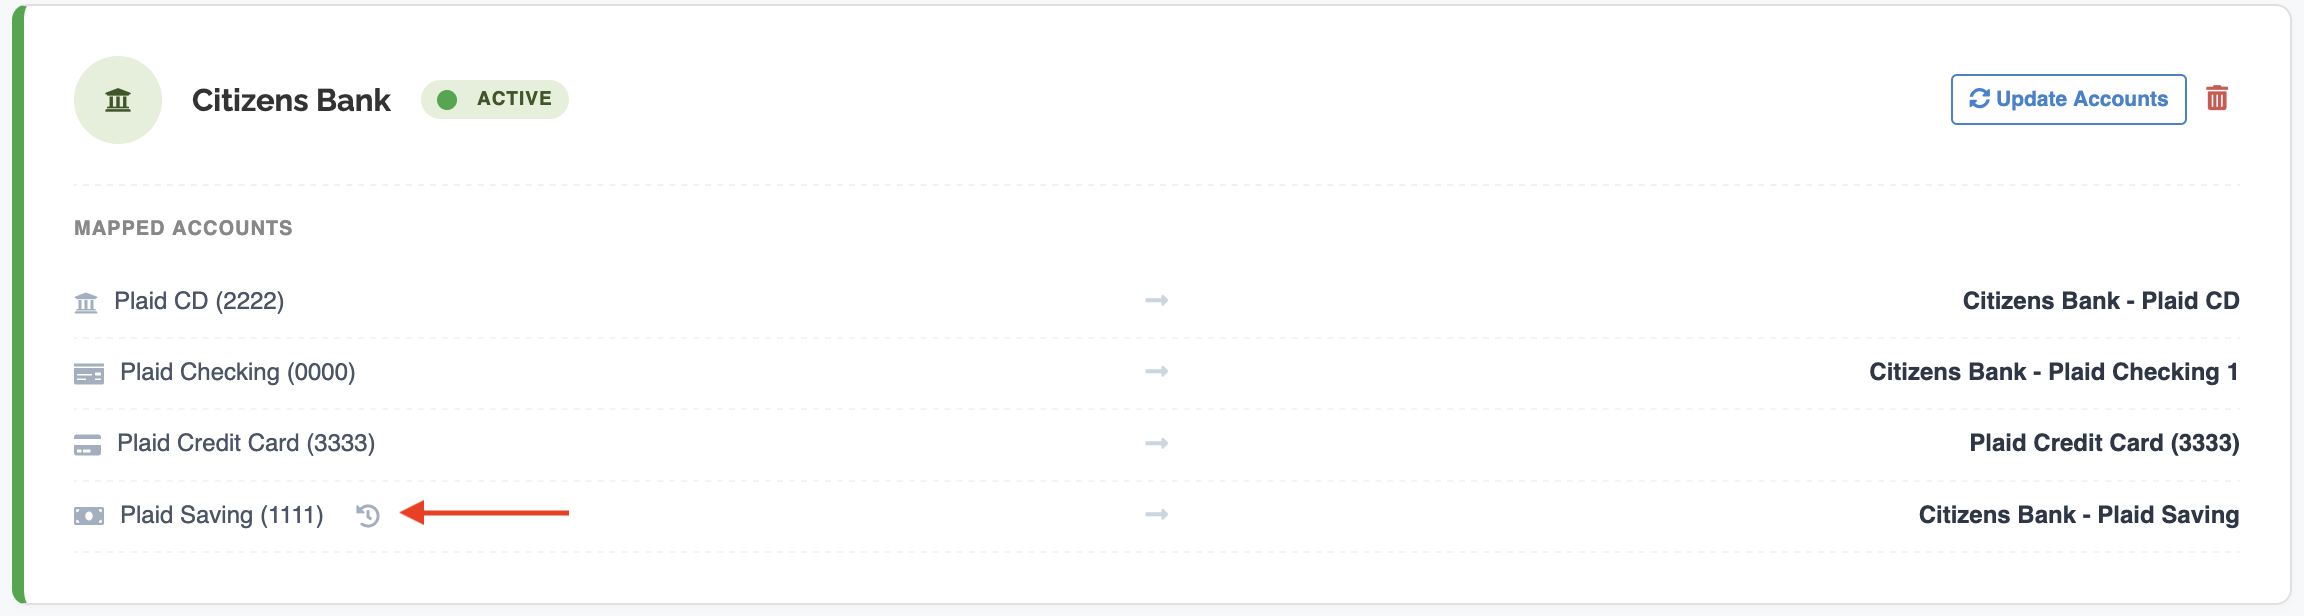
Clicking on the history icon will load an information box that tells you how many historical transactions are being saved and are available for transferring into your account. Click the blue View Transactions button to view the historical transactions.

When you view the list of saved historical transactions that are available for tranferring to your account, you have four options to handle them. You can choose to add all of the historical transactions, just the ones you select, delete all the historical transactions or delete selected historical transactions. If the transaction history is for an authorized account that doesn't have a paired ClearCheckbook account, an account will be created for you when adding the transaction history.

If you click the Make New Account in ClearCheckbook link from the Paired ClearCheckbook Account column in the Bank Connections section for an account that has saved history, that history will be automatically transferred to the newly created account.
The first thing you should do if your transactions haven't synced in a few days is make sure your connection is still active. You can check the connection statuses from the Account Settings page. If a connection is broken, you'll need to repair it before transactions will resume syncing. More information on connection statuses can be found here: Connection Statuses
Most institutions will send new transaction data once every 24 hours on business days. Some institutions will send more frequently and others less so. If it hasn't been more than a business day since your last transaction sync occurred, please be patient and see if new transactions sync during the next business day.
We rely on Plaid to handle the retrieval and processing of your transactions. This is a one-way street where they send us a notification that the transactions are ready and then we download them. There isn't currently a way for ClearCheckbook to force Plaid to retrieve and process transactions outside of their schedule.
All downloaded transactions come pre-categorized and we apply those categories to the transaction by default. If a category doesn't already exist in your categories list, the category will be created automatically. While the automatic categories applied to the transactions are usually pretty accurate, you may want more control over how your transactions are categorized.
If the pre-assigned categories aren't meeting your needs or you'd prefer to use categories you've already established, there are a few methods to handle this:
Use pre-assigned categories?. When turned off, transactions won't have any categories assigned to them. You can then set up keyword matching and category replacement (more on that below), or manually update the categories after the transactions have synced.If you want your synced transactions to be assigned to categories of your choosing, you can use our Keyword Matching and Replacement tool, as mentioned in point #2 above. This tool gives you a way to identify a keyword in a synced transaction description and assign it to a category of your choice. For example, if you regularly buy groceries at Kroger, you can add a match that searches for kroger in the description text and then have the system apply the category Groceries.
There isn't a limit to the number of matches you can set up, so you can create as many as you need to cover all of your various transactions. Another option you have with each match is to automatically replace the text. For example, if you regularly shop at Costco, the description text may appear as COSTCO WHSE #1016 ALBUQUERQUE NM 87114 US. Using text replacement, you can set the match to find the word costco and replace the description text with Costco Wholesale. This makes your transaction register a little easier to read.
If you already had transactions sync over before setting up your keyword matching and replacements, you can still apply the matches to those transactions after the fact. To do this, set up some keyword matches and then click the blue Run Matches button below your matching list. If you don't see the button, you can refresh the page to make it show up.

Run Matches button to apply matches to previously synced transactions.After you click the button, the system will go through all of your previously synced transactions and run them through the keyword matches you set up.