You can auto-clear your transactions by uploading a CSV, QIF, OFX or QFX file that contains cleared transactions from your bank. We'll then search the transactions you've entered and clear any that match. After uploading a valid file, you will be prompted with some more options to make transaction matching easier.
You can find the Auto-Clear tool by clicking on Tools at the top of the page, then click on the Auto-Clear link.The Auto-Clear process follows a very similar flow to the Import Transactions tool.
The first thing you need to do is select the file QIF, OFX, QFX or CSV file from your computer. If you're importing a CSV file, make sure the file adheres to our recommended file structure.
Assuming transactions were found in the file you selected, you will be redirected to a page where you can match the fields in the file to those in ClearCheckbook. There are also other options you can change on this page that will affect how the transactions are imported. You can learn more about these options in the Import Options section.
After setting the import options the actual transactions will be processed from the file. Depending on the size of this file this might take a minute or two. You'll be redirected to the Import Verification page once the transactions have been loaded.
This page allows you to modify some filter criteria to match transactions from the file you just loaded to those in your transaction register. Once you find all matching transactions you can select to clear those in your transaction register. You also have the option of importing any unmatched transactions.
The form at the top of the page lets you set some variables that determine whether or not transactions are a match. You can change the allowed difference in amount and difference in days. By default, the form will look for exact amount matches with a maximum difference of 3 days allowed.
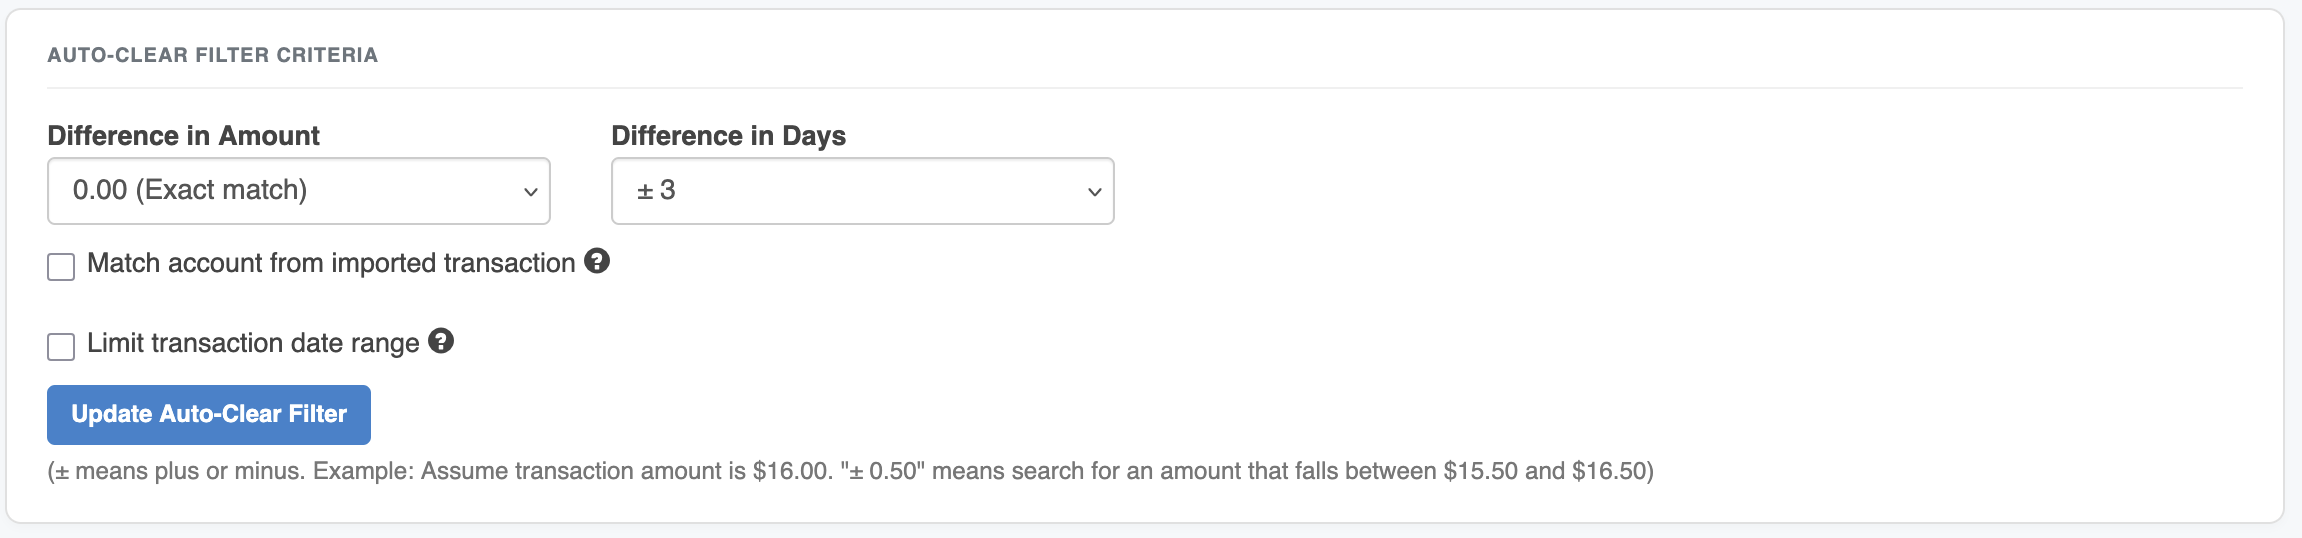
There are two other options you can use to help narrow down which transactions are searched. These options are explained below.
| Option | Description |
|---|---|
Match account from imported transaction |
When checked, this will only check for transactions in the account that is associated with the imported transaction. This only works if the imported file contains account data. |
Limit transaction date range |
When checked, a new form will appear that lets you select a start date for the transaction searching. This limits the transaction date based on the Date column in the imported file, not the transactions in the register. |
When you submit the Auto-Clear Filter Criteria form and results are found, you'll see a list of the matching transactions and you'll be able to perform a few different actions. The results list looks like the screenshot below:
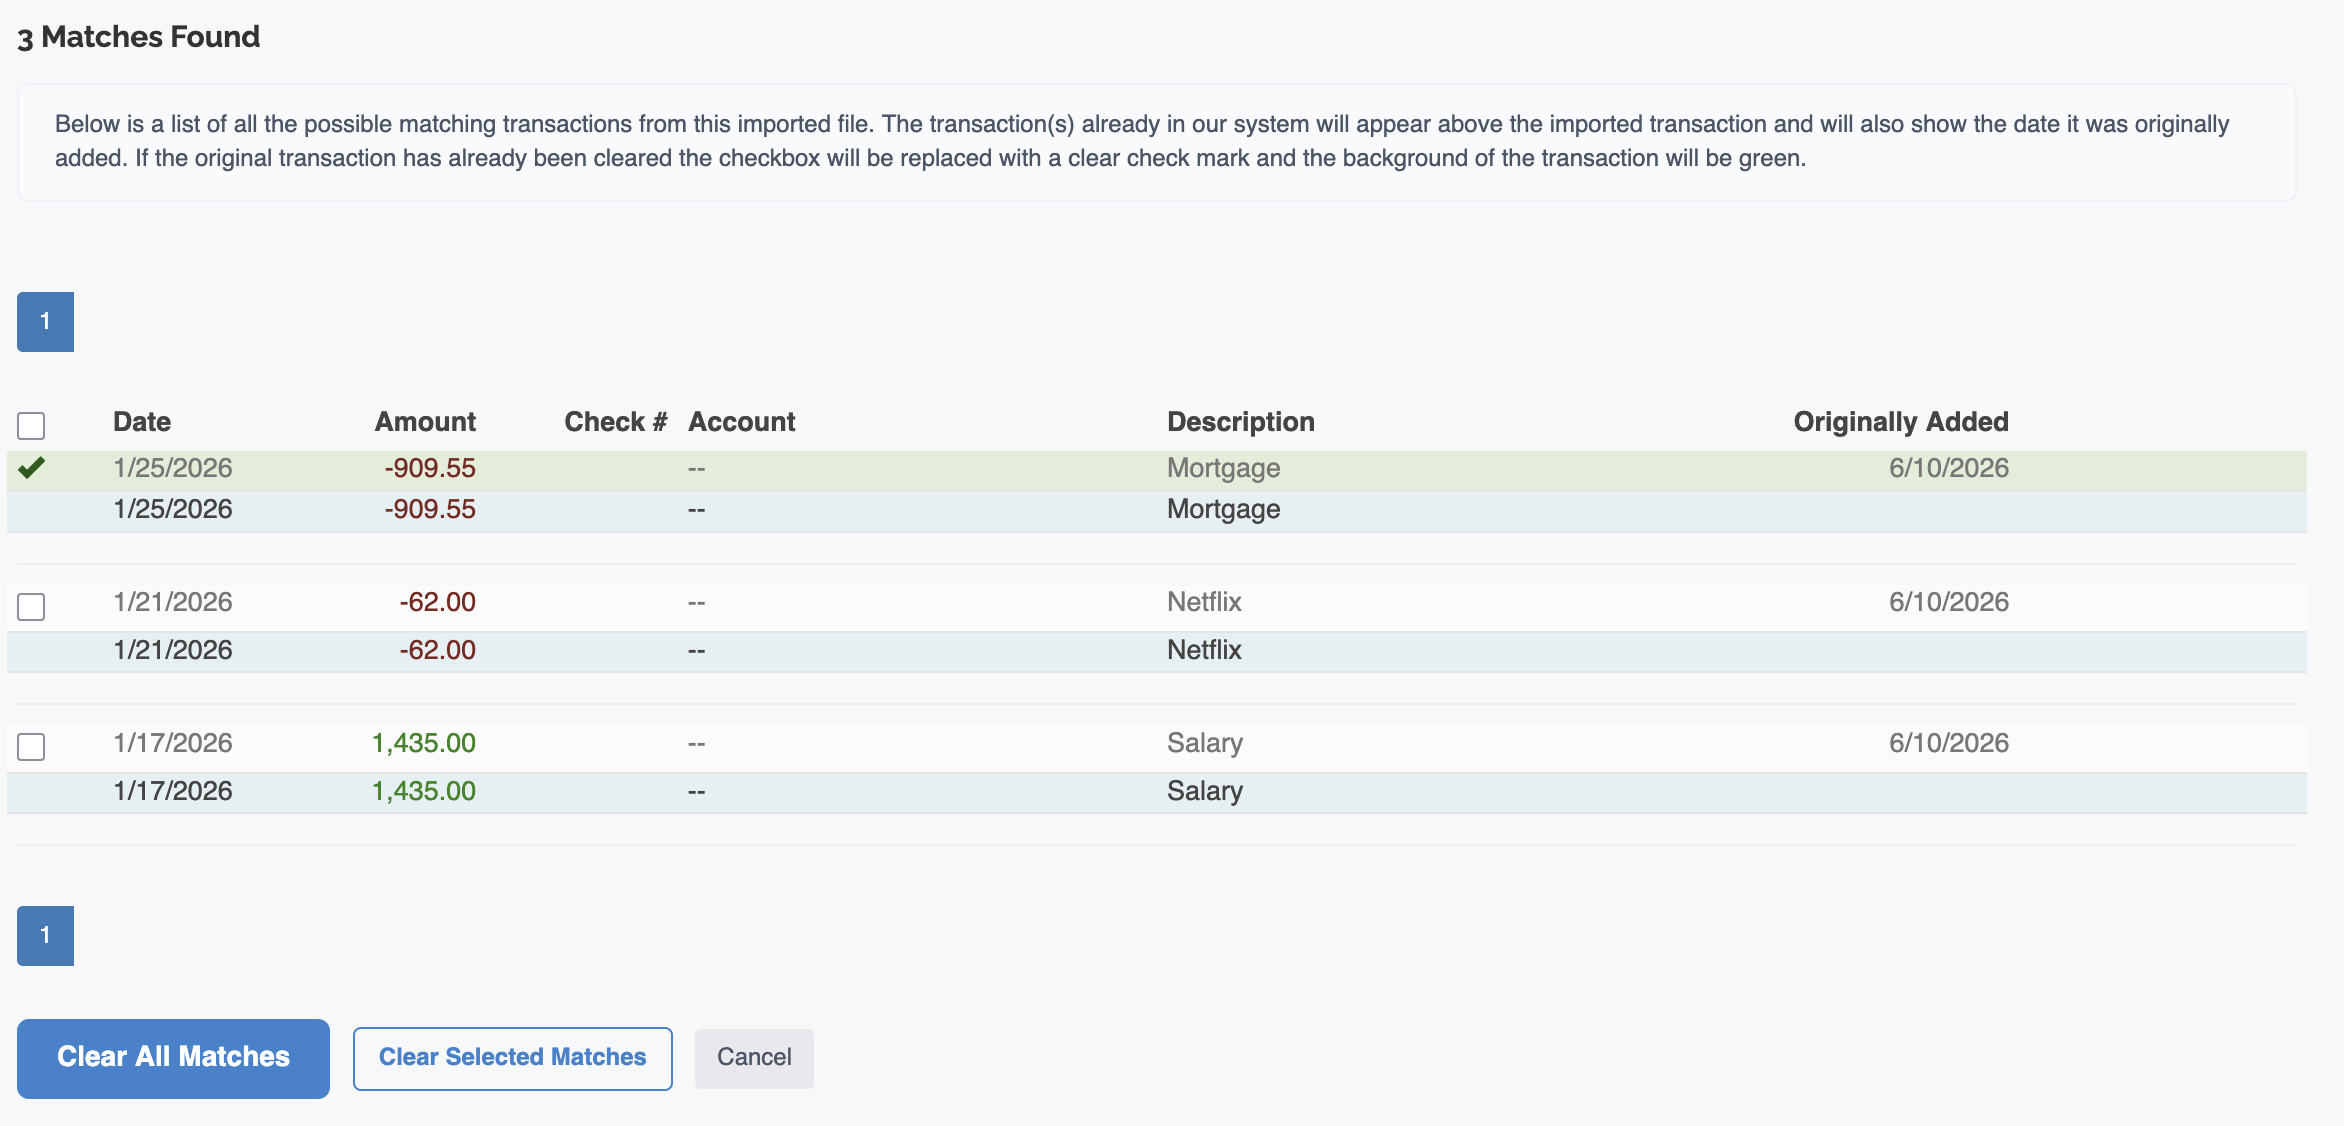
The transactions that are currently in your register appear on the line above the transactions from the file you loaded. The transactions from the loaded file also have a blue background.
If the transaction from your transaction register has already been cleared it will show up with a green background and the checkbox on the left side of the transaction will be replaced by a check mark.
We also show you what date the transaction was originally added to your transaction register to help you determine if the two transactions really are a match.
To clear the matching transactions you can either select some of the transactions and click the Clear Selected Matches button or clear all matches by clicking the Clear All Matches button. Clicking Cancel will delete all transactions that were loaded from the imported file without clearing any of your existing transactions.
If the file you loaded contains transactions that don't seem to match any in your transaction register, an alert will appear letting you know. You can view those transaction(s) and decide if you want them to be imported into your transaction register.

View All Uploaded Transactions link will take you to the Import Transactions - Verify Imported Transactions page where you can view the transactions and decide if you want to import them into your register.